Apache Spark – Install on Ubuntu 16
Apache Spark can be run on majority of the Operating Systems. In this tutorial, we shall look into the process of installing Apache Spark on Ubuntu 16 which is a popular desktop flavor of Linux.
Install Dependencies
Java is the only dependency to be installed for Apache Spark.
To install Java, open a terminal and run the following command :
~$ sudo apt-get install default-jdk
Steps to Install latest Apache Spark on Ubuntu 16
1. Download Spark
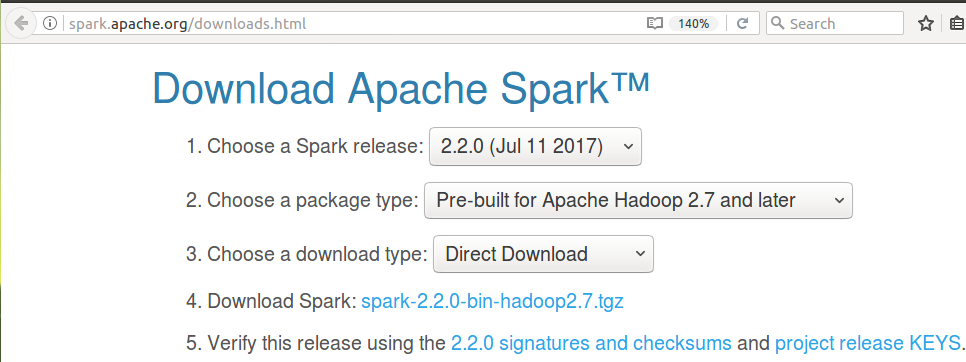
There is a continuous development of Apache Spark. Newer versions roll out now and then. So, download latest Spark version when you are going to install.
To download latest Apache Spark release, open the url [http://spark.apache.org/downloads.html] in a browser.

2. Unzip and move spark to /usr/lib/
The download is a zip file. Before setting up Apache Spark in the PC, unzip the file. To unzip the download, open a terminal and run the tar command from the location of the zip file.
~$ tar xzvf spark-2.2.0-bin-hadoop2.7.tgz
Now move the folder to /usr/lib/ . In the following terminal commands, we copied the contents of the unzipped spark folder to a folder named spark. Then we moved the spark named folder to /usr/lib/.
~$ mv spark-2.2.0-bin-hadoop2.7/ spark
~$ sudo mv spark/ /usr/lib/
3. Add Path
Now we need to set SPARK_HOME environment variable and add it to the PATH. As a prerequisite, JAVA_HOME variable should also be set.
To set JAVA_HOME variable and add /usr/lib/spark/bin folder to PATH, open ~/.bashrc with any of the editor. We shall use nano editor here :
$ sudo nano ~/.bashrc
And add following lines at the end of ~/.bashrc file.
export JAVA_HOME=/usr/lib/jvm/default-java/jre
export SPARK_HOME=/usr/lib/spark/bin
export PATH=$PATH:SPARK_HOME
Latest Apache Spark is successfully installed in your Ubuntu 16.
4. Verify installation
Now that we have installed everything required and setup the PATH, we shall verify if Apache Spark has been installed correctly.
To verify the installation, close the Terminal already opened, and open a new Terminal again. Run the following command :
~$ spark-shell
~$ spark-shell
Using Sparks default log4j profile: org/apache/spark/log4j-defaults.properties
Setting default log level to "WARN".
To adjust logging level use sc.setLogLevel(newLevel). For SparkR, use setLogLevel(newLevel).
17/08/04 03:42:23 WARN NativeCodeLoader: Unable to load native-hadoop library for your platform... using builtin-java classes where applicable
17/08/04 03:42:23 WARN Utils: Your hostname, arjun-VPCEH26EN resolves to a loopback address: 127.0.1.1; using 192.168.1.100 instead (on interface wlp7s0)
17/08/04 03:42:23 WARN Utils: Set SPARK_LOCAL_IP if you need to bind to another address
17/08/04 03:42:36 WARN ObjectStore: Failed to get database global_temp, returning NoSuchObjectException
Spark context Web UI available at http://192.168.1.100:4040
Spark context available as 'sc' (master = local[*], app id = local-1501798344680).
Spark session available as 'spark'.
Welcome to
      ____              __
     / __/__  ___ _____/ /__
    _\ \/ _ \/ _ `/ __/  '_/
   /___/ .__/\_,_/_/ /_/\_\   version 2.2.0
      /_/

Using Scala version 2.11.8 (OpenJDK 64-Bit Server VM, Java 1.8.0_131)
Type in expressions to have them evaluated.
Type :help for more information.

scala> :quit
sparkuser@tutorialkart:~$
Also verify the versions of Spark, Java and Scala displayed during the start of spark-shell.
:quit command exits you from scala script of spark-shell.
Conclusion
In this Spark Tutorial, we have gone through a step by step process to make environment ready for Spark Installation, and the installation of Apache Spark itself.
