Installing Docker on Mac
Docker Desktop is the easiest way to get started with Docker on macOS. It provides an intuitive user interface and the essential tools to develop, ship, and run containerized applications seamlessly.
Step-by-Step Guide to Install Docker on macOS
Prerequisites
- A Mac running macOS 10.15 or newer (Catalina, Big Sur, Monterey, Ventura, etc.).
- Administrator privileges to install software.
- At least 4GB of RAM (8GB or more recommended).
- Enable virtualization in macOS.
Steps to Install Docker Desktop
Download Docker Desktop for Mac:
- Visit the official Docker website: https://www.docker.com/products/docker-desktop
- Click on the “Download for Mac” button.
Install Docker Desktop:
- Locate the downloaded
.dmgfile in your Downloads folder.

- Double-click the
.dmgfile to open the installer.

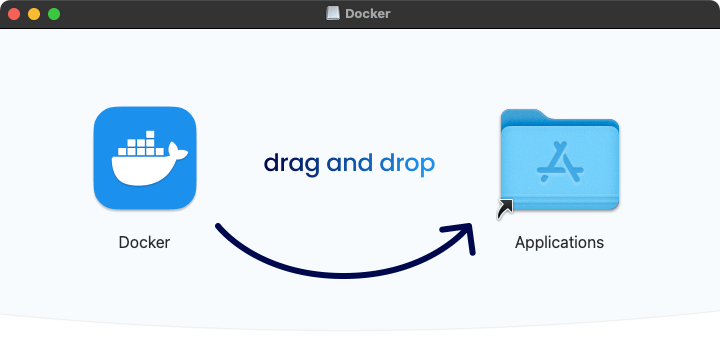
- Drag and drop the Docker icon into the
Applicationsfolder as prompted.
Run Docker Desktop:
- Navigate to the
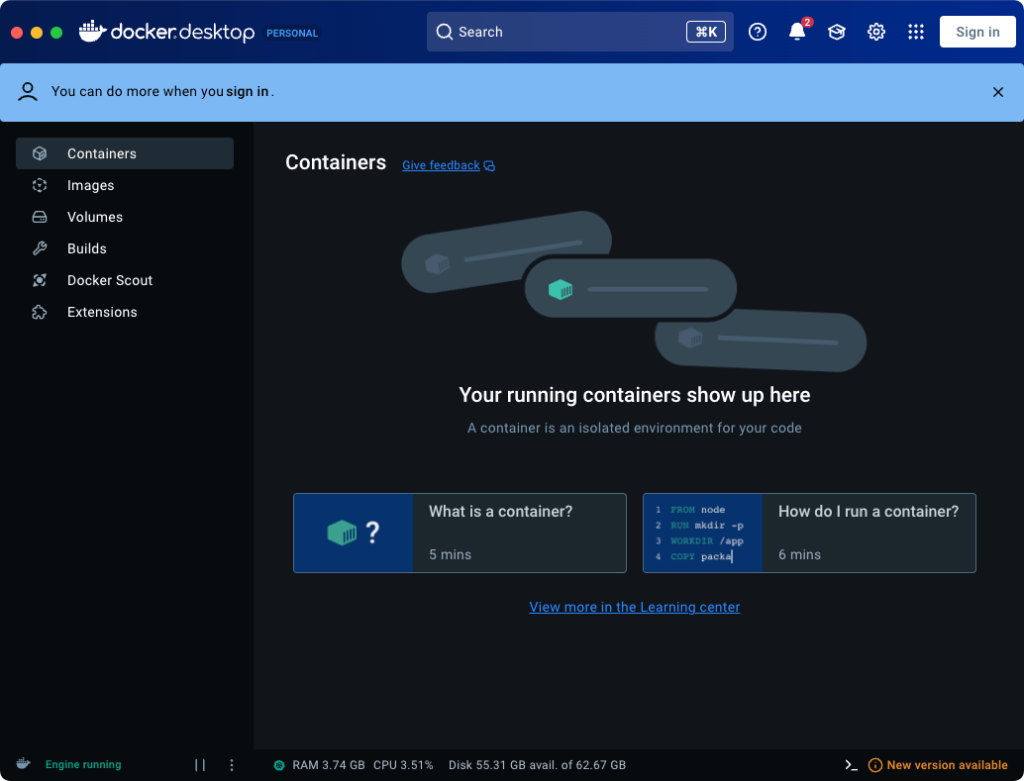
Applicationsfolder. - Double-click the Docker icon to start Docker Desktop. If prompted, grant permissions and authenticate using your admin credentials.
Verify Installation:
Once Docker Desktop launches, you should see the Docker icon in the menu bar.

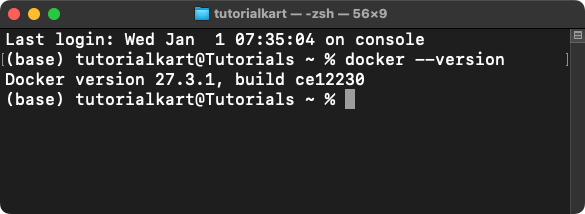
Open a terminal and run the following command to verify Docker installation:
docker --version
You should see the Docker version displayed, confirming a successful installation.
Optional: Enable Kubernetes (if needed):
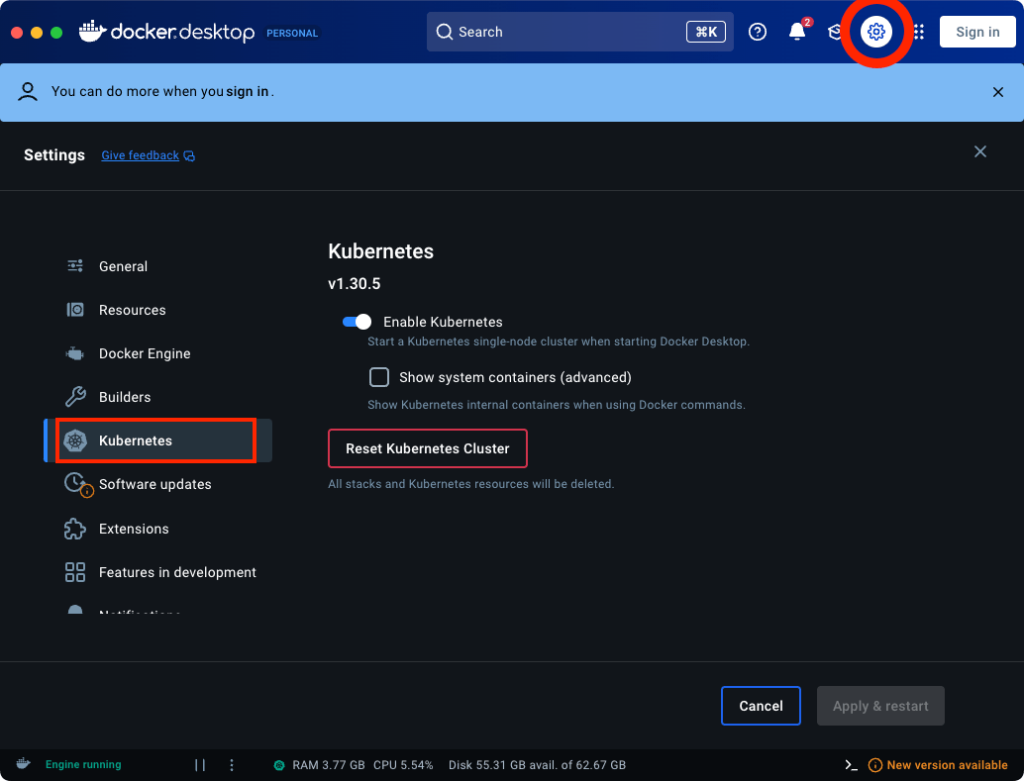
Open Docker Desktop settings by clicking the gear icon in the menu bar.

Navigate to the Kubernetes tab and enable Kubernetes if required for your projects.
Troubleshooting
- Docker is not starting: Restart your Mac and try launching Docker Desktop again.
- Command not found: Ensure the Docker binary is added to your
PATH. Restart your terminal if necessary. - Virtualization issues: Verify that virtualization is enabled in macOS by checking your system settings.
Conclusion
Congratulations! You’ve successfully installed Docker Desktop on your Mac. You can now start building and managing containerized applications. Explore the Docker CLI and GUI to familiarize yourself with its features. Happy coding!
