 TutorialKart.com
In this Python Tkinter tutorial, you will learn how to build desktop GUI applications using windows, widgets, layout managers, events, and themed controls. The examples begin with a basic Tkinter window and progress to an interactive application that accepts user input.
What Is Tkinter in Python?
Tkinter is Python’s standard interface to the Tcl/Tk GUI toolkit. It provides classes for creating desktop windows, labels, buttons, text fields, menus, dialog boxes, and other graphical controls.
Most Python installations include Tkinter, so a separate package installation is often unnecessary. The module is named tkinter in Python 3.
While tkinter supplies the core widgets and their behavior, the tkinter.ttk module provides themed widgets that generally follow the appearance of the operating system more closely.
Check Whether Tkinter Is Available
Open a terminal or command prompt and run the following command:
python -m tkinterOn systems where the Python 3 command is named python3, use:
python3 -m tkinterIf Tkinter is installed correctly, Python opens a small demonstration window and displays the installed Tcl/Tk version. Close that window before continuing.
Import Tkinter in a Python Program
Tkinter is an inbuilt python package. You can import the package and start using the package functions and classes.
import tkinter as tkUsing the alias tk keeps widget names explicit, such as tk.Label and tk.Button, while avoiding long references.
or you can use the other variation of importing the package
from tkinter import *The wildcard form works, but it imports many names into the current namespace. For larger programs, import tkinter as tk is usually easier to read and maintain.
Create the Main Tkinter Window
To create a GUI Window, tkinter provides Tk() class. The syntax of Tk() class is:
Tk(screenName=None, baseName=None, className=’Tk’, useTk=1)In a typical application, call Tk() once to create the root window. Additional windows can be created later with Toplevel.
Following is a simple example to create a GUI Window.
Python Program
import tkinter as tk

main_window = tk.Tk()
main_window.mainloop()
Output
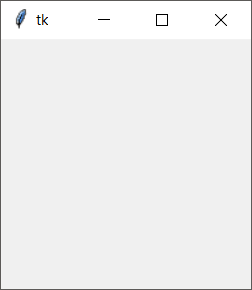
The mainloop() method starts Tkinter’s event loop. The event loop keeps the window open, redraws widgets, and responds to mouse, keyboard, and window events. Without it, the program normally exits immediately after creating the window.
Set the Tkinter Window Title, Size, and Minimum Dimensions
You can configure the root window before starting the event loop. The following program sets a title, initial size, and minimum allowed size.
import tkinter as tk

root = tk.Tk()
root.title("Customer Details")
root.geometry("420x240")
root.minsize(320, 180)

root.mainloop()title()sets the text displayed in the title bar.geometry()sets an initial width and height in pixels.minsize()prevents the user from shrinking the window below the given dimensions.
Build a Tkinter App with Label, Entry, and Button Widgets
The following beginner example creates a small greeting application. It reads text from an Entry widget when the user selects the button and then updates a Label.
import tkinter as tk
from tkinter import ttk


def show_greeting():
    name = name_entry.get().strip()

    if name:
        result_label.config(text=f"Hello, {name}!")
    else:
        result_label.config(text="Enter your name first.")


root = tk.Tk()
root.title("Tkinter Greeting App")
root.geometry("360x200")

content = ttk.Frame(root, padding=20)
content.grid(row=0, column=0, sticky="nsew")

root.columnconfigure(0, weight=1)
root.rowconfigure(0, weight=1)
content.columnconfigure(1, weight=1)

ttk.Label(content, text="Name:").grid(
    row=0, column=0, padx=(0, 10), pady=8, sticky="w"
)

name_entry = ttk.Entry(content)
name_entry.grid(row=0, column=1, pady=8, sticky="ew")
name_entry.focus()

ttk.Button(
    content,
    text="Show greeting",
    command=show_greeting
).grid(row=1, column=0, columnspan=2, pady=8)

result_label = ttk.Label(content, text="")
result_label.grid(row=2, column=0, columnspan=2, pady=8)

root.bind("<Return>", lambda event: show_greeting())
root.mainloop()
This example demonstrates the basic structure used by many Tkinter programs:
- Create the root window.
- Create widgets and assign each widget a parent.
- Arrange the widgets with a geometry manager.
- Connect user actions to callback functions.
- Start the event loop with
mainloop().
Handle Tkinter Button Commands and Keyboard Events
Tkinter applications are event-driven. Instead of running user-interface steps in a fixed sequence, the program waits for an event and calls the function associated with that event.
The command option connects a widget such as a button to a callback function:
button = ttk.Button(root, text="Save", command=save_data)Pass the function name without parentheses. Writing command=save_data() would call the function immediately while the widget is being created.
The bind() method connects a keyboard, mouse, or window event to a handler. Event handlers called through bind() receive an event object:
import tkinter as tk


def report_click(event):
    status.config(text=f"Clicked at x={event.x}, y={event.y}")


root = tk.Tk()
root.geometry("320x160")

status = tk.Label(root, text="Click anywhere in the window")
status.pack(pady=50)

root.bind("<Button-1>", report_click)
root.mainloop()
Arrange Tkinter Widgets with pack(), grid(), and place()
Tkinter uses geometry managers to determine the position and size of widgets. The three available geometry managers are pack(), grid(), and place().
Use pack() for Simple Vertical or Horizontal Layouts
pack() places widgets against a side of their parent. It is suitable for simple rows, columns, and stacked sections.
import tkinter as tk

root = tk.Tk()

for label_text in ("First", "Second", "Third"):
    tk.Button(root, text=label_text).pack(fill="x", padx=12, pady=4)

root.mainloop()
Use grid() for Forms and Row-Column Layouts
grid() arranges widgets in rows and columns. It is commonly used for data-entry forms, calculators, and settings screens.
import tkinter as tk
from tkinter import ttk

root = tk.Tk()
root.title("Login Form")

frame = ttk.Frame(root, padding=16)
frame.grid()

ttk.Label(frame, text="Username:").grid(row=0, column=0, sticky="w")
ttk.Entry(frame).grid(row=0, column=1, padx=8, pady=6)

ttk.Label(frame, text="Password:").grid(row=1, column=0, sticky="w")
ttk.Entry(frame, show="*").grid(row=1, column=1, padx=8, pady=6)

ttk.Button(frame, text="Sign in").grid(
    row=2, column=0, columnspan=2, pady=(8, 0)
)

root.mainloop()
Use place() for Explicit Coordinates
place() positions widgets with explicit coordinates or relative positions. It can be useful for overlays and highly controlled interfaces, but fixed coordinates may not adapt well when fonts, window dimensions, or operating-system settings change.
Do not use pack() and grid() for widgets that share the same parent container. You can use different geometry managers in separate frames.
Use tkinter.ttk for Themed Python GUI Widgets
The ttk module includes themed alternatives to several classic Tkinter widgets. Import it alongside Tkinter:
import tkinter as tk
from tkinter import ttk
You can then create widgets such as ttk.Button, ttk.Label, ttk.Entry, ttk.Checkbutton, ttk.Combobox, ttk.Notebook, and ttk.Treeview.
Classic Tkinter widgets are still useful. For example, Canvas, Text, and Listbox do not have direct themed replacements with identical behavior.
Tkinter Widgets for Python Desktop Applications
You can add widgets into the window. Also note that there are a wide variety of widgets you can use from tkinter. In this Tkinter Tutorial, we will cover all these widgets. Following are the list of Tkinter widgets.
- Button displays an action that the user can select.
- Canvas draws shapes, images, and custom graphics.
- Checkbutton represents an on-or-off choice.
- Radiobutton selects one option from a related group.
- Entry accepts a single line of text.
- Frame groups related widgets in a container.
- Label displays text or an image.
- Listbox displays a selectable list of values.
- Menu creates application menus and menu commands.
- MenuButton displays a button associated with a menu.
- Message displays multiline text within a requested width.
- Scale selects a numeric value by moving a slider.
- Scrollbar controls the visible area of a scrollable widget.
- Text displays and edits multiline formatted text.
- TopLevel creates an additional application window.
- SpinBox selects a value by typing or using arrow buttons.
- PannedWindow arranges resizable panes separated by movable dividers.
Tkinter Label Widget Tutorials
- How to set Color for Label Text in Tkinter Python?
- How to set Font Size for Label Text in Tkinter Python?
- How to set Italic Text for Label in Tkinter Python?
- How to set Bold Text for Label in Tkinter Python?
- How to set Font Family for Label in Tkinter Python?
- How to set Border for Label in Tkinter Python?
- How to set Background Color for Label in Tkinter Python?
- How to set Background Image for Label in Tkinter Python?
- How to display Text over an Image in Tkinter Python?
- How to Left Align Text in Label in Tkinter Python?
- How to Center Align Text in Label in Tkinter Python?
- How to Justify Text in Label in Tkinter Python?
- How to Right Align Text in Label in Tkinter Python?
- How to Change Text Color for Label on Hovering in Tkinter Python?
- How to Wrap Text in Label in Tkinter Python?
- How to Update Text in a Label on Button Click in Tkinter Python?
- How to Set Specific Width for Label in Tkinter Python?
- How to Set Specific Height for Label in Tkinter Python?
- How to Underline Text in Label in Tkinter Python?
- How to Strike-through Text in Label in Tkinter Python?
Tkinter Button Widget Tutorials
- Tkinter Button
- Tkinter Button Anchor
- How to Set Bold Text for Button in Tkinter Python
- How to Set Italic Text for Button in Tkinter Python
- How to set Button Active Background Color in Tkinter Python
- How to set Button Active Foreground Color in Tkinter Python
- How to set Button Background Color in Tkinter Python
- How to set Button Color in Tkinter Python
- How to Change Button Color after Clicking in Tkinter Python
- How to Change Button Color on Hovering in Tkinter Python
- How to set Button Border in Tkinter Python
- How to Set Button Border Color in Tkinter Python
- How to set Button command in Tkinter Python
- How to set Button Font in Tkinter Python
- How to set Button Foreground Color in Tkinter Python
- How to set Button Height in Tkinter Python
- How to set Button Width in Tkinter Python
- How to Set the Size of Button in Tkinter Python
- How to Disable the Button After Click in Tkinter Python
- How to Call a Function on Button Click in Tkinter Python
- How to Call a Function with Arguments on Button Click in Tkinter Python
Tkinter Entry Widget Tutorials
- How to get Text Entered in Entry Widget in Tkinter Python
- How to set a Value in Entry Widget in Tkinter Python
- How to Focus Entry Widget in Tkinter Python
- How to set Width for Entry Widget in Tkinter Python
- How to set Placeholder for Entry Widget in Tkinter Python
- How to use Entry Widget for Password in Tkinter Python
- How to Toggle Password Visibility in Entry Widget in Tkinter Python
- How to setup Validation for Entry Widget in Tkinter Python
- How to Limit Characters in Entry Widget in Tkinter Python
- How to set a Default Value for Entry Widget in Tkinter Python
- How to Auto-resize Entry Widget in Tkinter Python
- How to Auto-resize Entry Widget based on Input in Tkinter Python
- How to set Background Color for Entry Widget in Tkinter Python
- How to set Font Color for Entry Widget in Tkinter Python
- How to set Font Size for Entry Widget in Tkinter Python
- How to set Bold Font for Entry Widget in Tkinter Python
- How to Center Align Text in Entry Widget in Tkinter Python
- How to setup Change Event for Entry Widget in Tkinter Python
- How to clear Entry Widget on Button Click in Tkinter Python
- How to disable Entry Widget on Button Click in Tkinter Python
- How to Delete Last Character in Entry Widget in Tkinter Python
- What are the Events available for Entry Widget in Tkinter Python
- How to get Cursor Position in Entry Widget in Tkinter Python
- How to Allow Only Integers in Entry Widget in Tkinter Python
- How to Right Align Text in Entry Widget in Tkinter Python
- How to Change Background Color of Entry Widget on Hover in Tkinter Python
- How to Change Background Color of Entry Widget on Focus in Tkinter Python
- How to Implement Undo and Redo for Entry Widget in Tkinter Python
Tkinter Text Widget Tutorials
- How to get Value Entered in Text Widget in Tkinter Python
- How to set a Value in Text Widget in Tkinter Python
- How to Focus Text Widget in Tkinter Python
- How to set Specific Width for Text Widget in Tkinter Python
- How to set Specific Height for Text Widget in Tkinter Python
- How to set Specific Size for Text Widget in Tkinter Python
- How to set Placeholder for Text Widget in Tkinter Python
- How to set Auto-scroll for Text Widget in Tkinter Python
- How to set Horizontal Scrollbar for Text Widget in Tkinter Python
- How to set Vertical Scrollbar for Text Widget in Tkinter Python
- How to setup Validation for Text Widget in Tkinter Python
- How to Limit Characters in Text Widget in Tkinter Python
- How to set a Default Value for Text Widget in Tkinter Python
- How to Wrap Content in Text Widget in Tkinter Python
- How to Auto-resize Text Widget based on Input in Tkinter Python
- How to set Background Color for Text Widget in Tkinter Python
- How to set Font Color for Text Widget in Tkinter Python
- How to Set Different Font Colors for Different Parts of Text Widget in Tkinter Python
- How to set Font Size for Text Widget in Tkinter Python
- How to set Font Family for Text Widget in Tkinter Python
- How to set Bold Font for Text Widget in Tkinter Python
- How to Center Align Text in Text Widget in Tkinter Python
- How to call a Function when the Text Changes in a Text Widget in Tkinter Python
- How to clear Text Widget on Button Click in Tkinter Python
- How to disable Text Widget on Button Click in Tkinter Python
- How to disable Text Widget with a Default Value in it in Tkinter Python
- How to Delete Last Character in Text Widget in Tkinter Python
- What are the Different Events available for Text Widget in Tkinter Python
- How to get Cursor Position in Text Widget in Tkinter Python
- How to Allow Only Numbers in Text Widget in Tkinter Python
- How to Right Align Text in Text Widget in Tkinter Python
- How to Change Background Color of Text Widget on Hover in Tkinter Python
- How to Change Background Color of Text Widget on Focus in Tkinter Python
Keep the Tkinter Interface Responsive
A callback runs on Tkinter’s main GUI thread. A long calculation, network request, or blocking loop inside a callback can prevent the window from repainting and responding to input.
Use the after() method when an operation can be divided into short scheduled steps. The following clock updates a label once per second without blocking the event loop.
import tkinter as tk
from datetime import datetime


def update_clock():
    current_time = datetime.now().strftime("%H:%M:%S")
    clock_label.config(text=current_time)
    root.after(1000, update_clock)


root = tk.Tk()
root.title("Tkinter Clock")

clock_label = tk.Label(root, font=("TkDefaultFont", 24))
clock_label.pack(padx=30, pady=30)

update_clock()
root.mainloop()
For genuinely long-running work, move the work to another thread or process and send results back to the GUI safely. Tkinter widget updates should remain on the main Tkinter thread.
Common Tkinter Errors and Their Causes
While working with Tkinter, you may come across some of the following issues.
- Python Tkinter Frame Width Height Not Working
- Python ModuleNotFoundError: No module named ‘_tkinter’ on Mac
ModuleNotFoundError: No module named ‘tkinter’
This error means that the Python interpreter being used cannot import Tkinter. Confirm that the script is running with the intended Python installation. On some Linux distributions, Tkinter is supplied as a separate operating-system package associated with the installed Python version.
_tkinter.TclError: no display name and no $DISPLAY environment variable
This usually occurs when a Tkinter program runs in an environment without an available graphical display, such as a headless server or some remote shell sessions. Run the application in a desktop session or configure an appropriate display environment when GUI execution is required.
Tkinter Window Opens and Closes Immediately
Make sure the program calls mainloop() after creating and arranging the widgets. When launching a script from a terminal, also check the terminal for an exception that may have ended the program.
Tkinter Widget Is Not Visible
Creating a widget does not place it in the window. Call pack(), grid(), or place() for the widget. Also verify that its parent container is visible and that the widget has not been placed outside the available area.
Tkinter Tutorial FAQs
How do I use Tkinter in Python?
Import tkinter, create a root window with tk.Tk(), add widgets, arrange them with a geometry manager, connect events to callback functions, and call mainloop(). A minimal program requires only the root window and the event loop.
Do I need to download Tkinter separately?
Tkinter is included with many standard Python distributions. Run python -m tkinter or python3 -m tkinter to check. If the module is unavailable, install a Python distribution that includes Tcl/Tk or the Tkinter package provided for your operating system.
What is the difference between tkinter and tkinter.ttk?
tkinter contains the classic Tk widgets, while tkinter.ttk contains themed widgets. The themed widgets often match the operating system more closely and use styles for appearance. Applications commonly use widgets from both modules.
Should I use pack or grid in Tkinter?
Use pack() for straightforward stacked or side-by-side layouts. Use grid() when widgets need to align in rows and columns. Both are valid, but do not mix them among widgets that have the same parent.
Can Tkinter be used for complete desktop applications?
Yes. Tkinter can be used for forms, utilities, editors, internal tools, educational applications, and other desktop interfaces. Larger applications are easier to maintain when the interface is divided into frames or classes and business logic is kept separate from widget code.
Editorial QA Checklist for This Tkinter Tutorial
- Run each Tkinter program with a supported Python 3 installation and confirm that its window opens without exceptions.
- Verify that every interactive example calls
mainloop()and that button callbacks are passed without unintended parentheses. - Confirm that no example mixes
pack()andgrid()inside the same parent container. - Test keyboard bindings, focus behavior, resizing, and empty-input handling in the greeting application.
- Check that Tkinter,
ttk, widget names, event patterns, and code-block language classes are written consistently.
Next Steps for Learning Python Tkinter
In this Python Tutorial, we learned how to import Tkinter, create a root window, start the event loop, arrange widgets, handle user actions, use themed controls, and diagnose common GUI problems. Continue with the widget-specific tutorials above to learn the options and events available for labels, buttons, entries, text areas, frames, canvases, and other Tkinter controls.