Customer service queues in Dynamics 365
In Dynamics 365, Queues are called as Containers used to organise, prioritise and monitor work progress. Queues provides a process of acting as a hold container for work items. Example :- We can Queue the cases that are to be resolved.
In this Dynamics 365 tutorial, we will learn about creating Queues, Route items to Queues and assigning items in the queue to work.
Creating Queues in Dynamics 365
Generally in Dynamics 365, by default queues are created for every user for tracking work progress. Before creating a queue in Dynamics 365, we must analyze the organisation structure and business process. In Dynamics 365, we can create two types of Queues : Public and Private queue.
Private Queue :- Private queue are created to limit set of members to view the items in the Queue.
Public Queue :- Public queues are created to let everyone to access every item in the queue.
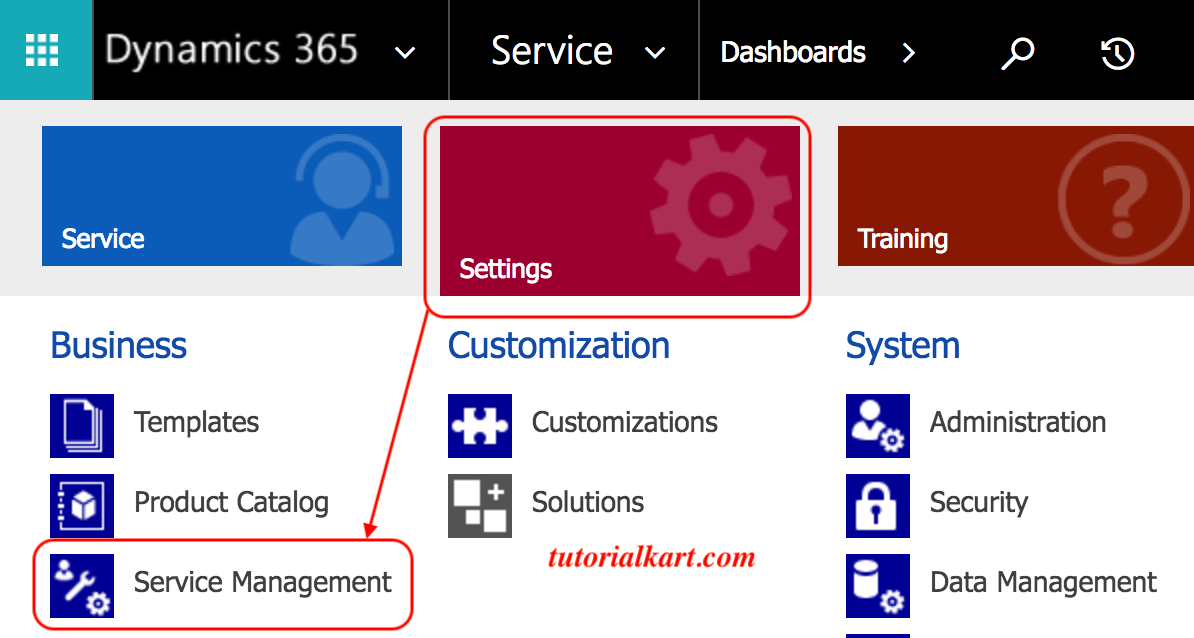
To create a Queue in Dynamics 365, navigate to Settings | Service Management and choose Queues.
Select queues to create and manage queue services, and manage the membership of the private queues.
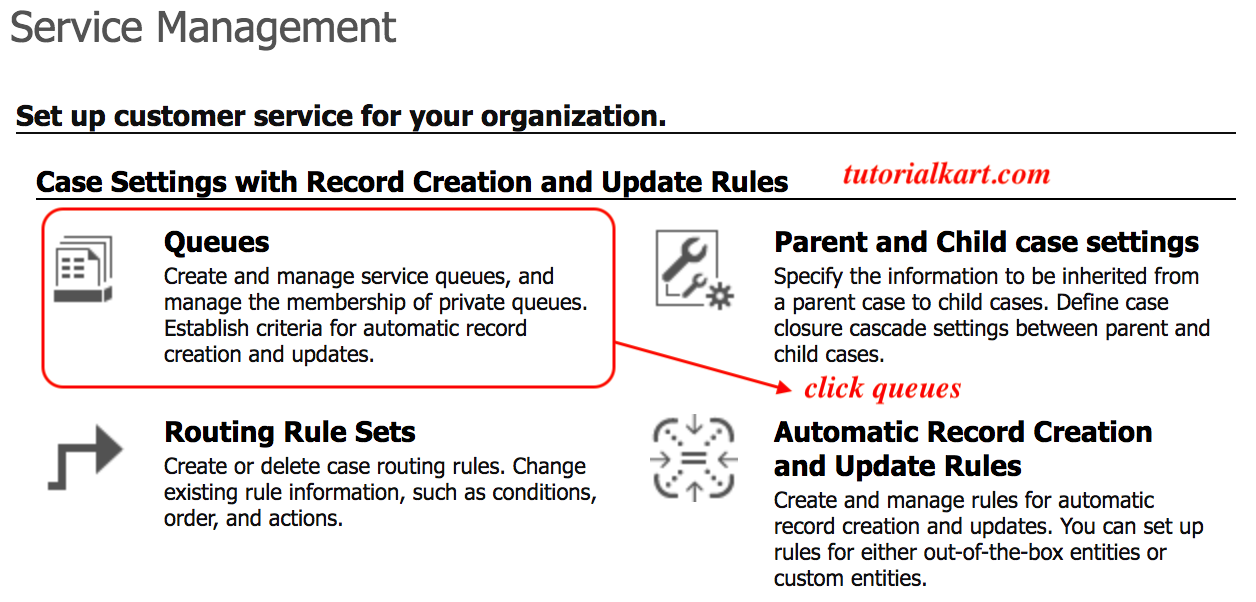
- Click on New
To create a queue, enter all the required information in summary and Email.
- Enter the Queue name.
- In the type filed select the queue type as public or private.
- Enter incoming email address.
- Enter description.
- In the email settings, select any one from the list to convert incoming email to activities.
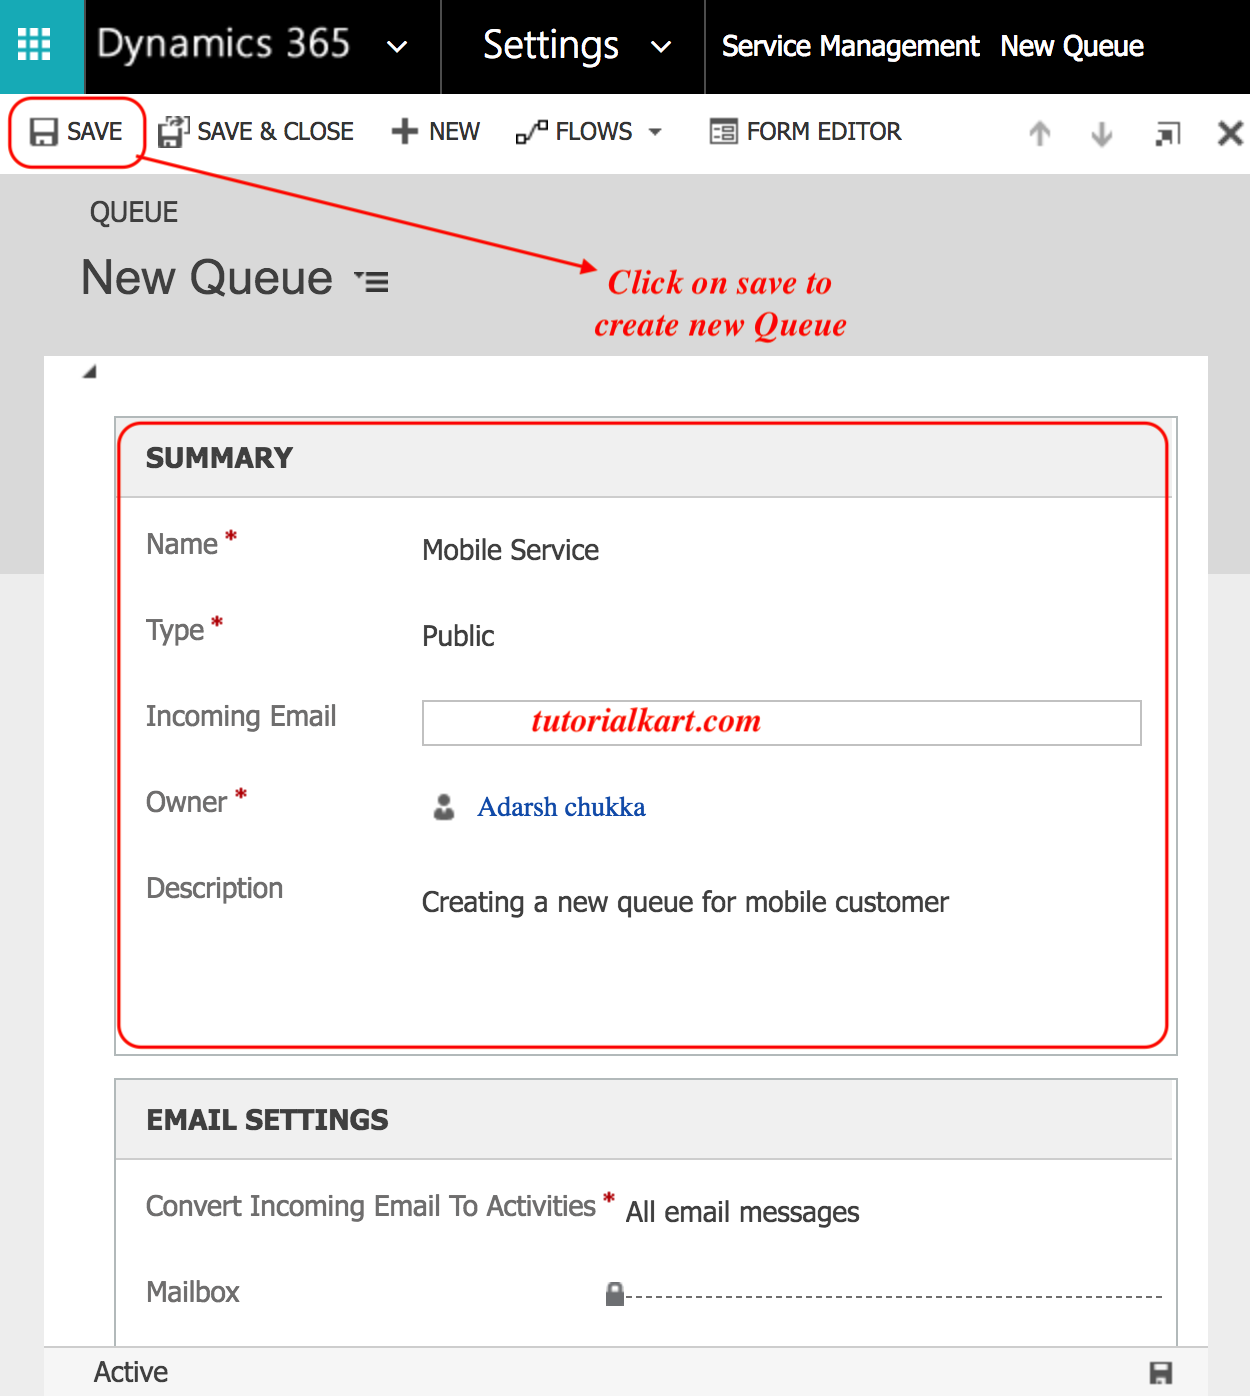
- Click on Save button and activate the Queue as shown below.
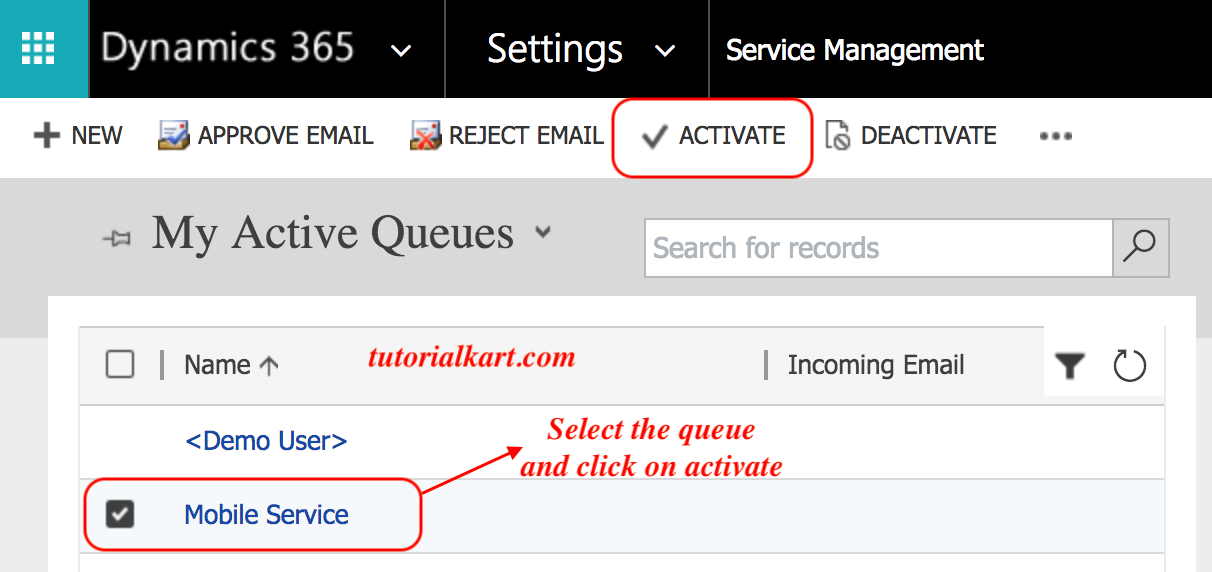
How to Assign a case to a Queue ?
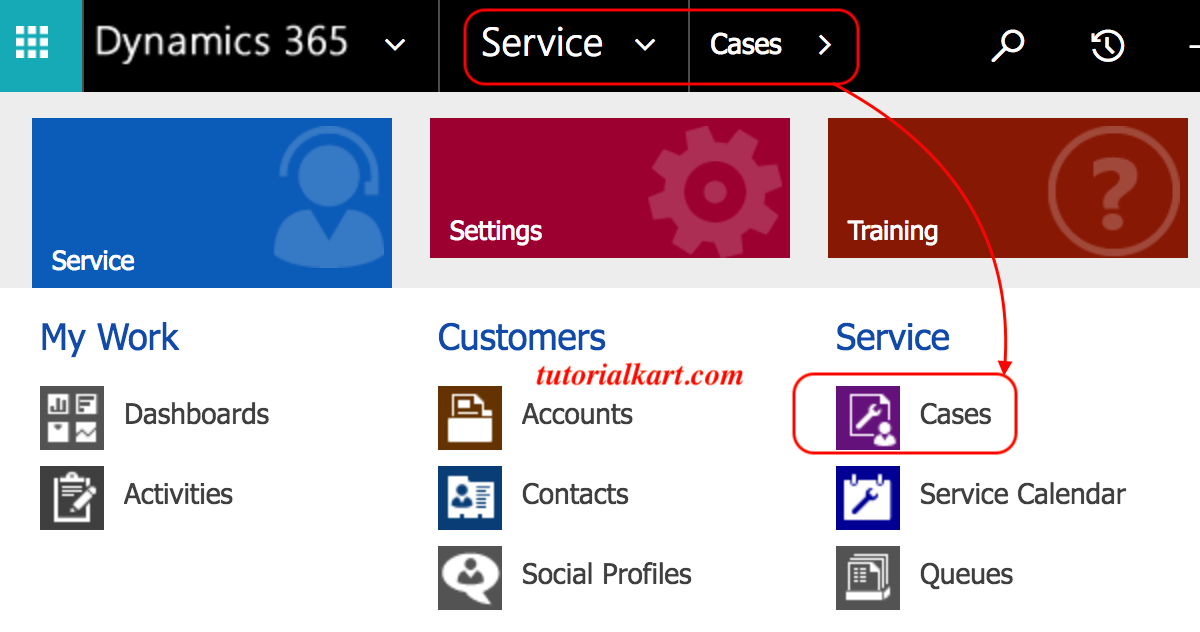
A case is assigned to a queue team to analyze the queue and they may re-assign the case to another team. To learn how to assign a case to a queue, go to service | Cases and select the case.
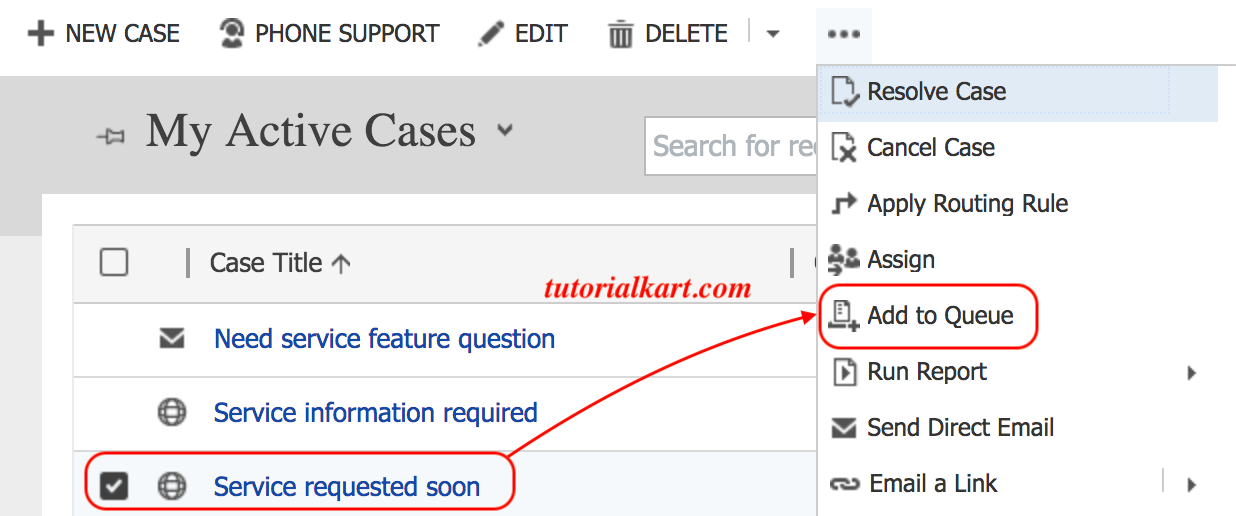
Select the list of cases that are to be added to a Queue as shown below.
Select the queue that you want to add the selected record. Here we selected Mobile service queue as shown below.
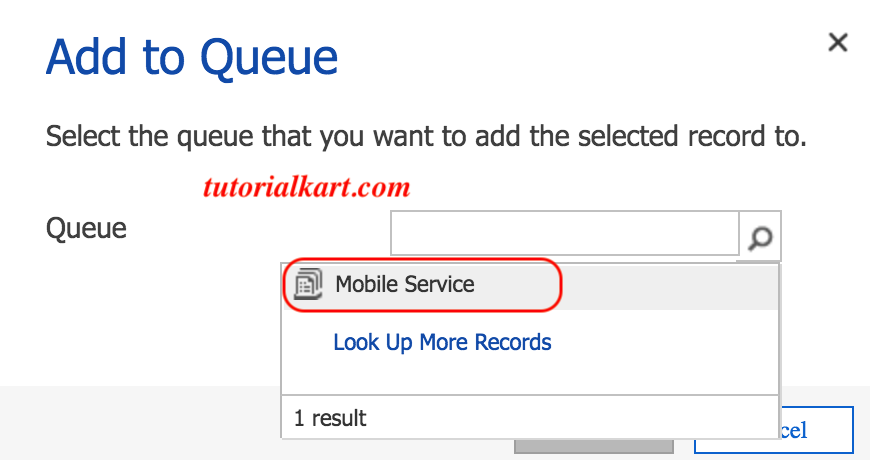
- Click on Add button.
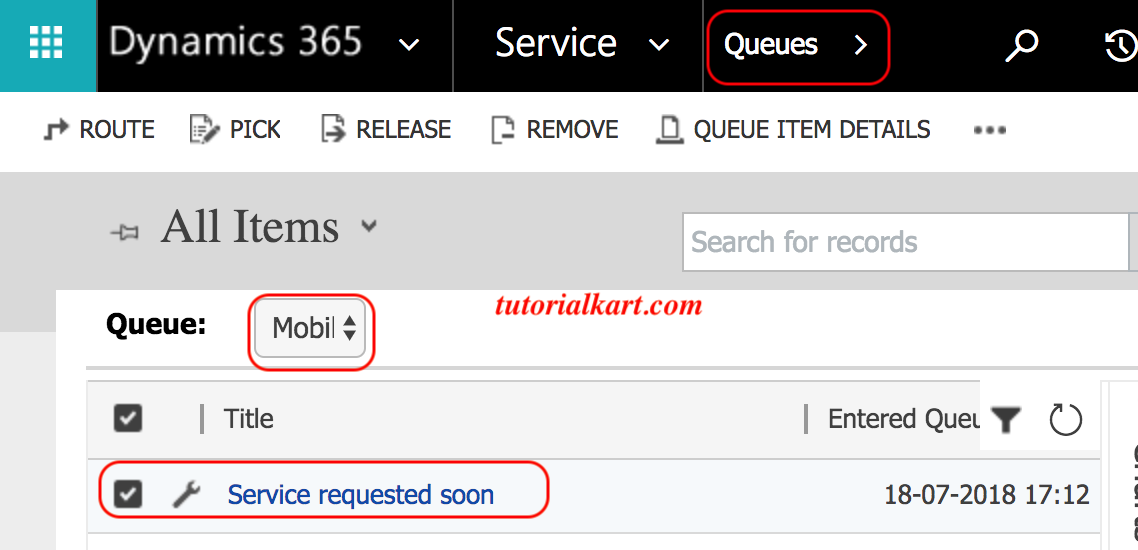
In Dynamics 365, Cases in queues are grouped until they are taken our from a queue or accepted by a Customer service representative. CSR can route these case manually or by automatically using routing rules.
Conclusion
In this Dynamics 365 tutorial, we covered topics regarding Creating a Queue and assigning a Case to a Queue. In our next tutorial, we will learn about creating a routing rule set and applying a route set.
