What is Site map Designer in Dynamics 365?
Site map Designer in Dynamics 365 is visual editor to update site map for your Application. Site maps define the navigation for your app. Create a site map for your app with ease by using the tile-based site map designer. The new Site map Designer in Dynamics 365, lets user to drag and drop components into the designer, preview your work, and instantly publish the site map. Administrators and any user with the required privileges can quickly create site maps for apps.
Using site map designer in Dynamics 365, we can also define the area, subarea, or group titles in the languages supported by Microsoft Dynamics 365.
- By default, a site map for the Dynamics 365 – custom app is already available.
- You can edit this site map or configure site maps for new apps by using the site map designer.
Using Site map designer we perform the following actions in Dynamics 365
- Can create a Site map for a custom application.
- Can edit the default site map.
- We can add and delete area, group and subarea to a group in the site map.
- Can organize area, groups and subareas.
- We can clone a component.
How to edit a site map designer in Dynamics 365?
- To edit a site map in Dynamics 365, navigate to Settings | Customizations| Solutions.
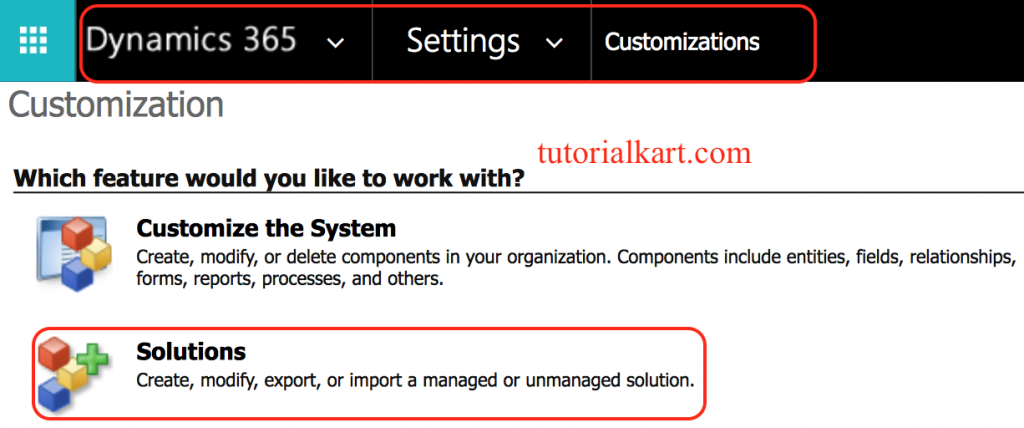
- Click on tutorialkart Solution |Client extensions | Add existing | Site map.
- Select Client extensions from the list of Components on the left
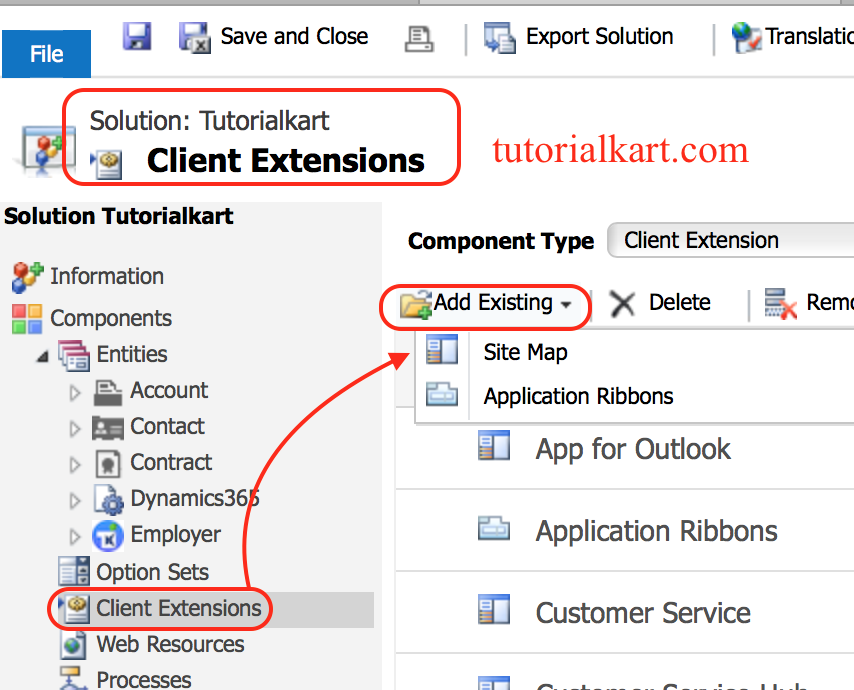
- Now a popup window will be displayed where we have to add solution components.
In Dynamics 365, a site map will be present for every application in our Dynamics 365 organization and a default site map. Select default site map as shown.
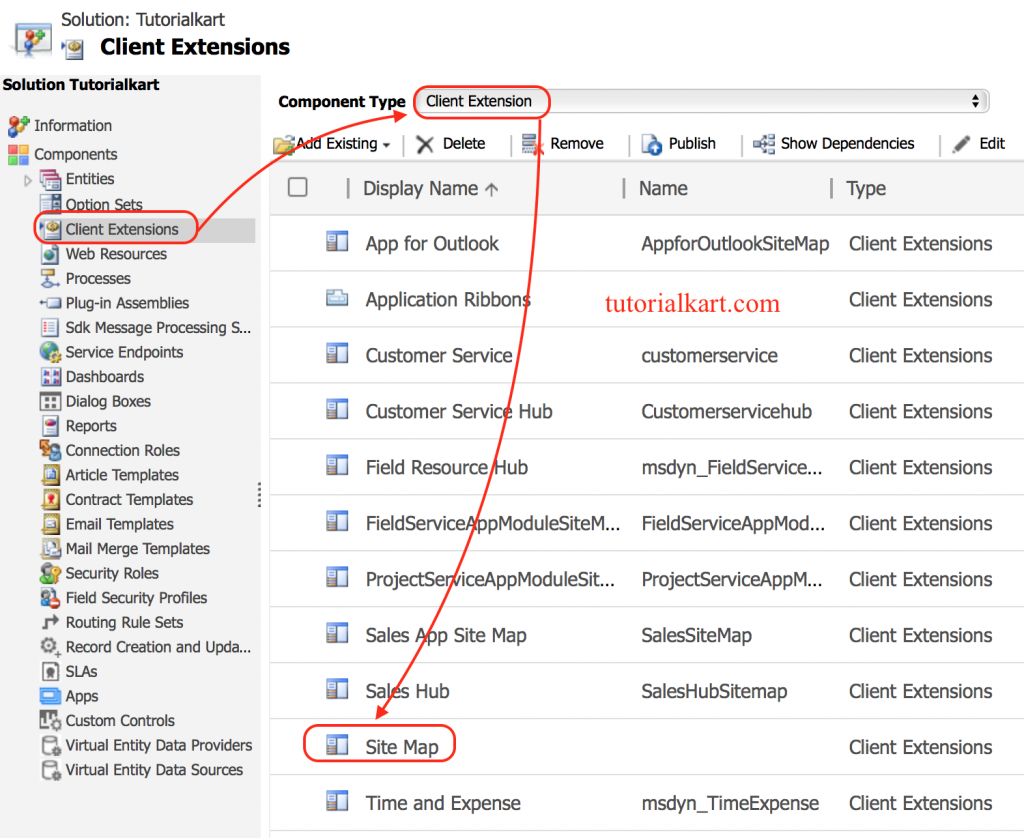
In this example, we are going to add custom entity called “Dynamics 365” that created in tutorialkart Solutions.
Adding New Area in Site map designer
To add new area in Site map Designer, navigate to Components | Click on Area and drag a new area as shown below.
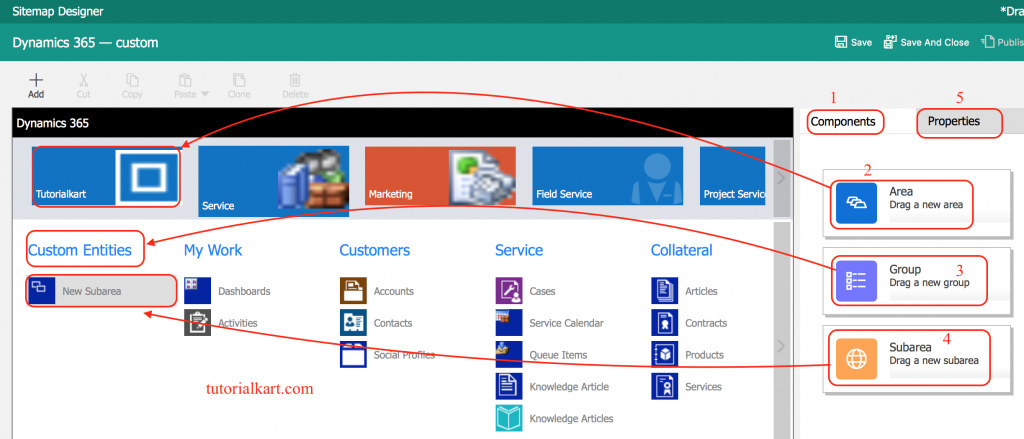
As shown above we have added Area and names it as tutorialkart, Group and named it as Custom entities and Subarea.
- Now click on Properties to change title, to select entity from the drop down, to select Icon.
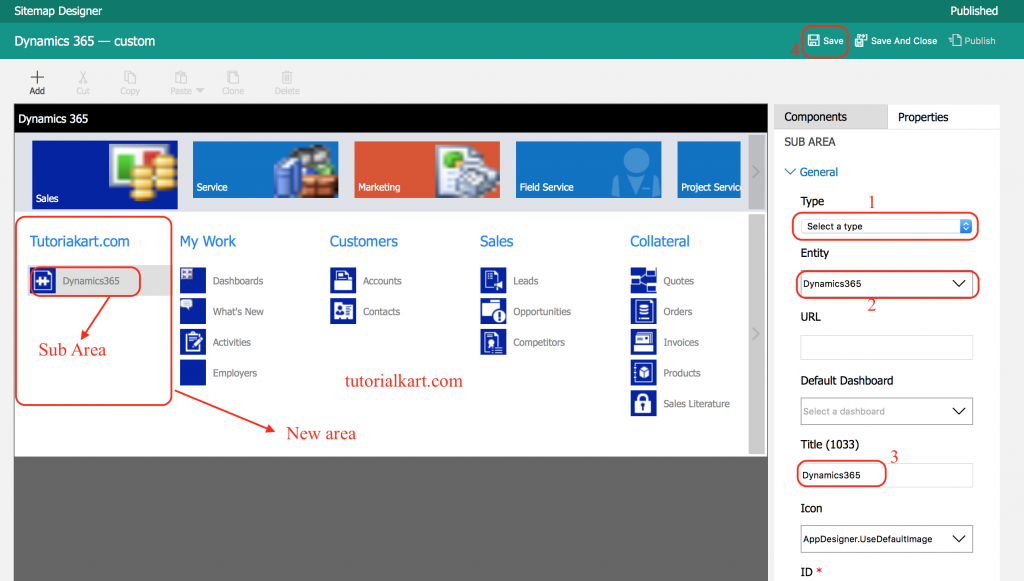
- Now, click on ‘Save’ button and then, click on ‘Publish’ button.
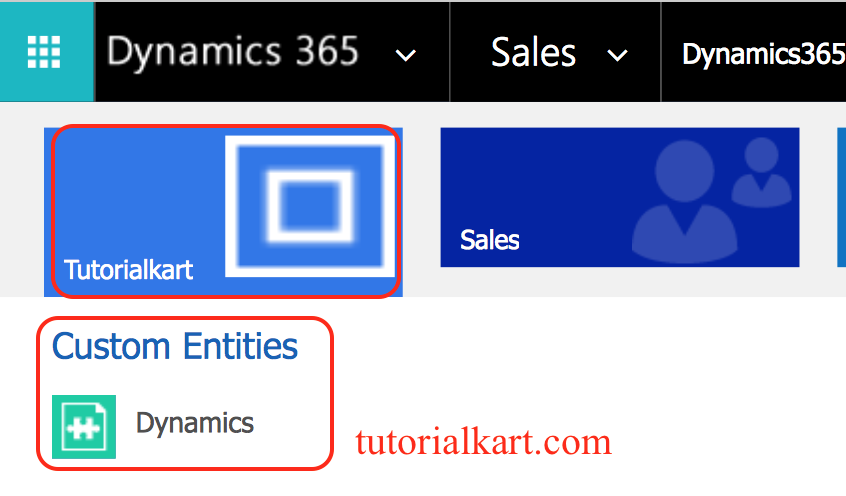
We have successfully edit site map and added our custom entities on Microsoft CRM menu in dynamics 365.
