HTML Forms
HTML forms are one of the most fundamental building blocks of web development. They enable user interaction by collecting data, which can be sent to a server for processing.
HTML forms are essential for creating features like login pages, search bars, registration forms, surveys, and more.
In this HTML tutorial, we will cover the structure of HTML forms, their elements, attributes, and best practices to create robust, user-friendly forms for your web applications.
What is an HTML Form?
An HTML form is a container for collecting user inputs. It can include text fields, checkboxes, radio buttons, dropdown menus, file uploads, and buttons for submitting or resetting data.
The basic structure of an HTML form looks like this:
<form action="/submit" method="POST">
  <label for="username">Username:</label>
  <input type="text" id="username" name="username">
  <br>
  <button type="submit">Submit</button>
</form>
The <form> element encapsulates all the input fields and buttons used to collect data.
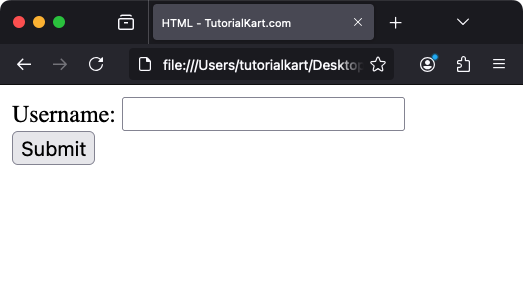
Example: index.html
<!DOCTYPE html>
<html lang="en">
<body>
  <form action="/submit" method="POST">
    <label for="username">Username:</label>
    <input type="text" id="username" name="username">
    <br>
    <button type="submit">Submit</button>
  </form>
</body>
</html>
Screenshot

Attributes of the <form> Element
The <form> element has several attributes that control its behavior:
action: Specifies the URL where the form data should be sent.method: Defines the HTTP method used for form submission (GETorPOST).target: Specifies where to display the response, e.g.,_self,_blank.enctype: Determines how the form data is encoded (application/x-www-form-urlencoded,multipart/form-data).novalidate: Disables browser validation of form fields.
Common Form Elements
1 Text Input
The <input type="text"> element creates a single-line text field for user input:
<label for="name">Name:</label>
<input type="text" id="name" name="name" placeholder="Enter your name" required>
Attributes like placeholder and required improve usability and validation.
2 Password Input
The <input type="password"> element is used for entering sensitive information like passwords:
<label for="password">Password:</label>
<input type="password" id="password" name="password" required>
The characters entered are obscured for privacy.
3 Radio Buttons
Radio buttons allow users to select one option from a group:
<label>
  <input type="radio" name="gender" value="male"> Male
</label>
<label>
  <input type="radio" name="gender" value="female"> Female
</label>
All radio buttons in a group should share the same name attribute.
4 Checkboxes
Checkboxes allow users to select multiple options:
<label>
  <input type="checkbox" name="interest" value="coding"> Coding
</label>
<label>
  <input type="checkbox" name="interest" value="music"> Music
</label>
5 Dropdown Menu
The <select> element creates a dropdown menu:
<label for="country">Country:</label>
<select id="country" name="country">
  <option value="usa">United States</option>
  <option value="canada">Canada</option>
  <option value="uk">United Kingdom</option>
</select>
Each <option> defines a selectable item.
6 File Upload
The <input type="file"> element allows users to upload files:
<label for="file">Upload your file:</label>
<input type="file" id="file" name="file">
7 Buttons
Buttons allow users to submit, reset, or perform custom actions:
<button type="submit">Submit</button>
<button type="reset">Reset</button>
Custom JavaScript can be added to buttons for advanced functionality.
Form Validation
HTML provides built-in form validation through attributes like required, minlength, maxlength, and pattern. For example:
<input type="email" name="email" required pattern=".+@.+\.com">Custom error messages and validation logic can be implemented using JavaScript.
Styling Forms with CSS
CSS can be used to style form elements and improve their appearance. For example:
<style>
  input, select, button {
    padding: 10px;
    margin: 5px;
    font-size: 16px;
  }

  button {
    background-color: #4CAF50;
    color: white;
    border: none;
    cursor: pointer;
  }

  button:hover {
    background-color: #45a049;
  }
</style>
This example styles the form inputs and adds a hover effect to buttons.
Best Practices for Creating Forms
- Use semantic HTML, such as
<label>for accessibility. - Provide clear instructions and placeholders.
- Group related fields using
<fieldset>and<legend>. - Ensure forms are responsive and work well on all devices.
- Validate data on both the client and server sides for security.
Conclusion
HTML forms are indispensable for collecting user input on the web. By understanding their structure, attributes, and elements, you can create forms that are functional, user-friendly, and accessible. Combine built-in validation with modern CSS and JavaScript to build engaging and secure web forms tailored to your application’s needs.
