HTML Input File
The HTML <input> element with type="file" allows users to select one or more files from their local device and upload them to a server. This input type is commonly used in forms for file uploads such as images, documents, or videos.
File inputs simplify the file selection process and ensure compatibility with web applications that require file uploads.
In this tutorial, we will learn the syntax and how to use input element with file type, handling accessibility, allowing multiple file uploads, etc., with the help of detailed examples.
1 Basic Syntax of File Input
The basic syntax for a file input field is:
<input type="file" name="upload">Here:
type="file": Specifies that the input is for file selection.name: Defines the name of the input field for form submission.
2 Adding a Label for Accessibility for File Input
To make the file input field more accessible, use a <label> element:
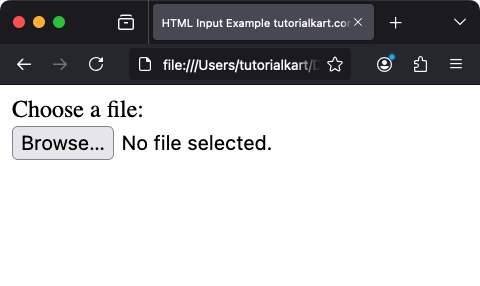
<label for="file-upload">Choose a file:</label>
<input type="file" id="file-upload" name="file-upload">
Clicking the label focuses the file input, improving usability for users.

3 Allowing Multiple File Uploads
To enable users to select multiple files at once, use the multiple attribute:
<input type="file" name="files" id="multi-upload" multiple>When this attribute is present, users can select multiple files in the file selection dialog.
Example: index.html
<!DOCTYPE html>
<html lang="en">
<body>

  <form id="sampleForm">
    <label for="multi-upload">Choose files:</label>
    <input type="file" name="files" id="multi-upload" multiple>
  </form>

</body>
</html>
Video
4 Restricting File Types
To restrict the types of files users can select, use the accept attribute:
<input type="file" name="image" id="image-upload" accept="image/*">In this example, only image files are allowed.
Example: index.html
<!DOCTYPE html>
<html lang="en">
<body>

  <form id="sampleForm">
    <label for="image-upload">Choose files:</label>
    <input type="file" name="image" id="image-upload" accept="image/*">
  </form>

</body>
</html>
Video
The accept attribute can also specify specific file extensions:
<input type="file" name="document" accept=".pdf, .doc, .docx">This example restricts the file types to PDFs and Word documents.
5 Setting File Input to Required
The required attribute ensures that users cannot submit the form without selecting a file:
<input type="file" name="file" id="required-file" required>If no file is selected, the browser will display an error message when the user attempts to submit the form.
Example: index.html
<!DOCTYPE html>
<html lang="en">
<body>

  <form id="sampleForm">
    <label for="required-file">Choose file:</label>
    <input type="file" name="file" id="required-file" required>
    <input type="submit" value="Upload">
  </form>

</body>
</html>
Video
6 Styling the File Input
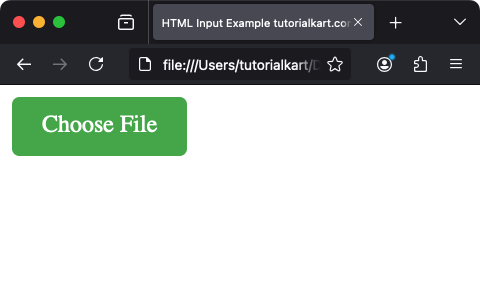
The default appearance of a file input is browser-defined, but you can style it using CSS and custom labels:
<style>
  .file-label {
    display: inline-block;
    padding: 10px 20px;
    background-color: #4CAF50;
    color: white;
    border-radius: 5px;
    cursor: pointer;
  }

  .file-label:hover {
    background-color: #45a049;
  }

  #file-hidden {
    display: none;
  }
</style>

<label for="file-hidden" class="file-label">Choose File</label>
<input type="file" id="file-hidden" name="hidden-file">
This example hides the default file input and uses a styled label to trigger the file selection dialog.

7 Using JavaScript with File Input
JavaScript can dynamically interact with the file input. For example, displaying the selected file name:
<label for="file-js">Upload a file:</label>
<input type="file" id="file-js" name="file-js">
<p id="file-name">No file selected</p>

<script>
  const fileInput = document.getElementById('file-js');
  const fileName = document.getElementById('file-name');

  fileInput.addEventListener('change', () => {
    if (fileInput.files.length > 0) {
      fileName.textContent = `Selected file: ${fileInput.files[0].name}`;
    } else {
      fileName.textContent = 'No file selected';
    }
  });
</script>
This script updates the paragraph text with the name of the selected file, providing immediate feedback to the user.
8 Accessibility Considerations for File Input
To ensure the file input is accessible:
- Use a descriptive
<label>element to provide context. - Ensure sufficient color contrast for any styled elements.
- Include additional instructions or feedback for screen reader users using
aria-describedby.
9 Real-World Use Cases for File Input
- Profile Picture Upload: Allow users to upload images for their profile.
- Document Submission: Enable users to submit resumes, forms, or contracts.
- Media Upload: Collect photos, videos, or audio files for content platforms.
Conclusion
The HTML <input type="file"> element is used for file uploads. By leveraging attributes, styling, and JavaScript, you can create intuitive and user-friendly file upload interfaces tailored to your application’s needs.
