HTML <ol> Tag
The HTML <ol> tag is used to create an ordered list in a webpage. Items in an ordered list are displayed in a specific sequence, with each item numbered or labeled. Ordered lists are ideal for instructions, rankings, or any content where the order of items is significant.
The <ol> tag works with the <li> tag, where each <li> represents an individual list item.
Basic Syntax of HTML <ol> Tag
The basic structure of an ordered list is:
<ol>
    <li>Item 1</li>
    <li>Item 2</li>
    <li>Item 3</li>
</ol>
The <ol> element serves as the container, and each <li> represents an item in the list.
Example of a Simple Ordered List
Here’s an example of a recipe instruction list using the <ol> tag:
index.html
<!DOCTYPE html>
<html>
    <body>
        <h2>Recipe Instructions</h2>
        <ol>
            <li>Preheat the oven to 350°F.</li>
            <li>Mix all ingredients in a bowl.</li>
            <li>Bake for 25 minutes.</li>
        </ol>
    </body>
</html>
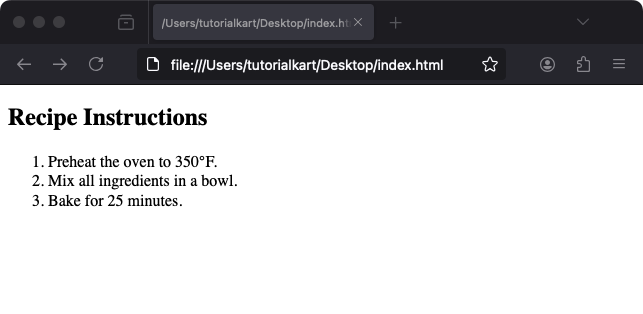
Explanation: The list items “Preheat the oven,” “Mix all ingredients,” and “Bake for 25 minutes” are displayed as numbered steps.
Styling Ordered Lists with CSS
You can style ordered lists using CSS to change the numbering style or appearance:
index.html
<!DOCTYPE html>
<html>
    <head>
        <style>
            ol {
                list-style-type: upper-roman; /* Change numbers to Roman numerals */
                padding-left: 20px;
            }
            ol.custom-list {
                list-style-type: square; /* Change to square bullets */
            }
        </style>
    </head>
    <body>
        <h2>Roman Numeral List</h2>
        <ol>
            <li>Step 1</li>
            <li>Step 2</li>
        </ol>

        <h2>Custom Styled List</h2>
        <ol class="custom-list">
            <li>Step A</li>
            <li>Step B</li>
        </ol>
    </body>
</html>
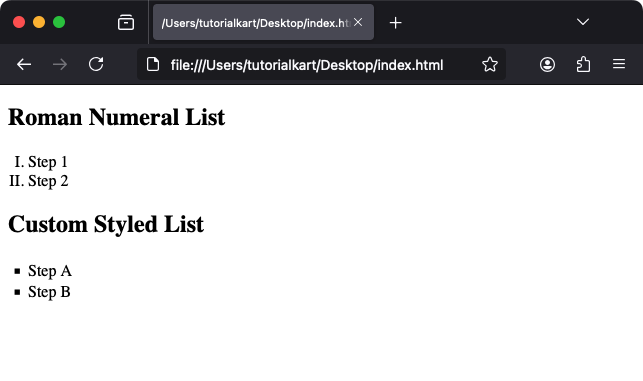
Result: The first list displays Roman numerals, and the second uses square bullets as defined by the list-style-type property.
Nested Ordered Lists
You can create nested ordered lists to represent hierarchical content:
index.html
<!DOCTYPE html>
<html>
    <body>
        <h2>Nested List Example</h2>
        <ol>
            <li>Main Step 1
                <ol>
                    <li>Sub-step 1</li>
                    <li>Sub-step 2</li>
                </ol>
            </li>
            <li>Main Step 2
                <ol>
                    <li>Sub-step A</li>
                    <li>Sub-step B</li>
                </ol>
            </li>
        </ol>
    </body>
</html>
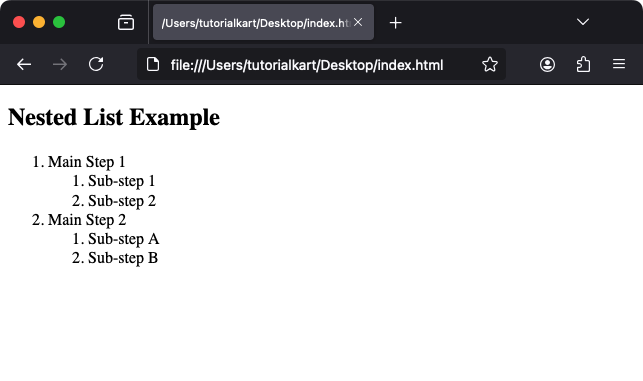
Explanation: Nested <ol> tags create sub-lists under the main list items, resulting in hierarchical numbering.
Attributes of HTML <ol> Tag
- type: Specifies the type of numbering or bullets. Possible values include:
1: Default numeric (1, 2, 3).A: Uppercase letters (A, B, C).a: Lowercase letters (a, b, c).I: Uppercase Roman numerals (I, II, III).i: Lowercase Roman numerals (i, ii, iii).
- start: Specifies the starting number for the list. For example,
start="5"begins the list with 5. - reversed: Reverses the numbering order so the list counts down instead of up.
- Global Attributes: Supports all global attributes like
id,class, andstyle.
Practical Applications of the <ol> Tag
- Step-by-Step Instructions: Provide clear, numbered steps for tasks or processes.
- Rankings: Display ranked items like top 10 lists or leaderboards.
- Hierarchical Data: Use nested lists to represent structured or categorized information.
- Sequential Content: Present any data that requires a specific order, such as timelines or event sequences.
The <ol> tag is versatile and can be customized with attributes and CSS for a wide range of applications.
