JUnit – Install Using Maven – Step by Step Process
JUnit – Install Using Maven
Installing JUnit using Maven is a straightforward process that ensures the required library is automatically downloaded and added to your project.
In this JUnit tutorial, we will cover the steps to set up JUnit in a Maven project, along with a simple example to verify the installation.
Prerequisites
Java Development Kit (JDK): Ensure JDK is installed and configured on your system.
Maven: Download and install Maven. Verify its installation by running mvn -version in the terminal.
Integrated Development Environment (IDE): Any Java IDE like IntelliJ IDEA, Eclipse, or VS Code.
Step 1: Create a Maven Project in Eclipse
To begin, create a Maven project. You can do this either via your IDE or the command line:
Most IDEs have a “Create New Project” wizard. Select “Maven” as the project type, specify the groupId and artifactId, and create the project.
Let us see the steps in Eclipse IDE.
Open Eclipse IDE.
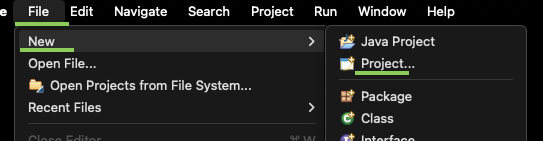
Navigate to File > New > Project.
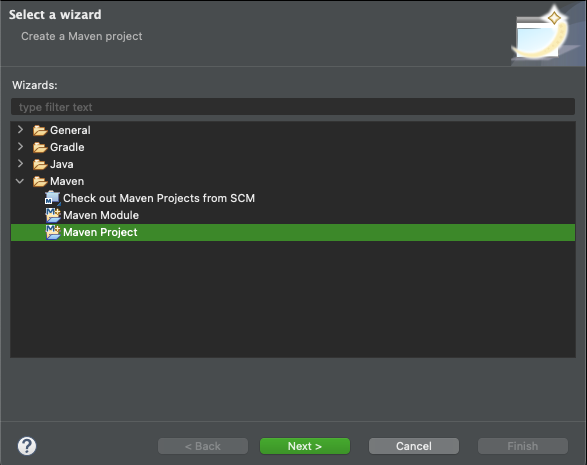
In the dialog box, select Maven.
Use Default location, and click on Next.
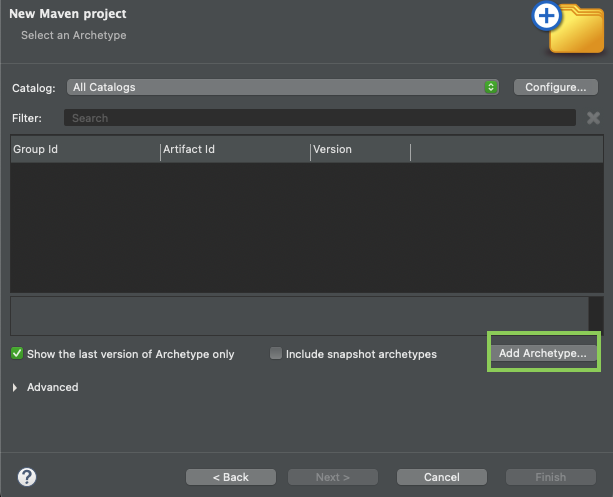
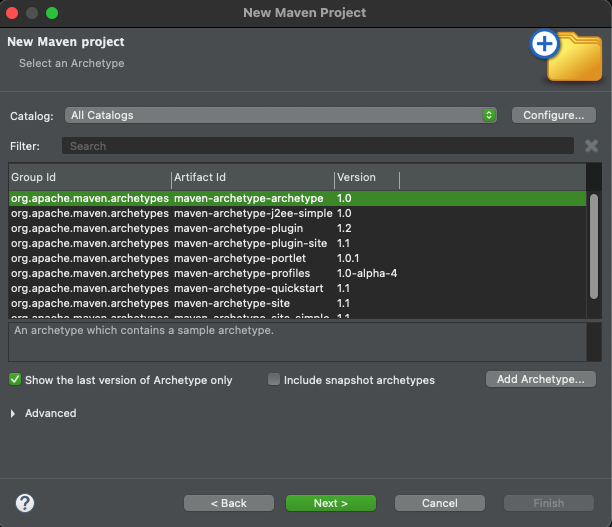
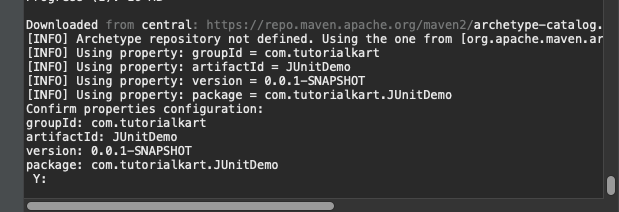
If the list is empty as shown below, click on Configure… -> Apply and Close. Now, select maven-archetype-archetype. Click Next.
Fill in the required fields, and click Finish.
Group Id: e.g., com.tutorialkart
Artifact Id: e.g., JUnitDemo
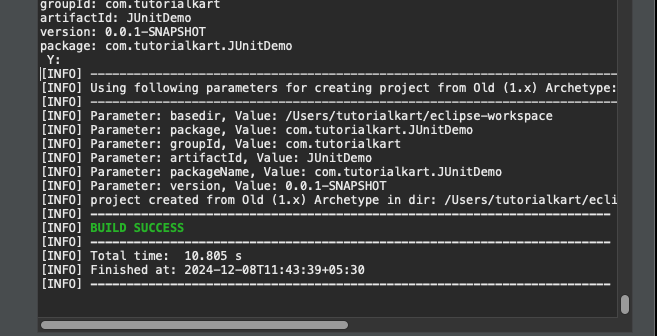
All the required libraries/packages would be downloaded. You may need to confirm for properties configuration, by clicking Enter in keyboard.
The project is created, and you can check the same in Project Explorer.
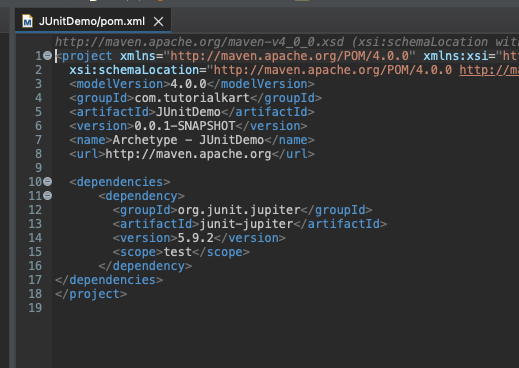
Step 2: Add JUnit Dependency
Edit the pom.xml file in the root directory of your project and add the JUnit dependency. For JUnit 5 (JUnit Jupiter), use the following configuration:
The scope is set to test, which means the JUnit library will be available only during testing and will not be included in the final build.
Step 3: Update Maven Dependencies
After adding the dependency, update the Maven project to download the JUnit library.
Most IDEs automatically sync Maven dependencies, or you can manually update by right-clicking the project and selecting “Maven” > “Update Project.”
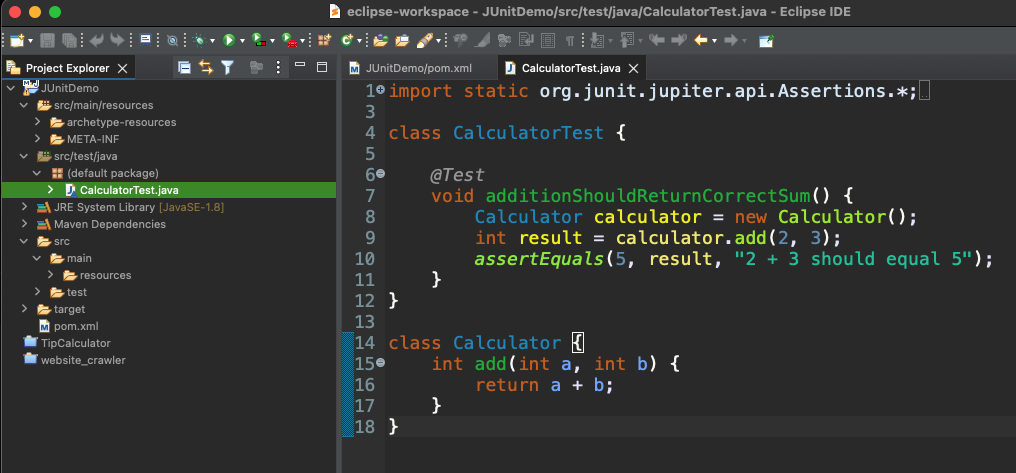
Step 4: Write a Simple Test Case
Create a test file in the src/test/java directory. Here’s an example of a simple JUnit test:
</>
Copy
import static org.junit.jupiter.api.Assertions.*;
import org.junit.jupiter.api.Test;

class CalculatorTest {

    @Test
    void additionShouldReturnCorrectSum() {
        Calculator calculator = new Calculator();
        int result = calculator.add(2, 3);
        assertEquals(5, result, "2 + 3 should equal 5");
    }
}

class Calculator {
    int add(int a, int b) {
        return a + b;
    }
}
Save this file in src/test/java, ensuring the directory matches your package structure.
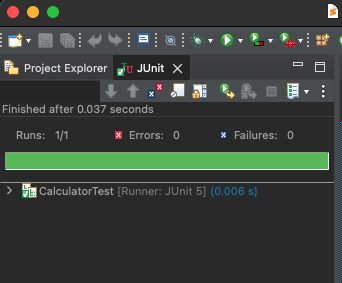
Step 5: Run the Tests
You can run the tests using IDE.
Right-click on the test class or method and select “Run As” > “JUnit Test” (or equivalent option).
If the setup is correct, you should see the test passing with output indicating success.
Conclusion
By following these steps, you can easily set up JUnit in a Maven project and start writing automated tests. This setup ensures that your project is organized, dependencies are managed efficiently, and testing is seamlessly integrated into the development workflow.
JUnit, combined with Maven, simplifies the testing process and improves code quality, making it an essential tool for modern Java developers.