In this tutorial, you will learn how to install MySQL Server on a Windows system. MySQL Server is essential for creating, managing, and securing databases, and it can be installed easily using the MySQL Installer for Windows.
Steps to Install MySQL Server in Windows
Step 1: Download MySQL Installer
To download MySQL Server, start by downloading the MySQL Installer:
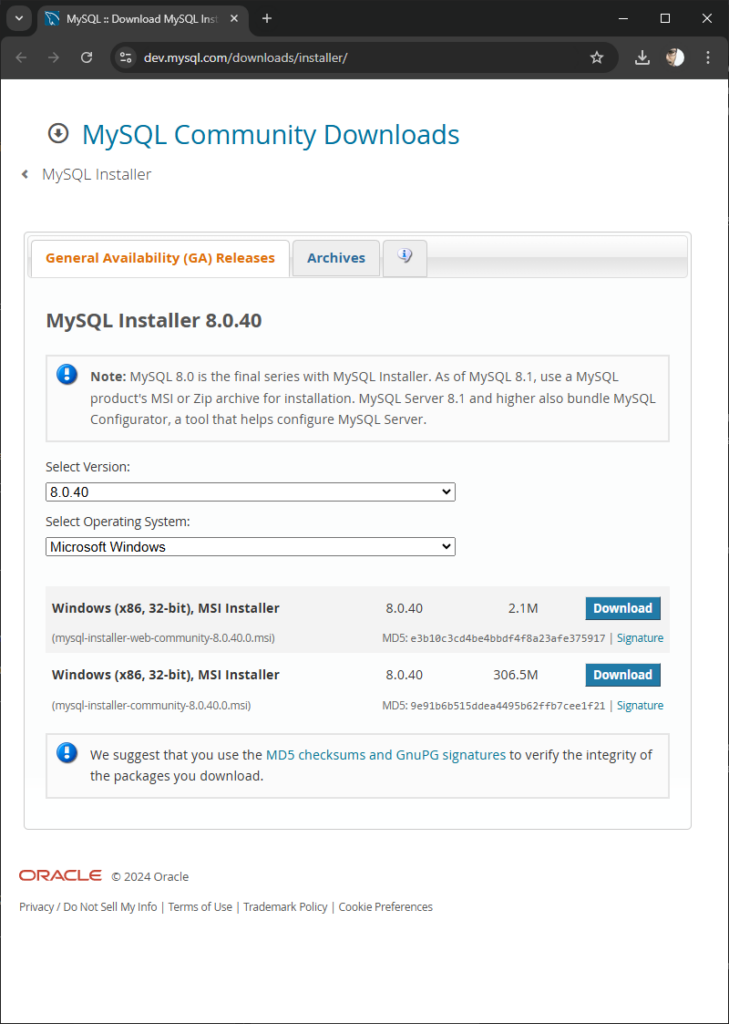
Go to the official MySQL Installer download page.

Select the MySQL Installer for Windows (either the web or full version) and click Download. We recommend downloading the full version as it includes all necessary components.
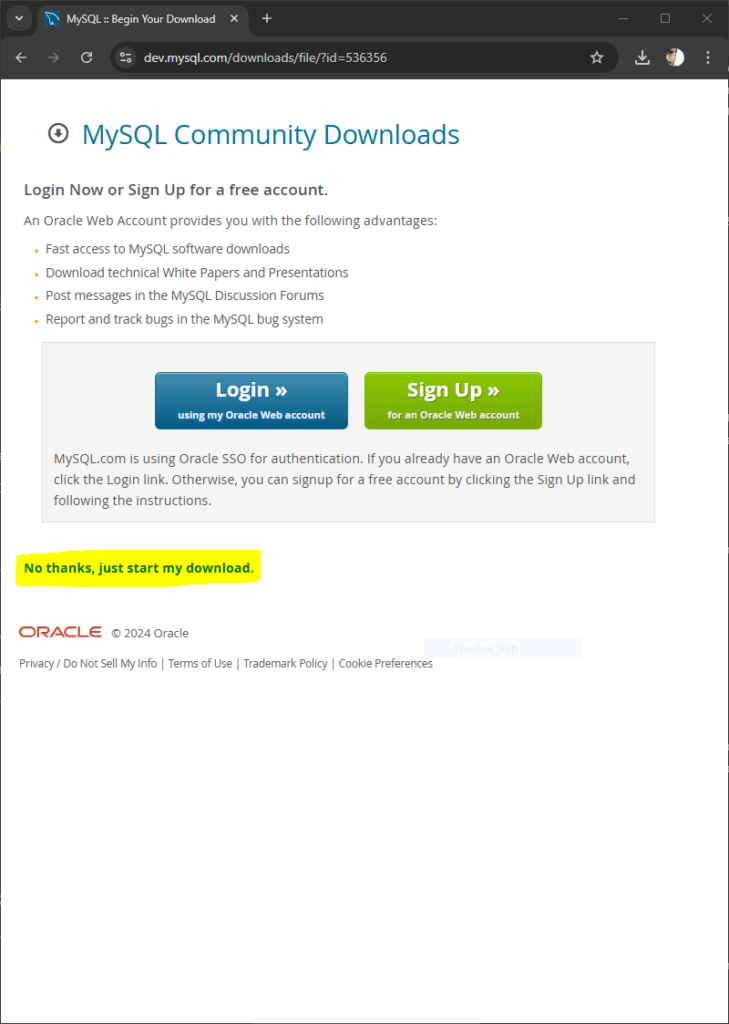
You may be prompted to log in or sign up for a MySQL account. To skip, select No thanks, just start my download.

Step 2: Run the MySQL Installer
After downloading, locate the installer file (usually in your Downloads folder) and double-click it to start the installation process.

In the installer window, click Add on the right side of the window. Select MySQL Server from the available options and click the green right arrow to add it to the Products To Be Installed section.

Click Next to proceed with the installation setup.

Click the Execute button to start installing MySQL Server and its dependencies. Follow the on-screen prompts to complete this step.
Step 3: Configure MySQL Server
Once the installation is complete, the setup wizard will guide you through configuring MySQL Server. Key configuration options include:
Type and Networking: Configure server type, networking options, and set the default port (3306).

Authentication Method: Choose the default or legacy authentication method based on your application requirements.

Accounts and Roles: Set the root account password and add any additional user accounts you need. In this setup, we have used 12345678 as password, so that it would be easy to follow up in the upcoming tutorials.

Windows Service: Configure MySQL as a Windows service for easy management, allowing it to start automatically when Windows starts.

Once all settings are configured, click Apply Configuration to save and implement them.

Step 4: Installation Complete
After configuration, MySQL Server is ready to use. Click Finish to complete the installation.

Step 5: Verify MySQL Server Installation
To verify that MySQL Server is running correctly, open a Command Prompt and navigate to the MySQL bin directory.
cd "Program Files\MySQL\MySQL Server 8.0\bin"Run the following command:
mysql -u root -pEnter the root password (12345678) you set during installation. If successful, you will be logged into the MySQL command line.

Conclusion
You have successfully installed MySQL Server on Windows. You can now create databases, execute queries, and manage your MySQL environment. For additional management options, consider using MySQL Workbench for a graphical interface.
