 TutorialKart.com
Python Pillow Tutorial
Pillow is a Python image-processing library used to open, inspect, modify, create, and save raster images. It supports common formats such as PNG, JPEG, GIF, BMP, TIFF, and WebP, depending on the features available in the installed build.
In this Python Pillow tutorial, you will learn how to install Pillow, open and inspect images, display them, resize and rotate them, flip and crop them, change color modes, apply filters, draw on images, add text, work with transparency, and save the processed result.
Install Pillow for Python
We will start with installing pillow package using pip.
To install pillow, run the following pip command.
pip install PillowC:\>pip install Pillow
Collecting Pillow
Installing collected packages: Pillow
Successfully installed Pillow-5.4.1On systems with more than one Python installation, use the interpreter explicitly so that Pillow is installed for the intended environment.
python -m pip install PillowOn some systems, the interpreter command may be python3.
python3 -m pip install PillowVerify the installation by importing Pillow through the PIL package name.
from PIL import Image

print(Image.__version__)
The package is installed from PyPI as Pillow, but it is imported in Python as PIL. This name is retained for compatibility with the original Python Imaging Library.
Open an Image With Pillow Image.open()
You can read an image using Image.open() method of Python Pillow library.
Python Program
from PIL import Image

im = Image.open("image1.png")
Image.open() returns Pillow Image object. The input image can be a binary image, greyscale image or color image.
Image.open() identifies the file format from its contents and opens the file lazily. Pixel data is generally read when an operation requires it. A context manager is useful when you want the underlying file handle closed as soon as processing finishes.
from PIL import Image

with Image.open("image1.png") as image:
    print(image.format)
    print(image.size)
    print(image.mode)
Inspect Pillow Image Format, Size, and Mode
image.formatidentifies the detected file format, such asPNGorJPEG.image.sizereturns a(width, height)tuple in pixels.image.widthandimage.heightprovide the dimensions separately.image.modedescribes the pixel format, such asRGB,RGBA,L, or1.
A missing or invalid path raises FileNotFoundError. A file that Pillow cannot identify as a supported image can raise PIL.UnidentifiedImageError.
from PIL import Image, UnidentifiedImageError

try:
    with Image.open("image1.png") as image:
        print(image.size)
except FileNotFoundError:
    print("The image file was not found.")
except UnidentifiedImageError:
    print("The file is not a supported image.")
Show or Display an Image With Pillow
You can show the image read, using Image.show() method. The image is displayed in a window.
Python Program
from PIL import Image

# read an image
im = Image.open("image1.png")

# show the image in a window
im.show()
Output
Run the program, and the default program in your OS to display the image will start to show the image.
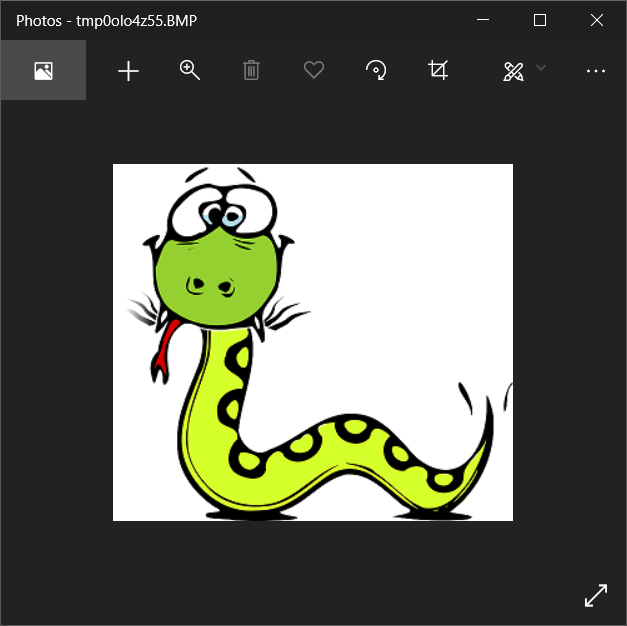
show() is mainly a debugging convenience. It usually writes a temporary file and asks the operating system to open it in an external image viewer. For notebooks, web applications, and desktop interfaces, use the display mechanism provided by that environment instead.
Resize an Image With Pillow
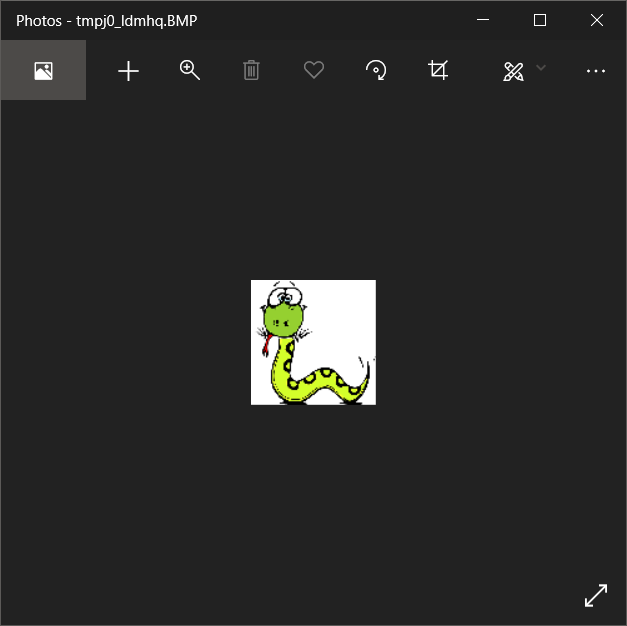
To resize image using PIL, follow these steps.
- Import Image from PIL package.
- Open image using Image.open() method. It returns an object.
- Call resize(size) method on the object. size is a tuple representing the target size.
- resize() method returns the resized image.
You can use this image object to save to persistent storage or show it like in the following program.
Python Program
from PIL import Image

# read an image
im = Image.open("python-image.png")

#resize image
im = im.resize((100, 100))

im.show()
Output
Resize a Pillow Image With a Resampling Filter
When changing image dimensions, specify a resampling filter. Image.Resampling.LANCZOS is commonly used for high-quality downscaling, while BICUBIC and BILINEAR provide other quality and performance trade-offs.
from PIL import Image

with Image.open("python-image.png") as image:
    resized = image.resize(
        (800, 600),
        Image.Resampling.LANCZOS,
    )
    resized.save("resized-image.png")
Preserve Aspect Ratio With Pillow thumbnail()
A fixed width and height can distort an image when the target ratio differs from the original. Use thumbnail() to fit the image within a bounding box while preserving its aspect ratio. Unlike many Pillow operations, thumbnail() modifies the image object in place.
from PIL import Image

with Image.open("python-image.png") as image:
    preview = image.copy()
    preview.thumbnail((400, 400), Image.Resampling.LANCZOS)
    preview.save("thumbnail.png")
Rotate an Image With Pillow
rotate(angle) method rotates the image by given angle in degrees, and returns the resulting image.
Python Program
from PIL import Image

# read an image
im = Image.open("python-image.png")

#rotate image
im = im.rotate(90)

im.show()
Output
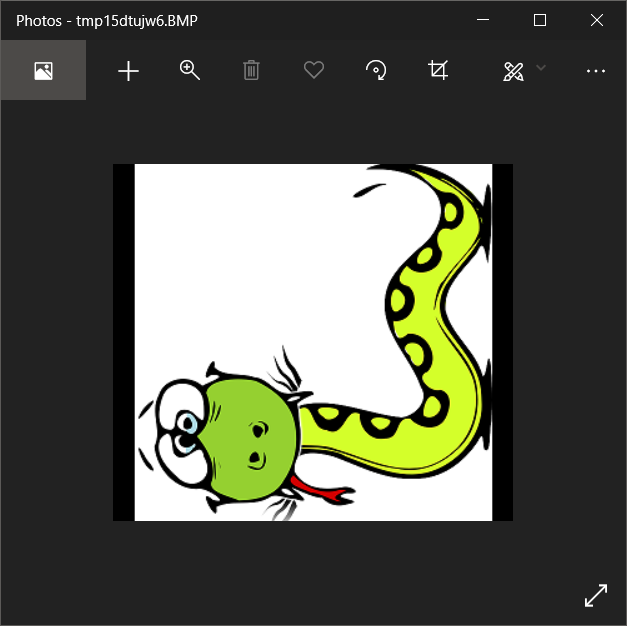
Positive angles rotate counterclockwise. By default, the output keeps the original canvas dimensions, which can clip corners. Set expand=True to enlarge the output canvas so that the complete rotated image fits.
from PIL import Image

with Image.open("python-image.png") as image:
    rotated = image.rotate(
        45,
        resample=Image.Resampling.BICUBIC,
        expand=True,
    )
    rotated.save("rotated-image.png")
Flip an Image With Pillow transpose()
transpose(method) function transposes the image using the given transpose method. method can take these values.
- PIL.Image.FLIP_LEFT_RIGHT
- PIL.Image.FLIP_TOP_BOTTOM
- PIL.Image.ROTATE_90
- PIL.Image.ROTATE_180
- PIL.Image.ROTATE_270
- PIL.Image.TRANSPOSE or PIL.Image.TRANSVERSE.
Let us pass PIL.Image.FLIP_LEFT_RIGHT for method, and flip the image along vertical axis.
Python Program
from PIL import Image

# read an image
im = Image.open("python-image.png")

#resize image
im = im.transpose(Image.FLIP_LEFT_RIGHT)

im.show()
Output
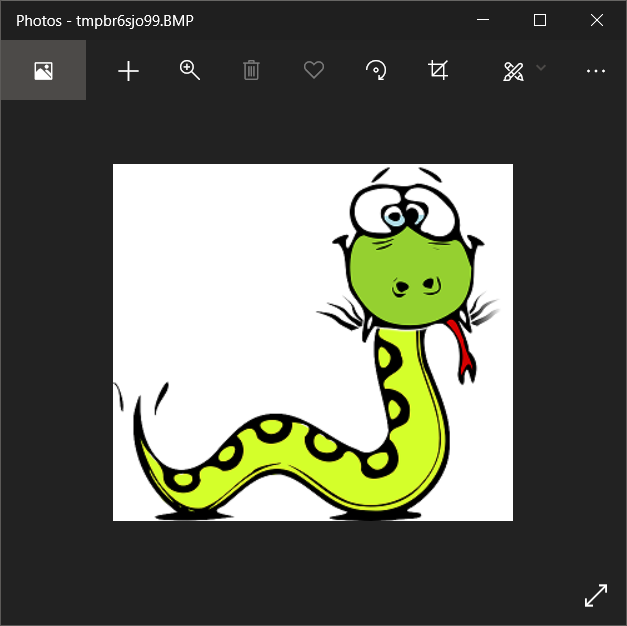
Current Pillow versions also expose transpose operations through Image.Transpose, which keeps the operation names grouped in one namespace.
from PIL import Image

with Image.open("python-image.png") as image:
    horizontal = image.transpose(Image.Transpose.FLIP_LEFT_RIGHT)
    vertical = image.transpose(Image.Transpose.FLIP_TOP_BOTTOM)

    horizontal.save("flipped-horizontal.png")
    vertical.save("flipped-vertical.png")
Crop an Image With Pillow Coordinates
Use crop() to extract a rectangular region. Pillow represents a crop box as (left, upper, right, lower). The left and upper edges are included, while the right and lower edges define the boundary.
from PIL import Image

with Image.open("python-image.png") as image:
    cropped = image.crop((100, 50, 500, 350))
    cropped.save("cropped-image.png")
The example starts 100 pixels from the left and 50 pixels from the top, then creates a region ending at horizontal coordinate 500 and vertical coordinate 350.
Convert Pillow Image Modes
Use convert() to change the image mode. Common modes include RGB for red, green, and blue channels; RGBA for RGB plus transparency; L for grayscale; and 1 for a one-bit image.
Convert a Pillow Image to Grayscale
from PIL import Image

with Image.open("python-image.png") as image:
    grayscale = image.convert("L")
    grayscale.save("grayscale-image.png")
Convert RGBA to RGB Before Saving as JPEG
JPEG does not support an alpha transparency channel. Convert an RGBA image to RGB before saving it as JPEG, or composite it onto a chosen background color when transparent areas must be preserved visually.
from PIL import Image

with Image.open("transparent-image.png") as image:
    rgb_image = image.convert("RGB")
    rgb_image.save("converted-image.jpg", quality=90)
Apply Pillow Image Filters
The ImageFilter module provides predefined filters for blurring, sharpening, detecting edges, and other image-processing operations.
from PIL import Image, ImageFilter

with Image.open("python-image.png") as image:
    blurred = image.filter(ImageFilter.GaussianBlur(radius=3))
    sharpened = image.filter(ImageFilter.SHARPEN)
    edges = image.filter(ImageFilter.FIND_EDGES)

    blurred.save("blurred-image.png")
    sharpened.save("sharpened-image.png")
    edges.save("edge-image.png")
Filtering returns a new image. The original object remains available unless you assign the result back to the same variable.
Adjust Pillow Image Brightness, Contrast, and Color
The ImageEnhance module adjusts visual properties with a numeric factor. A factor of 1.0 preserves the original appearance, values below 1.0 reduce the effect, and values above 1.0 increase it.
from PIL import Image, ImageEnhance

with Image.open("python-image.png") as image:
    brighter = ImageEnhance.Brightness(image).enhance(1.3)
    higher_contrast = ImageEnhance.Contrast(image).enhance(1.5)
    more_color = ImageEnhance.Color(image).enhance(1.2)

    brighter.save("brighter-image.png")
    higher_contrast.save("contrast-image.png")
    more_color.save("color-image.png")
Draw Shapes and Text on a Pillow Image
Use ImageDraw.Draw to draw lines, rectangles, ellipses, polygons, and text. Coordinates are measured from the upper-left corner of the image.
from PIL import Image, ImageDraw

image = Image.new("RGB", (600, 300), "white")
draw = ImageDraw.Draw(image)

draw.rectangle((40, 40, 240, 180), outline="black", width=4)
draw.ellipse((300, 40, 480, 220), fill="lightgray", outline="black")
draw.line((40, 250, 550, 250), fill="black", width=3)
draw.text((40, 200), "Created with Pillow", fill="black")

image.save("drawing.png")
Add Text With a TrueType Font in Pillow
Load a TrueType or OpenType font with ImageFont.truetype(). The font file must exist at the specified path.
from PIL import Image, ImageDraw, ImageFont

with Image.open("python-image.png").convert("RGBA") as image:
    draw = ImageDraw.Draw(image)
    font = ImageFont.truetype("DejaVuSans.ttf", size=36)

    draw.text(
        (30, 30),
        "Python Pillow",
        font=font,
        fill=(255, 255, 255, 255),
        stroke_width=2,
        stroke_fill=(0, 0, 0, 255),
    )

    image.save("image-with-text.png")
Paste, Composite, and Preserve Transparency With Pillow
Pillow can place one image over another. For an overlay with transparency, convert both images to RGBA and use the overlay’s alpha channel as the mask.
from PIL import Image

with Image.open("background.png").convert("RGBA") as background:
    with Image.open("logo.png").convert("RGBA") as logo:
        result = background.copy()
        result.paste(logo, (30, 30), logo)
        result.save("image-with-logo.png")
The third argument to paste() acts as a mask. Passing the RGBA logo itself uses its alpha channel, allowing partially transparent pixels to blend with the background.
Read and Modify Individual Pixels With Pillow
Use getpixel() and putpixel() for occasional pixel access. Coordinates use the form (x, y), where x increases from left to right and y increases from top to bottom.
from PIL import Image

with Image.open("python-image.png").convert("RGB") as image:
    pixel = image.getpixel((10, 10))
    print("Original pixel:", pixel)

    image.putpixel((10, 10), (255, 0, 0))
    image.save("pixel-updated.png")
Calling Python methods once per pixel can be slow for large images. For substantial numerical processing, consider bulk-oriented APIs or a numerical array library rather than deeply nested Python loops.
Process Multiple Images With Pillow
The following example creates thumbnails for all PNG and JPEG files in an input directory. It keeps each source filename while writing the processed files to a separate directory.
from pathlib import Path
from PIL import Image, UnidentifiedImageError

input_dir = Path("images")
output_dir = Path("thumbnails")
output_dir.mkdir(exist_ok=True)

for path in input_dir.iterdir():
    if path.suffix.lower() not in {".png", ".jpg", ".jpeg"}:
        continue

    try:
        with Image.open(path) as image:
            thumbnail = image.copy()
            thumbnail.thumbnail((300, 300), Image.Resampling.LANCZOS)
            thumbnail.save(output_dir / path.name)
    except UnidentifiedImageError:
        print(f"Skipped unsupported image: {path}")
When processing a directory, avoid overwriting source files until the output has been verified. Saving to a separate directory also makes failed or partial conversions easier to recover from.
Save an Image With Pillow
Image.save() method saves the image in specified format.
Python Program
from PIL import Image

# read an image
im = Image.open("python-image.png")

#image transformations
im = im.transpose(Image.FLIP_LEFT_RIGHT)

#save image
im.save('result-image.png', 'PNG')
Run this program, and an image file with the name ‘result-image.png’ will be created in the current directory. You may specify the absolute path or relative path along with the file name to save it to a different location.
Pillow can usually infer the output format from the filename extension. You can also pass the format explicitly, as in the existing example. Format-specific options control compression, image quality, metadata, and related behavior.
Save a JPEG With Pillow Quality Options
from PIL import Image

with Image.open("python-image.png") as image:
    image.convert("RGB").save(
        "result-image.jpg",
        format="JPEG",
        quality=90,
        optimize=True,
    )
Higher JPEG quality settings generally preserve more detail but produce larger files. PNG uses lossless compression and is often suitable for screenshots, diagrams, and images that require transparency.
Save a Pillow Image to Memory
Use io.BytesIO when an application needs encoded image bytes without first writing a file to disk.
from io import BytesIO
from PIL import Image

buffer = BytesIO()

with Image.open("python-image.png") as image:
    image.save(buffer, format="PNG")

png_bytes = buffer.getvalue()
print(len(png_bytes))
Common Python Pillow Errors and Fixes
ModuleNotFoundError: No module named 'PIL': Install Pillow with the same Python interpreter used to run the script.FileNotFoundError: Check the working directory, filename, extension, and path spelling.UnidentifiedImageError: Confirm that the file is a valid supported image rather than a renamed or damaged non-image file.cannot write mode RGBA as JPEG: Convert the image toRGBor composite transparency onto a background before saving.- Rotated corners are missing: Pass
expand=Truetorotate(). - The resized image looks stretched: Preserve the aspect ratio with
thumbnail()or calculate one target dimension from the other. - Text font cannot be opened: Supply a valid path to a readable TrueType or OpenType font file.
- Source image stays unchanged: Store the object returned by methods such as
resize(),rotate(),crop(), andfilter().
Python Pillow Tutorial FAQs
What is Pillow in Python?
Pillow is a maintained Python library for working with raster images. It provides classes and functions for opening, inspecting, resizing, cropping, rotating, filtering, drawing, converting, and saving images.
How do I use Pillow in Python?
Install the package with python -m pip install Pillow, import required classes from PIL, open an image with Image.open(), apply an operation, and save the returned image object with save().
Why is Pillow installed but imported as PIL?
Pillow is the package distribution name, while PIL is the import namespace retained for compatibility with the original Python Imaging Library.
Does Pillow preserve image quality when resizing?
Resizing necessarily recalculates pixels, so quality depends on the source image, target dimensions, and resampling filter. For high-quality downscaling, Image.Resampling.LANCZOS is commonly appropriate. Avoid repeatedly resizing and re-saving a lossy image such as JPEG.
Can Pillow process images without saving them to disk?
Yes. Pillow can open file-like objects and save encoded images to an io.BytesIO buffer. This is useful for web responses, database storage, testing, and other in-memory workflows.
Python Pillow Editorial QA Checklist
- Confirm that installation examples use the package name
Pillowand Python imports use the namespacePIL. - Verify that each sample input filename matches the file referenced by its explanation.
- Check that resize examples distinguish fixed-size resizing from aspect-ratio-preserving thumbnails.
- Confirm that new examples use
Image.ResamplingandImage.Transposewhere current enum syntax is being demonstrated. - Verify that RGBA images are converted or composited before being saved as JPEG.
- Check that rotation examples mention
expand=Truewhen clipping would affect the expected result. - Confirm that crop boxes follow the order
(left, upper, right, lower). - Run each complete Python example and verify that its output file is created in the stated location.
Python Pillow Image-Processing Summary
Pillow provides a direct API for common image-processing work in Python. A typical workflow is to open an image, inspect its size and mode, apply one or more transformations, and save the resulting image in a suitable format. Use context managers for file-backed images, preserve aspect ratio when required, choose a suitable resampling filter, and account for color mode and transparency before saving.
In this Python Tutorial, we learned how to use Python Pillow library.