Creating your First React Application
This tutorial will guide you through creating your first React application.
Prerequisites
- Basic knowledge of HTML, CSS, and JavaScript
- Node.js and npm installed on your computer
You can verify using the node and npm version commands as shown in the following screenshot.
node -v
npm -v
Steps to create your First React Application
Step 1
Open your terminal or command prompt, and navigate to the directory in which you would like to create your first React application.

Step 2
Run the following command to install the create-react-app tool:
npx create-react-app myappwhere myapp is the name of our React application. The above command creates a directory with the name myapp.
Step 3
Navigate to your new project directory:
cd myapp
Step 4
Start the development server:
npm startThis will open your browser and display the default React app.
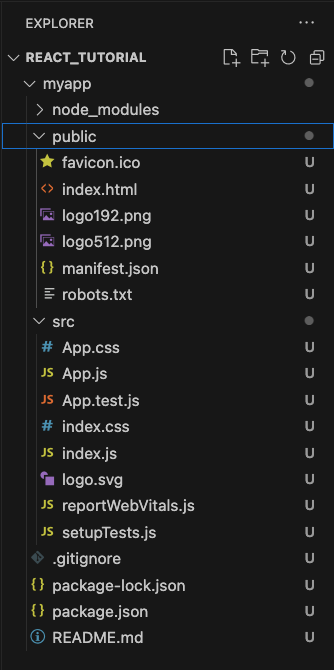
Explore the Project Structure
The create-react-app tool generates a project with the following structure. The following is the screenshot after opening the project in Visual Studio Code.

Modify the App Component
Edit the src/App.js file to customise your app:
src/App.js
import logo from './logo.svg';
import './App.css';

function App() {
  return (
    <div className="App">
      <header className="App-header">
        <h1>Welcome to My First React App</h1>
        <p>ReactJS Tutorials by TutorialKart!</p>
      </header>
    </div>
  );
}

export default App;
Save your changes and ensure the development server is running. Your browser should automatically refresh to show the updated app.
Or you may rerun the program. Let us rerun the program, and show how it is done from the terminal of Visual Studio Code.
Open Terminal window in Visual Studio Code, navigate to the project root directory, and run the npm start command, as shown int the following video.
Conclusion
Congratulations! You’ve built your first React application.
