React ToDo App
Building a ToDo app in React is a great way to practice fundamental concepts like state management, event handling, and conditional rendering. This example demonstrates a simple ToDo app with features to add, edit, and delete tasks.
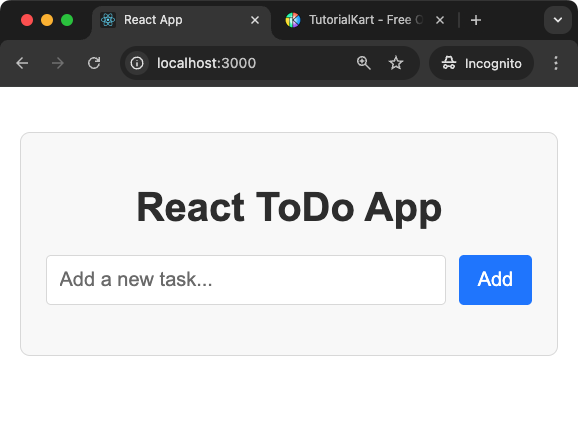
This application starts with a clean and intuitive interface, including an input field for adding tasks.

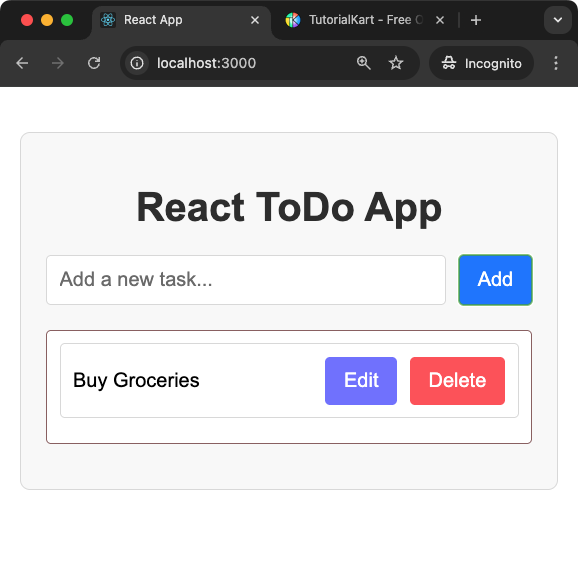
Each added task in the list has options for editing or deleting it.

Styling is added using CSS to make the interface visually appealing and user-friendly. The app leverages React’s state management to dynamically update the list based on user interactions.
The app consists of two main states: one for tracking the list of tasks and another for handling task-specific actions like editing. Adding a new task involves updating the tasks state with the new entry, while editing or deleting tasks modifies or removes entries dynamically. This provides an excellent example of how React’s declarative nature simplifies handling UI updates.
Moreover, the app ensures input validation to prevent adding empty tasks, and a clear visual distinction is made for edit and delete actions. With its foundational structure, this ToDo app can be extended further with additional features such as persistent storage or priority labels for tasks.
Steps to Use the App
- Adding a Task:
- Type the task you want to add into the input field at the top of the app.
- Click the “Add” button to add the task to the list.
- The new task will appear in the list below, ready for management.
- Editing a Task:
- Click the “Edit” button next to the task you want to modify.
- An input field will replace the task text, allowing you to make changes.
- Click the “Save” button to update the task with the new text.
- Deleting a Task:
- Click the “Delete” button next to the task you want to remove.
- The task will immediately be removed from the list.
Complete React ToDo Application
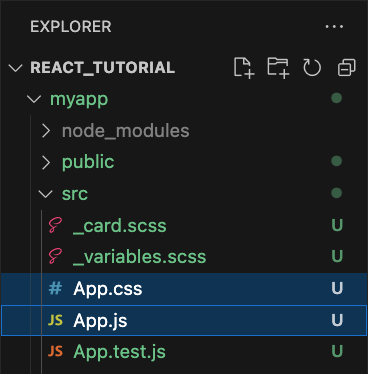
Create an empty React Application, and edit the App.js, and App.css files.
The following is the screenshot of project explorer in Visual Studio Code.
Explorer

App.js
import React, { useState } from 'react';
import './App.css';

function ToDoApp() {
  const [tasks, setTasks] = useState([]);
  const [newTask, setNewTask] = useState('');
  const [editingIndex, setEditingIndex] = useState(null);
  const [editingText, setEditingText] = useState('');

  const addTask = () => {
    if (newTask.trim() !== '') {
      setTasks([...tasks, newTask]);
      setNewTask('');
    }
  };

  const deleteTask = (index) => {
    const updatedTasks = tasks.filter((_, i) => i !== index);
    setTasks(updatedTasks);
  };

  const startEditing = (index) => {
    setEditingIndex(index);
    setEditingText(tasks[index]);
  };

  const saveEdit = () => {
    const updatedTasks = [...tasks];
    updatedTasks[editingIndex] = editingText;
    setTasks(updatedTasks);
    setEditingIndex(null);
    setEditingText('');
  };

  return (
    <div className="todo-app">
      <h1>React ToDo App</h1>
      <div className="input-container">
        <input
          type="text"
          placeholder="Add a new task..."
          value={newTask}
          onChange={(e) => setNewTask(e.target.value)}
        />
        <button onClick={addTask}>Add</button>
      </div>
      <ul>
        {tasks.map((task, index) => (
          <li key={index} className="task-item">
            {editingIndex === index ? (
              <span>
                <input
                  type="text"
                  value={editingText}
                  onChange={(e) => setEditingText(e.target.value)}
                />
                <button onClick={saveEdit}>Save</button>
              </span>
            ) : (
              <span>
                <span>{task}</span>
                <div className="buttons">
                  <button className="btn-edit" onClick={() => startEditing(index)}>Edit</button>
                  <button className="btn-delete"onClick={() => deleteTask(index)}>Delete</button>
                </div>
              </span>
            )}
          </li>
        ))}
      </ul>
    </div>
  );
}

export default ToDoApp;
App.css
.todo-app {
  font-family: Arial, sans-serif;
  margin: 20px auto;
  max-width: 400px;
  text-align: center;
  border: 1px solid #ddd;
  padding: 20px;
  border-radius: 8px;
  background-color: #f9f9f9;
}

h1 {
  color: #333;
  margin-bottom: 20px;
}

.input-container {
  display: flex;
  justify-content: center;
  margin-bottom: 20px;
}

input {
  flex: 1;
  padding: 10px;
  border: 1px solid #ddd;
  border-radius: 4px;
  margin-right: 10px;
  font-size: 16px;
}

button {
  padding: 10px 15px;
  border: none;
  border-radius: 4px;
  background-color: #007bff;
  color: white;
  cursor: pointer;
  font-size: 16px;
}

button:hover {
  background-color: #0056b3;
}
.btn-edit {
  background-color: rgb(120, 120, 255);
}
.btn-delete {
  background-color: rgb(255, 98, 98);
}
ul {
  padding-left: 0;
}
.buttons {
  display: flex;
  gap: 10px;
}

.task-item {
  display: block;
  padding: 10px;
  margin-bottom: 10px;
  background-color: white;
  border: 1px solid #956c6c;
  border-radius: 4px;
}
.task-item > span {
  display: flex;
  justify-content: space-between;
  align-items: center;
  padding: 10px;
  margin-bottom: 10px;
  background-color: white;
  border: 1px solid #ddd;
  border-radius: 4px;
}

.task-item input {
  flex: 1;
  margin-right: 10px;
}

task-item button {
  margin-left: 5px;
}
Conclusion
This React ToDo App demonstrates basic concepts of state management and event handling. It is a foundational project that can be enhanced further with features like persistent storage, animations, or filters. Experiment with styling and functionality to customise it as per your taste or requirements.
