In this tutorial, we will learn how to create a project in Xcode with SwiftUI, basic understanding of Xcode application, boilerplate code file created in the project, and run the application on a simulator.
SwiftUI – Create Project in Xcode
Following is a step by step process to create a Project in Xcode with SwiftUI.
Step 1 – Open Xcode
Open Xcode from Dock.

Welcome to Xcode window appears.
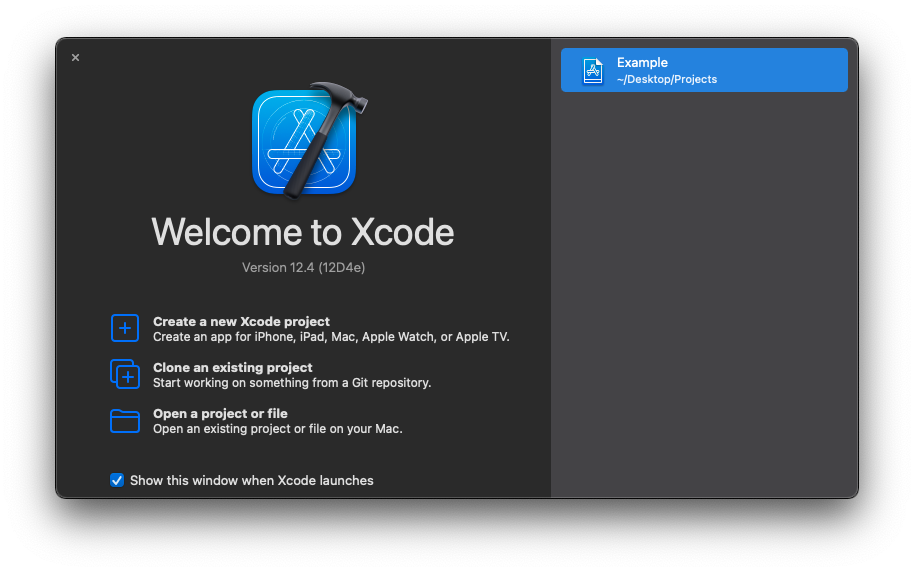
Step 2 – Create a new Xcode project
Under welcome message, there are some options. Click on Create a new Xcode project.

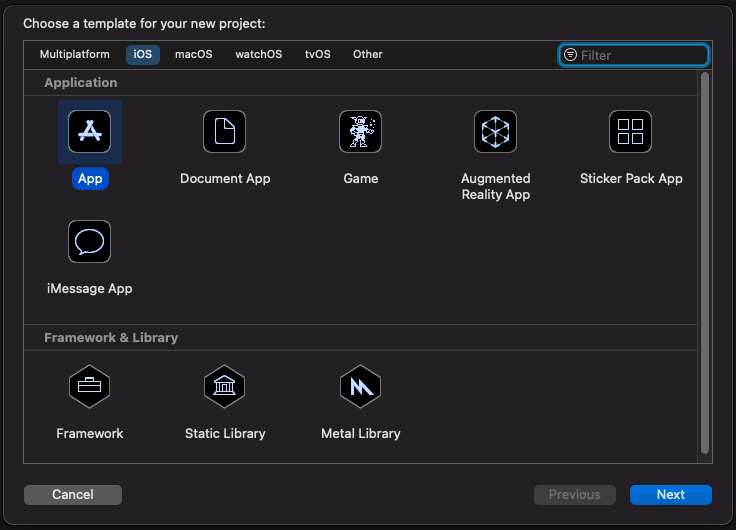
Step 3 – Choose Template
We have to choose a template for our project, based on the Device Type and Application Type.

In this tutorial, we will create a project with App template for iOS device.
Click on iOS, then under iOS tab, click on App template. Then, click on Next.
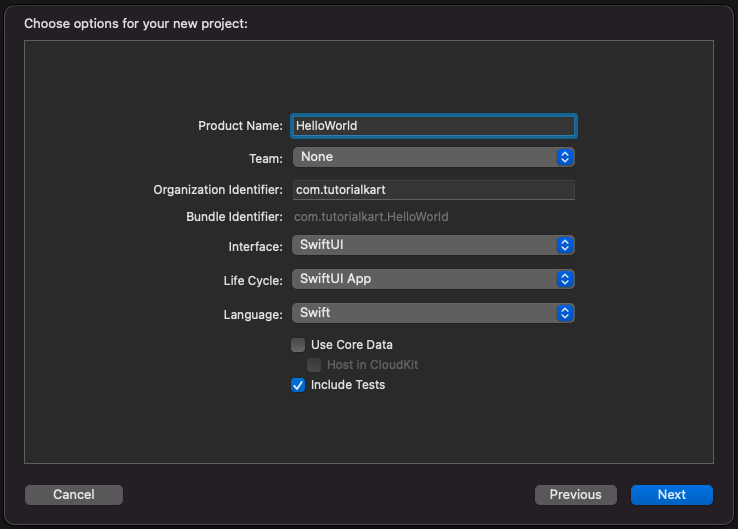
Step 4 – Set Project Options
Choose options for the project.
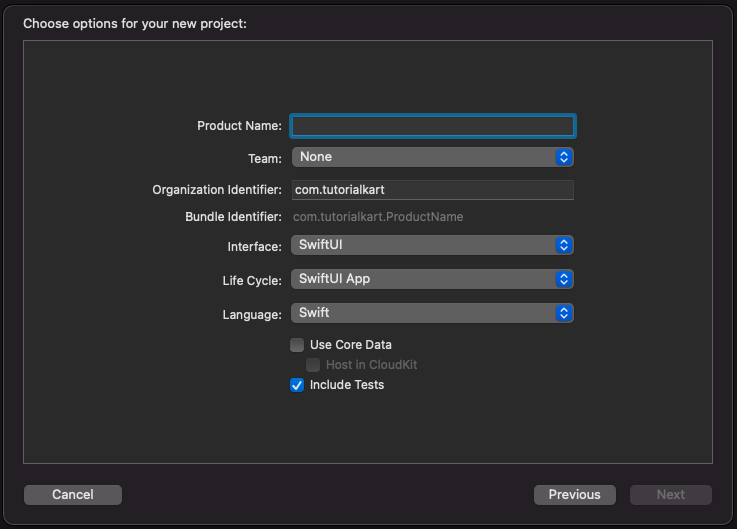
Enter a name for this project for Product Name field, and choose SwiftUI for Interface, SwiftUI App for Life Cycle; and click on Next button.
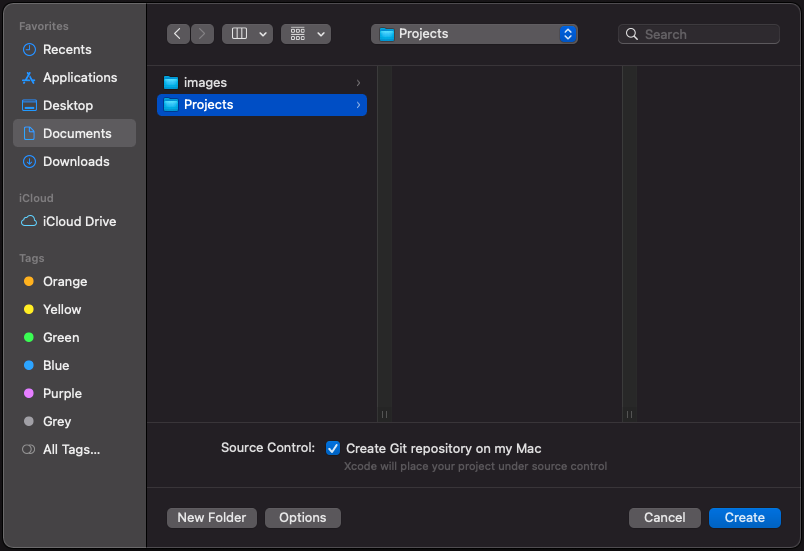
Step 5 – Choose Project Directory
Choose a directory for the project, and click on Create button.
Our HelloWorld project opens with all the boilerplate code.
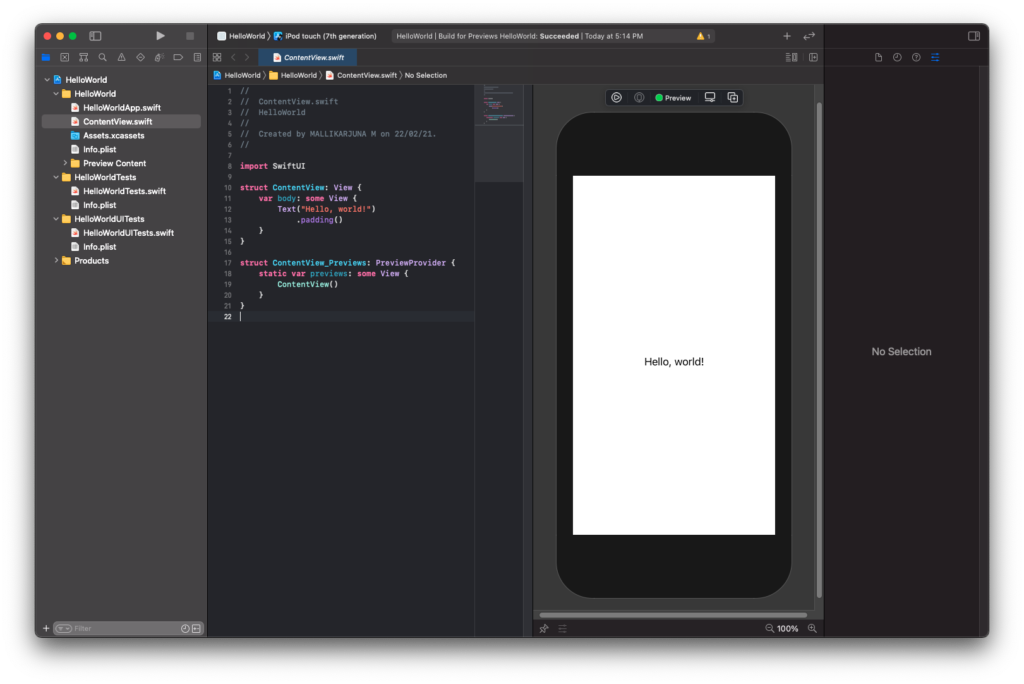
We have successfully created an iOS application with SwiftUI Interface.
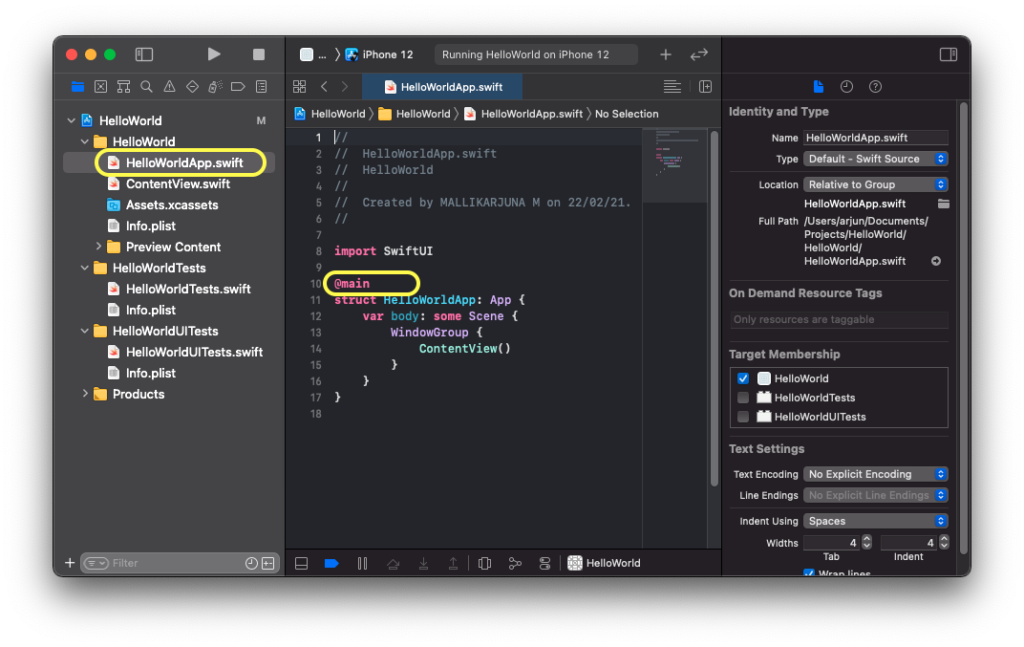
Xcode Project Window
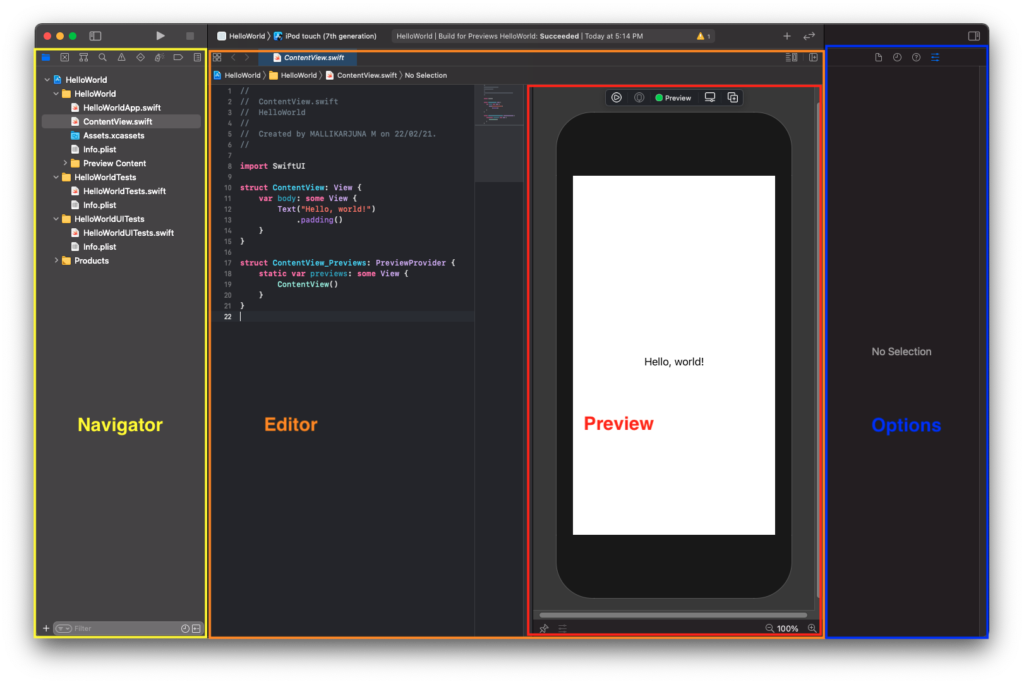
Now, let us dig through the Xcode application, and some of the files in this project.
It has a Navigator, Editor (including Preview), and Options (for any of the selected item in the Navigator or Editor).
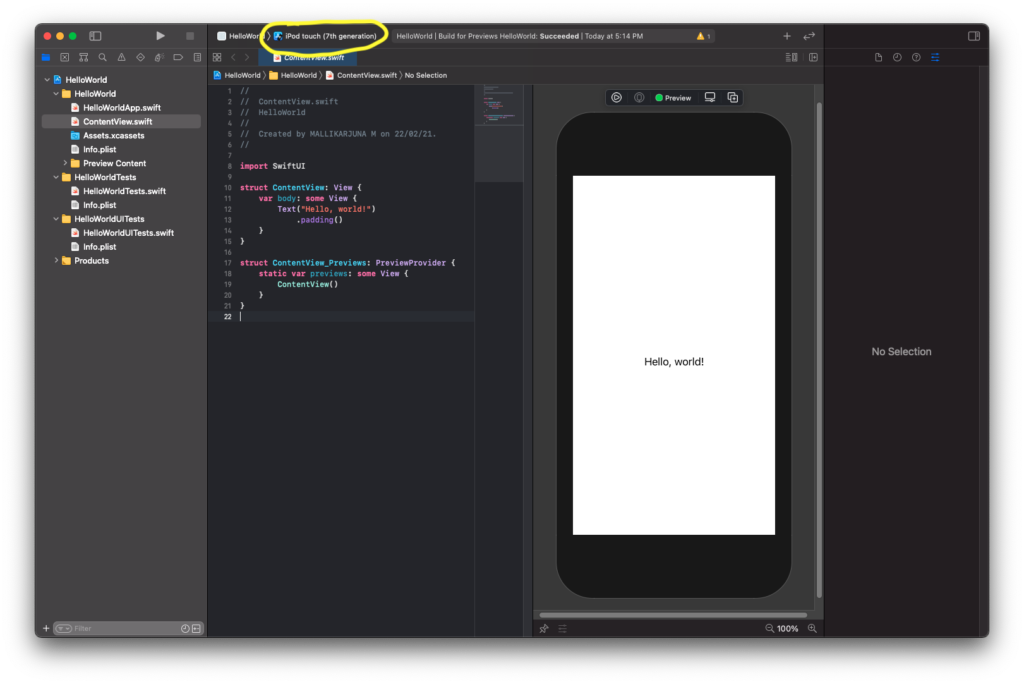
By default, a device would be selected for the project to run on.
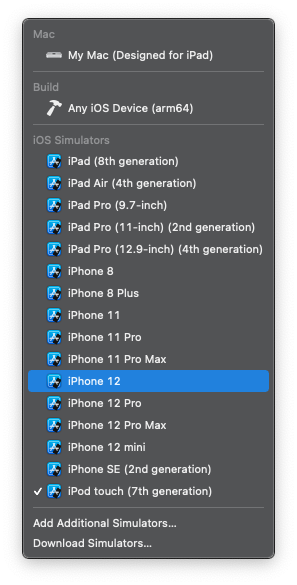
We may change the device on which our built project runs. Like, we may select a Simulator, or download a new Simulator and then select that, etc.
Click on the Device, as shown in the following screenshot, highlighted.
A list of available devices, simulator, etc, appear. Choose one based on the requirement.
Run
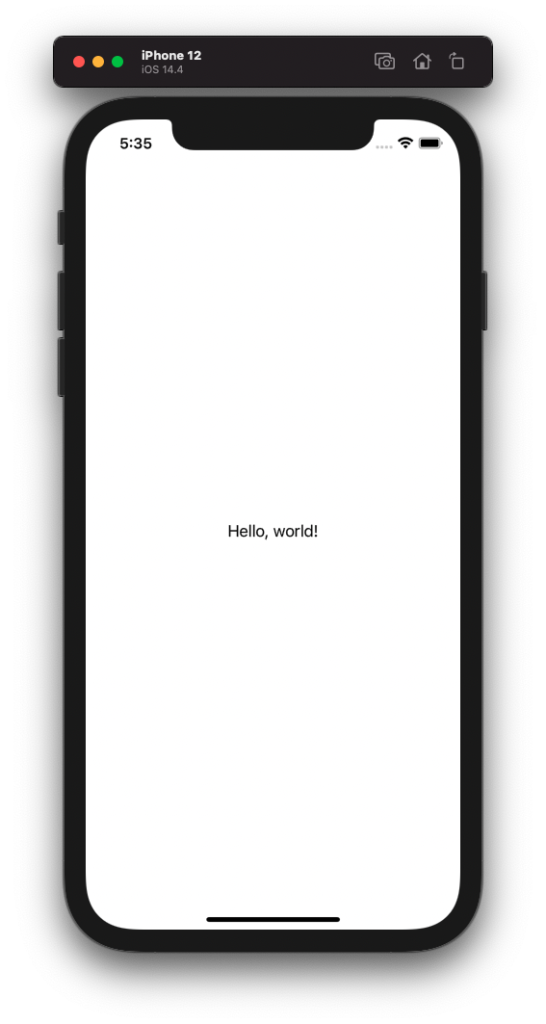
Now, run this application on the chosen device, by clicking on run button present at above Navigator.

Our project starts running on the device.
Project Files
Let us walkthrough some of the files that are created for this project.
HelloWorldApp.swift – [ProjectName]App.swift
This swift file has a struct with main attribute @main. This is the entry point for our project, when it is run.
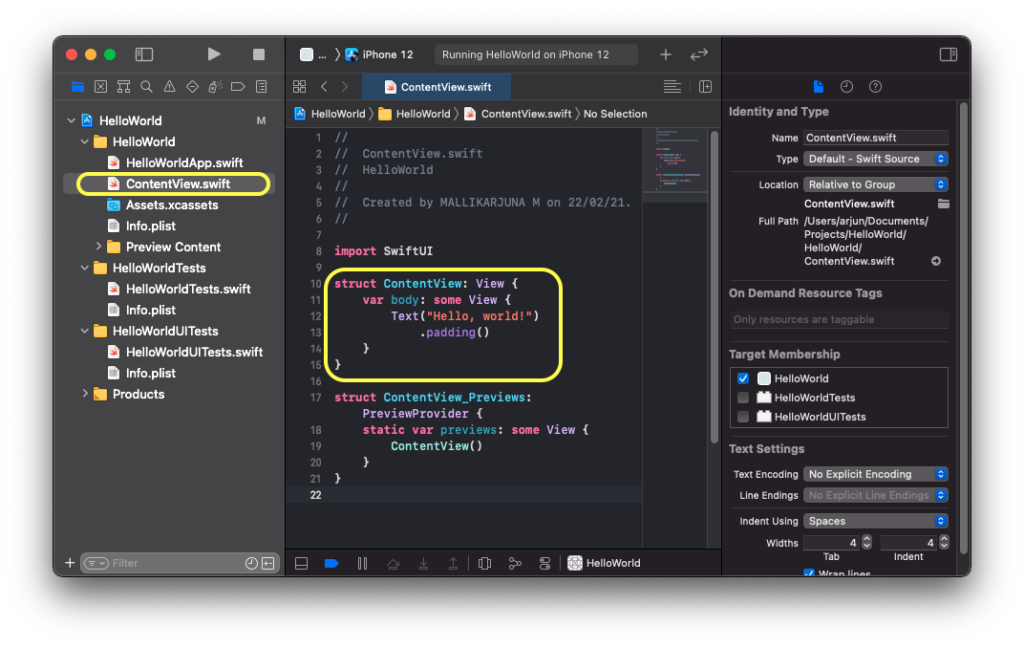
ContentView.swift
This file, contains the View, which is displayed in the UI. This contains the “Hello, world!” text displayed in the UI.
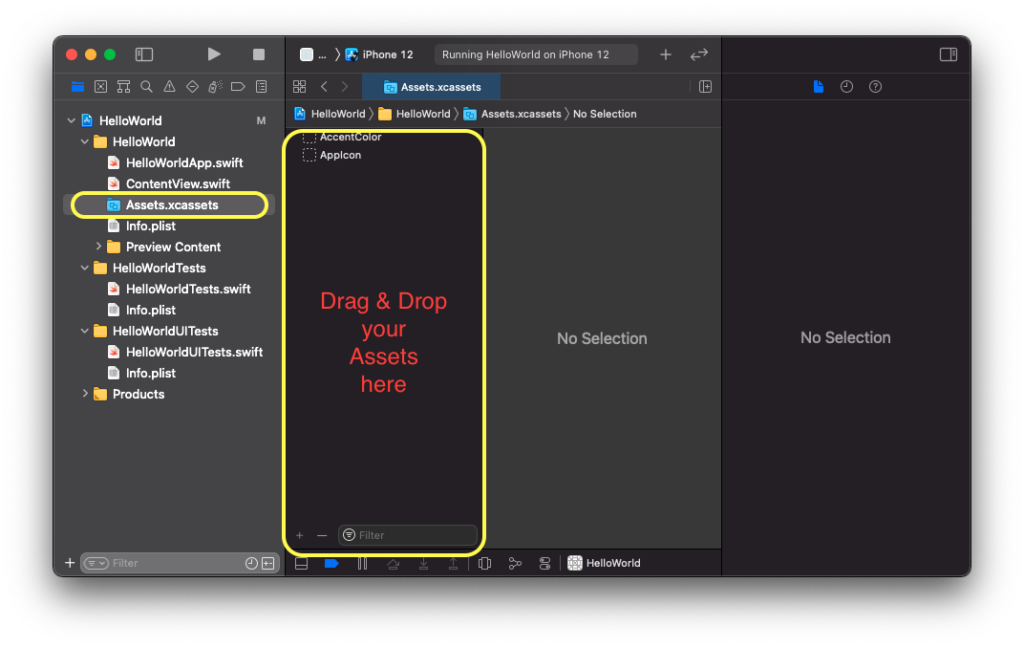
Assests.xcassets
This contains the list of assets for this project.
info.plist
This file contains information about the properties of this project, like build version, supported orientations, required capabilities, etc.

Conclusion
Concluding this SwiftUI Tutorial, we learned how to create an Xcode project with SwiftUI.