Adding a Color to the Assets in SwiftUI
In SwiftUI, you can manage and reuse colors efficiently by adding them to the asset catalog. Colors added to the asset catalog can be used throughout your app with a consistent naming convention.
In this tutorial, we will go through a step-by-step guide on how to add a color to the asset catalog and use it in your SwiftUI project.
Steps to Add a Color to the Asset Catalog
Follow the steps below to add a custom color to the asset catalog in Xcode:
Step 1:
Open your SwiftUI project in Xcode.

Step 2:
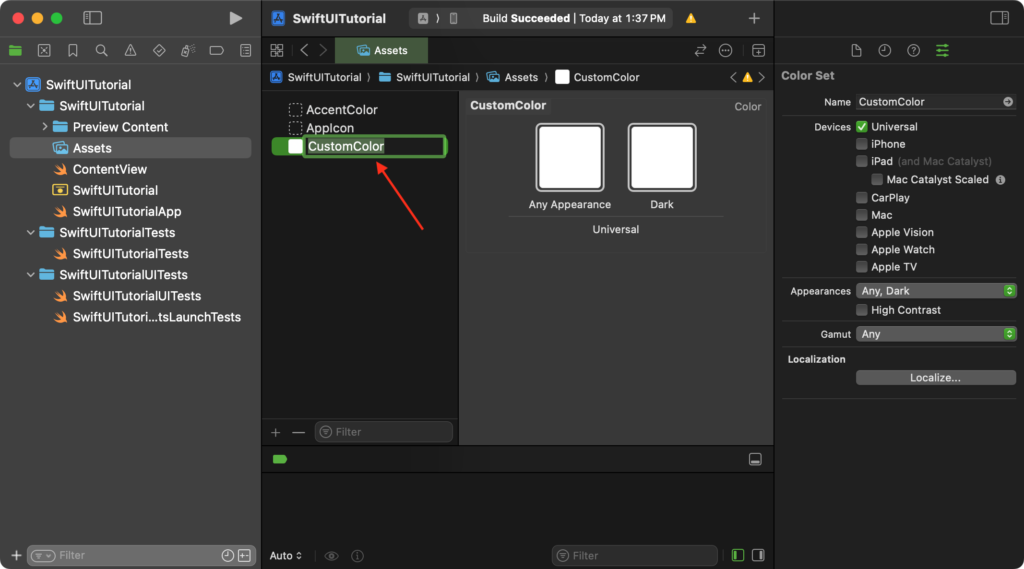
In the Project Navigator (left panel), locate and select the Assets.xcassets file.

Step 3:
In the Assets Catalog, click the + button at the bottom left corner and select New Color Set.

Step 4:
Rename the new color set by double-clicking on its default name (e.g., “Color”) and typing a meaningful name, such as CustomColor.

Step 5:
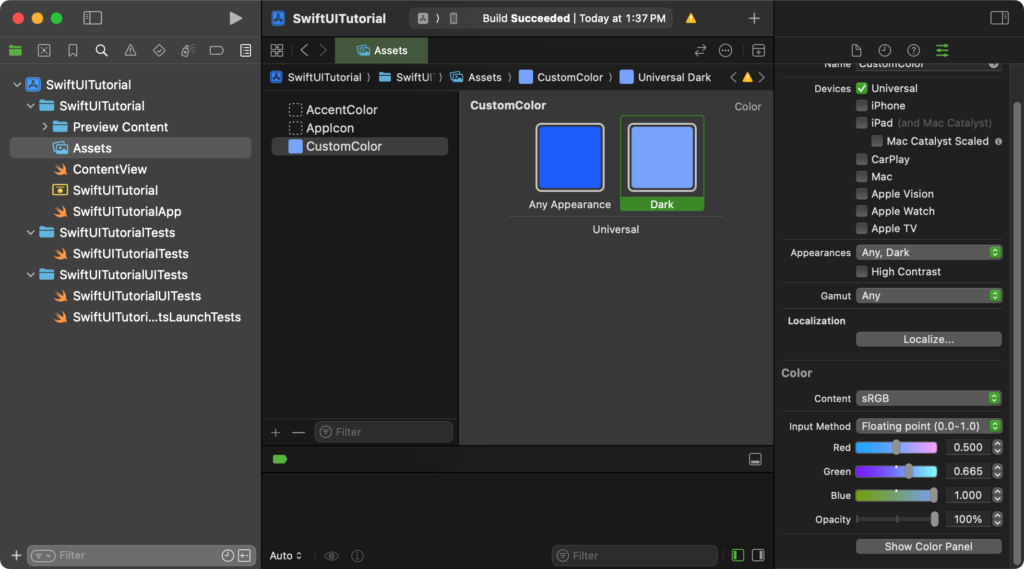
Click on the color set to configure its color values for light and dark modes:
- For Any Appearance, click the color well and choose or define your custom color.
- For Dark Appearance, repeat the process to define a different color if needed.

Step 6:
Save your changes. The color is now ready to be used in your SwiftUI project.
