SwiftUI – Form
In SwiftUI, the Form view is used to create grouped and organized user interfaces, typically for input fields, toggles, sliders, and other controls. It’s commonly used for building settings screens, data entry forms, and similar interfaces that require structured layouts.

The Form automatically adapts its appearance to match the platform’s design guidelines, making it easy to create forms that look consistent and professional across iOS, macOS, and other platforms.
In this SwiftUI tutorial, we will learn the basic syntax of a Form in SwiftUI, and how to use a Form with footers and multiple sections, with the help of examples.
Basic Syntax for Form
The basic syntax for creating a Form is:
Form {
    Section(header: Text("Header Text")) {
        // Form content goes here
    }
}
Here:
Form: The container for the form content.Section: Used to group related content and optionally display a header or footer.Text: A simple text view used as the section header.
Examples
Let’s explore how to create forms in SwiftUI with practical examples.
Example 1: Simple Form
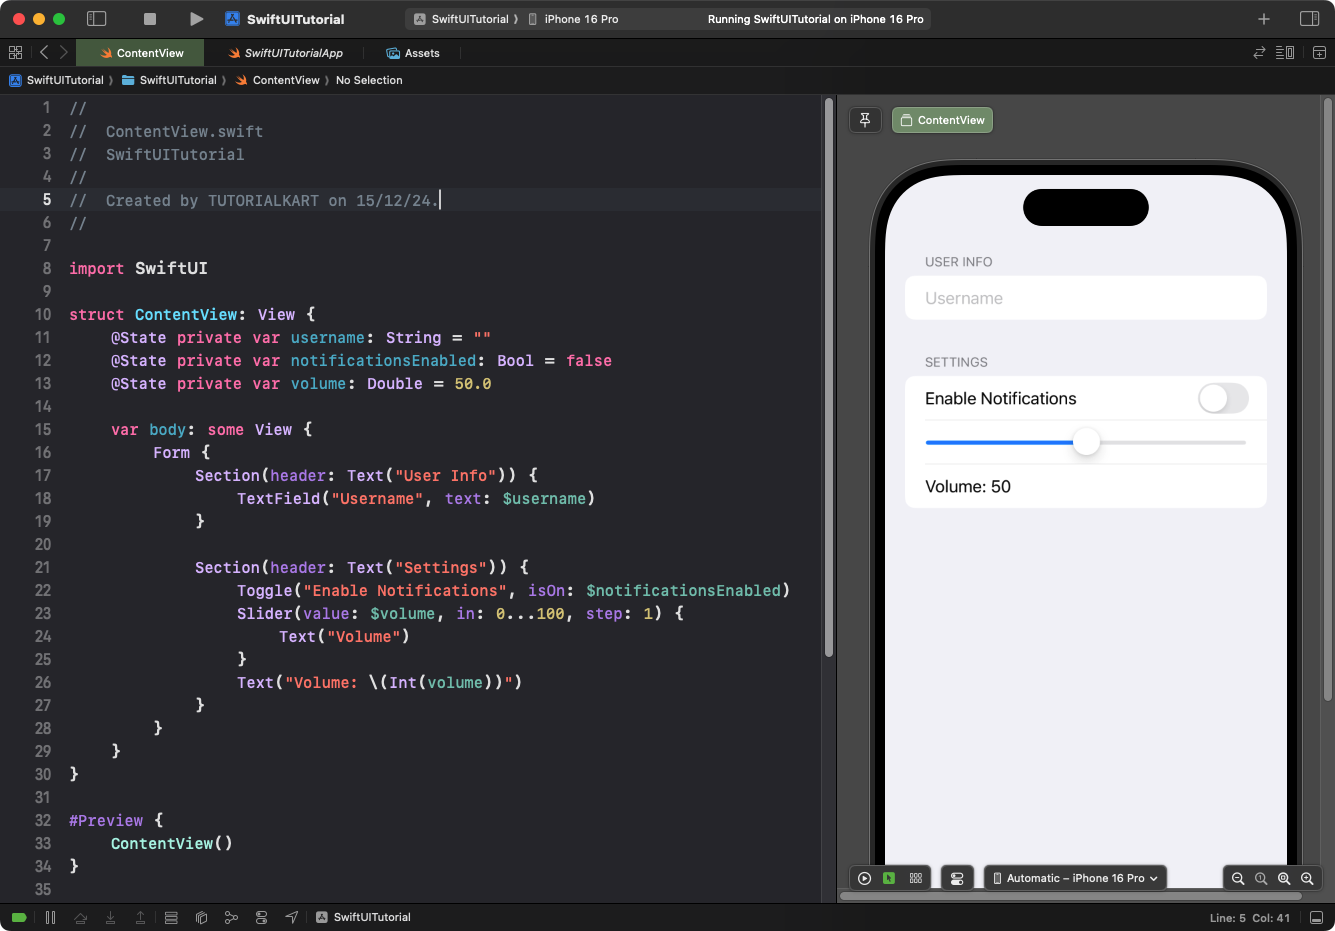
This example demonstrates a basic form with text fields, toggles, and sliders:
Code Example:
import SwiftUI

struct ContentView: View {
    @State private var username: String = ""
    @State private var notificationsEnabled: Bool = false
    @State private var volume: Double = 50.0

    var body: some View {
        Form {
            Section(header: Text("User Info")) {
                TextField("Username", text: $username)
            }

            Section(header: Text("Settings")) {
                Toggle("Enable Notifications", isOn: $notificationsEnabled)
                Slider(value: $volume, in: 0...100, step: 1) {
                    Text("Volume")
                }
                Text("Volume: \(Int(volume))")
            }
        }
    }
}
Explanation:
- User Info Section: Contains a text field for entering the username.
- Settings Section: Includes:
- A toggle to enable or disable notifications.
- A slider to adjust the volume, with a label showing the current value.
Result: A form with two sections is displayed, one for user information and one for settings, each containing appropriate input controls.
Example 2: Form with Footers
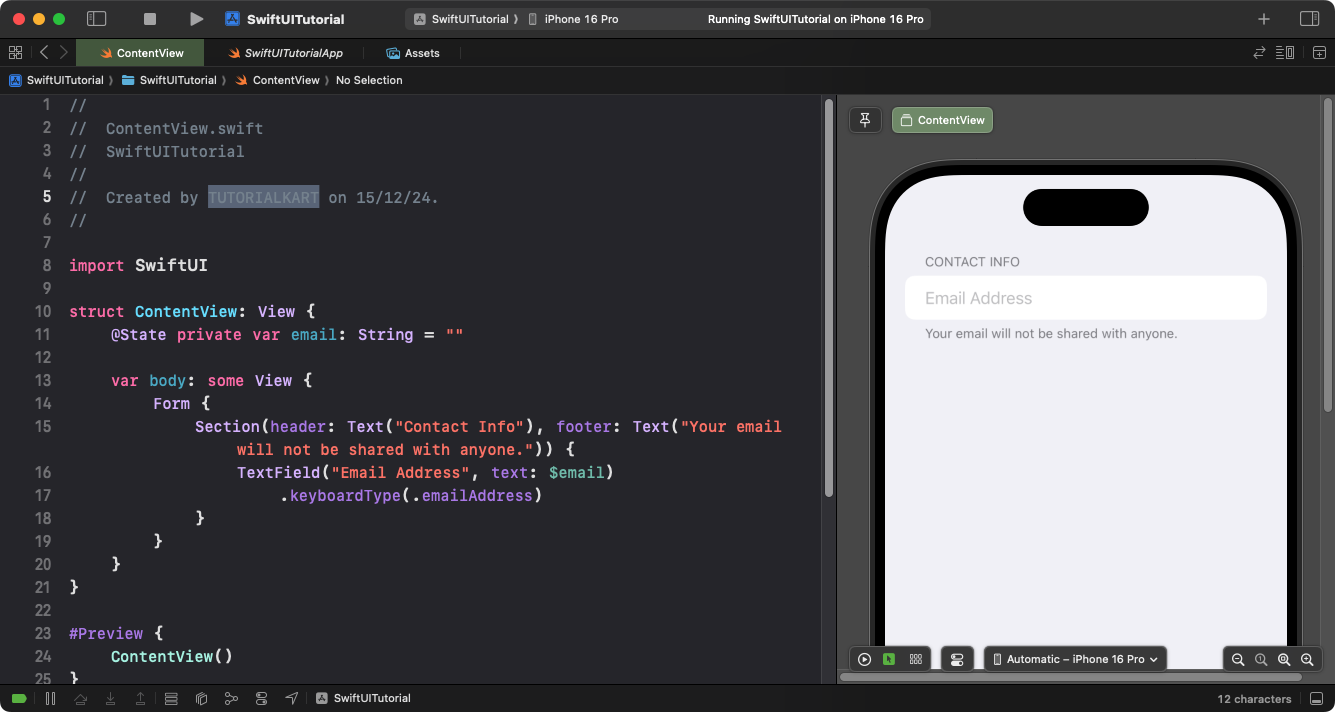
You can add footer text to sections for additional context or information:
Code Example:
import SwiftUI

struct ContentView: View {
    @State private var email: String = ""

    var body: some View {
        Form {
            Section(header: Text("Contact Info"), footer: Text("Your email will not be shared with anyone.")) {
                TextField("Email Address", text: $email)
                    .keyboardType(.emailAddress)
            }
        }
    }
}
Explanation:
- The
footerparameter of theSectionprovides additional context below the section. - The text field is configured for email input with a
.keyboardType(.emailAddress)modifier.
Result: A form is displayed with a single section containing an email input field and a footer note.
Example 3: Form with Multiple Sections
Forms can contain multiple sections to organize inputs logically:
Code Example:
import SwiftUI

struct ContentView: View {
    @State private var name: String = ""
    @State private var age: Int = 25
    @State private var termsAccepted: Bool = false

    var body: some View {
        Form {
            Section(header: Text("Personal Info")) {
                TextField("Name", text: $name)
                Stepper("Age: \(age)", value: $age, in: 0...100)
            }

            Section(header: Text("Terms & Conditions")) {
                Toggle("I accept the terms and conditions", isOn: $termsAccepted)
            }

            Section {
                Button("Submit") {
                    print("Form submitted")
                }
            }
        }
    }
}
Explanation:
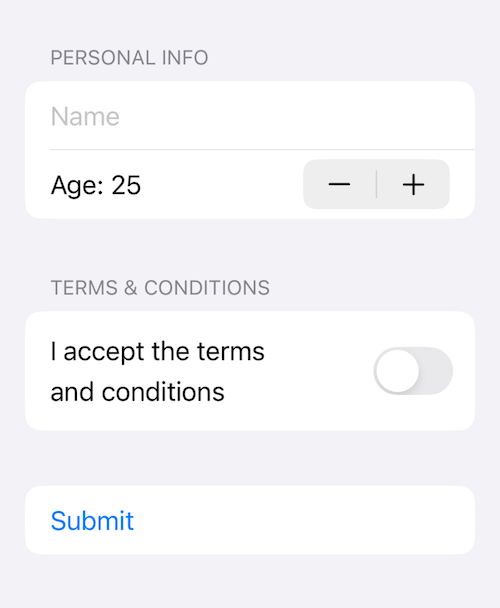
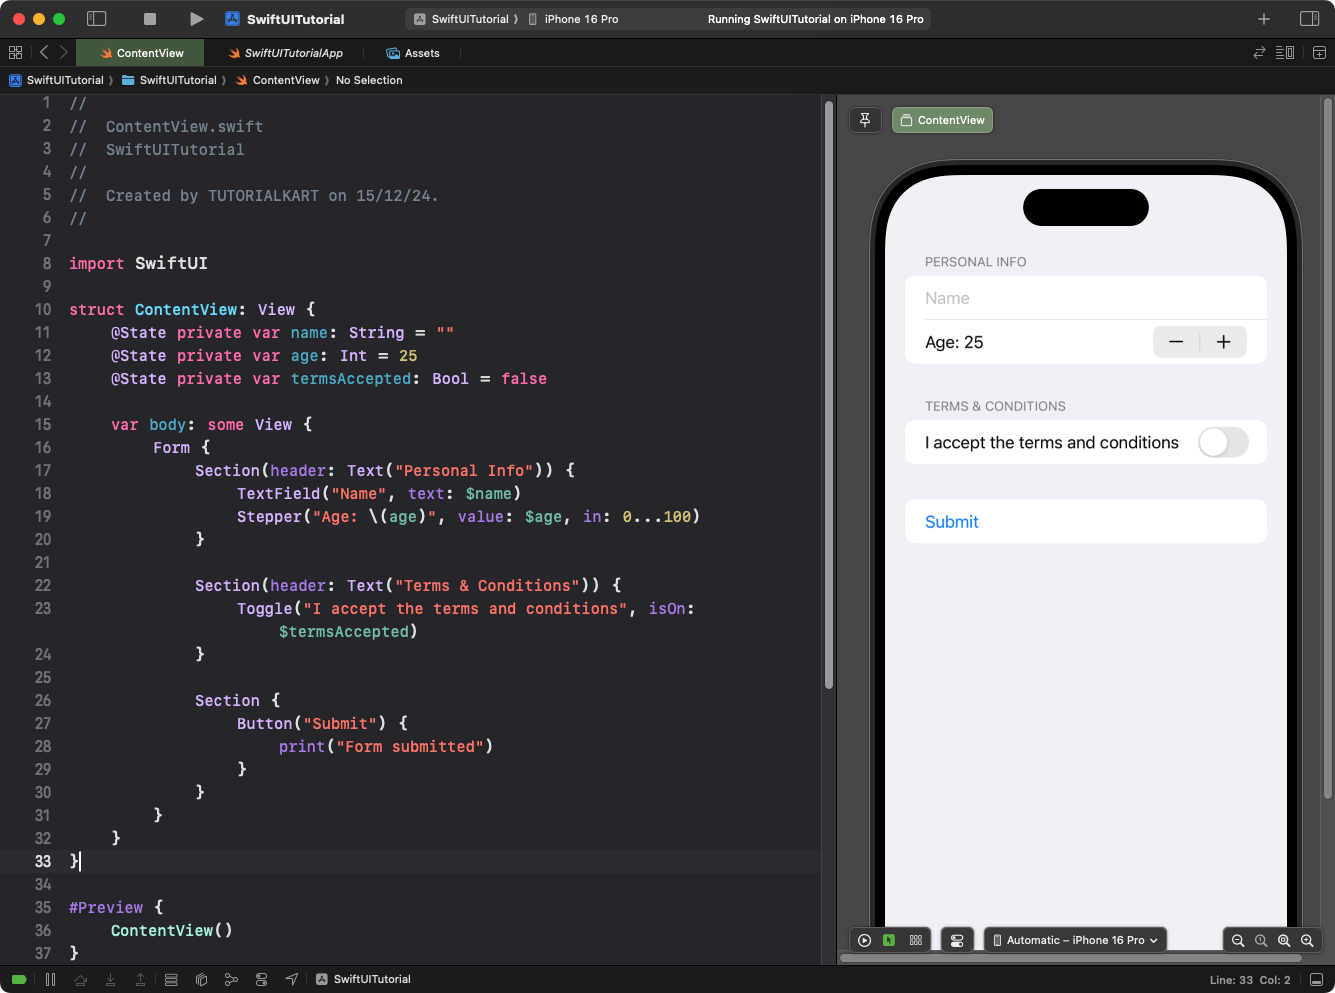
- Personal Info Section: Includes a text field for the name and a stepper for age selection.
- Terms & Conditions Section: Contains a toggle for accepting terms and conditions.
- Submit Section: Includes a button for form submission.
Result: A form with three sections is displayed, each serving a distinct purpose: collecting personal information, accepting terms, and submitting the form.
Conclusion
The Form view in SwiftUI is a powerful tool for building organized and interactive user interfaces. By leveraging sections, headers, footers, and various input controls, you can create forms that are both functional and visually appealing for a wide range of use cases.
