SwiftUI Image Border
In SwiftUI, the Image view allows you to display images and customize their appearance using various modifiers. Adding a border to an image is a common styling requirement, which can be easily achieved using the .border() or .overlay() modifier.

In this tutorial, we will guide you through adding borders to images in SwiftUI with examples.
When to Use Image Borders
Adding borders to images is useful in scenarios like:
- Enhancing the visual structure of a user interface.
- Highlighting or distinguishing specific images.
- Aligning images with a consistent design language or theme.
Syntax to Add Borders to Images
Here’s the basic syntax for adding a border using the .border() modifier:
Image("imageName")
    .border(Color.borderColor, width: borderWidth)
Alternatively, for more customized borders, you can use the .overlay() modifier:
Image("imageName")
    .overlay(
        RoundedRectangle(cornerRadius: radius)
            .stroke(Color.borderColor, lineWidth: borderWidth)
    )
Examples to Add Borders to Images
In the following examples, we demonstrate how to add simple and customized borders to images.
Example 1: Adding a Simple Border
In this example, we add a solid border around an image using the .border() modifier.
File: ContentView.swift
// ContentView.swift
// Created by TUTORIALKART.com

import SwiftUI

struct ContentView: View {
  var body: some View {
    VStack {
      SimpleImageBorderView()
    }
  }
}

struct SimpleImageBorderView: View {
  var body: some View {
    VStack {
      Image("sampleImage")
        .resizable()
        .scaledToFit()
        .frame(width: 250)
        .border(Color.blue, width: 10)

      Text("Image with Simple Border")
        .font(.headline)
    }
    .padding()
  }
}


#Preview {
  ContentView()
}
Detailed Explanation
- Image: The
Imageview loads a sample image from the app’s assets. - .border: Adds a solid blue border with a width of 10 points around the image.
- .frame: Sets the dimensions of the image with width of 250 points.
Output

Example 2: Adding a Rounded Border
In this example, we add a rounded border around an image by clipping the image to a rounded rectangle and then applying a border.
File: ContentView.swift
// ContentView.swift
// Created by TUTORIALKART.com
import SwiftUI
struct ContentView: View {
var body: some View {
VStack {
RoundedImageBorderView()
}
}
}
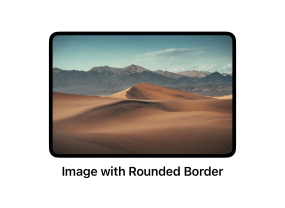
struct RoundedImageBorderView: View {
var body: some View {
VStack {
Image("sampleImage")
.resizable()
.scaledToFit()
.frame(width: 250)
.clipShape(RoundedRectangle(cornerRadius: 10))
.overlay(
RoundedRectangle(cornerRadius: 10)
.stroke(Color.black, lineWidth: 5)
)
Text("Image with Rounded Border")
.font(.headline)
}
.padding()
}
}
#Preview {
ContentView()
}Detailed Explanation
- Image: The
Imageview loads a sample image from the app’s assets. - .clipShape: Clips the image to match the shape of a rounded rectangle with a 10-point corner radius.
- .overlay: Adds a rounded border using a
RoundedRectanglewith a black stroke. - .frame: Specifies the dimensions of the image, with a width of 250 and automatic height preserving the aspect ratio.
Output

Conclusion
Adding borders to images in SwiftUI enhances their visual appeal and helps align them with your app’s design. Whether using a simple solid border or a customized rounded border, SwiftUI provides flexible options to suit your needs.