SwiftUI Image Grayscale
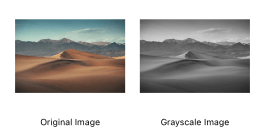
In SwiftUI, you can easily apply a grayscale effect to an image using the .grayscale() modifier. This effect is useful for creating subtle visual variations, emphasizing other UI elements, or achieving a particular design style.


In this tutorial, we will demonstrate how to apply grayscale effects to images with examples.
When to Use Grayscale Images
Grayscale images are useful in scenarios like:
- Designing monochromatic UI themes.
- Highlighting specific UI elements by de-emphasizing others.
- Creating a classic or vintage look for images.
Syntax to Apply Grayscale
Here’s the basic syntax for applying grayscale to an image:
Image("imageName")
    .grayscale(grayscaleValue)
Here, grayscaleValue is a Double between 0.0 (original color) and 1.0 (completely grayscale).
Examples to Apply Grayscale
In the following examples, we display both the original and grayscale versions of an image side by side.
Example 1: Applying Full Grayscale
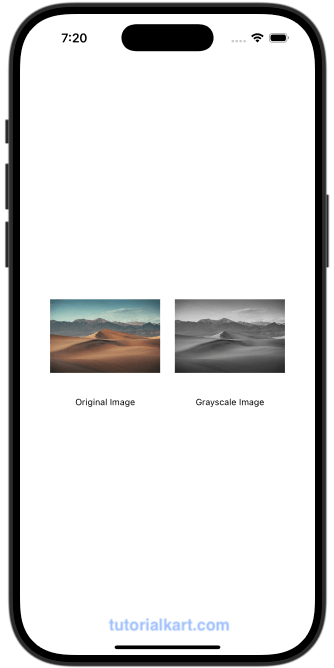
In this example, we apply a full grayscale effect to an image and display it alongside the original image.
File: ContentView.swift
// ContentView.swift
// Created by TUTORIALKART.com

import SwiftUI

struct ContentView: View {
  var body: some View {
    VStack {
      FullGrayscaleImageView()
    }
  }
}

struct FullGrayscaleImageView: View {
  var body: some View {
    HStack(spacing: 20) {
      VStack {
        Image("sampleImage")
          .resizable()
          .scaledToFit()
          .frame(width: 150, height: 150)

        Text("Original Image")
          .font(.caption)
      }

      VStack {
        Image("sampleImage")
          .resizable()
          .scaledToFit()
          .frame(width: 150, height: 150)
          .grayscale(1.0)

        Text("Grayscale Image")
          .font(.caption)
      }
    }
    .padding()
  }
}

#Preview {
  ContentView()
}
Detailed Explanation
- HStack: Aligns the original and grayscale images horizontally.
- Original Image: Displays the image without any grayscale effect.
- Grayscale Image: Applies a full grayscale effect to the image using
.grayscale(1.0). - .frame: Restricts the dimensions of both images to 150×150 points.
Output

Example 2: Applying Partial Grayscale to Image
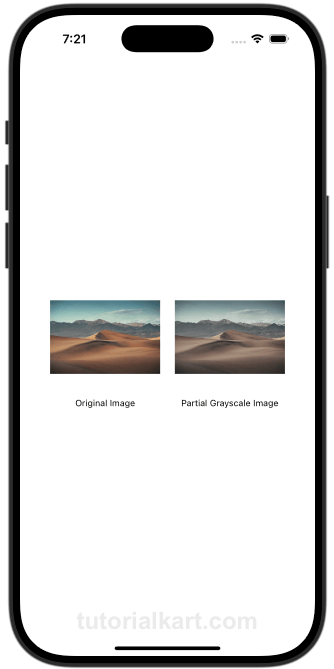
In this example, we apply a partial grayscale effect to an image and display it alongside the original image.
File: ContentView.swift
// ContentView.swift
// Created by TUTORIALKART.com

import SwiftUI

struct ContentView: View {
  var body: some View {
    VStack {
      PartialGrayscaleImageView()
    }
  }
}

struct PartialGrayscaleImageView: View {
  var body: some View {
    HStack(spacing: 20) {
      VStack {
        Image("sampleImage")
          .resizable()
          .scaledToFit()
          .frame(width: 150, height: 150)

        Text("Original Image")
          .font(.caption)
      }

      VStack {
        Image("sampleImage")
          .resizable()
          .scaledToFit()
          .frame(width: 150, height: 150)
          .grayscale(0.5)

        Text("Partial Grayscale Image")
          .font(.caption)
      }
    }
    .padding()
  }
}

#Preview {
  ContentView()
}
Detailed Explanation
- HStack: Aligns the original and partially grayscale images horizontally.
- Original Image: Displays the image without any grayscale effect.
- Partial Grayscale Image: Applies a partial grayscale effect using
.grayscale(0.5), blending original colors and grayscale. - .frame: Restricts the dimensions of both images to 150×150 points.
Output

Conclusion
Applying grayscale effects to images in SwiftUI is a straightforward way to enhance your app’s visual design. Whether you use full grayscale for a monochromatic theme or partial grayscale for subtle emphasis, the .grayscale() modifier provides flexibility and ease of use.
