SwiftUI – SecureField
The SecureField in SwiftUI is a specialised text field designed to securely accept sensitive information such as passwords. When users type into a SecureField, the input is masked with dots or asterisks to prevent it from being visible on the screen. This is essential for creating login forms or any feature that involves sensitive data input.
In this SwiftUI tutorial, we will cover the basic usage of SecureField with examples to demonstrate how to implement it effectively in your SwiftUI app.
Basic Syntax of SecureField
The basic syntax for creating a SecureField is:
SecureField("Placeholder Text", text: $password)Here:
"Placeholder Text": The placeholder text displayed when the field is empty.$password: A binding variable that holds the user’s input securely.
To use SecureField, you need a @State variable to bind the input to the view.
Examples
Let’s explore some basic examples to understand how to use SecureField in SwiftUI.
Example 1: Simple SecureField
Here’s how to create a simple password field:
Code Example:
import SwiftUI

struct ContentView: View {
    @State private var password: String = ""

    var body: some View {
        VStack {
            SecureField("Enter your password", text: $password)
                .padding()
                .textFieldStyle(RoundedBorderTextFieldStyle())

            Text("Your password: \(password)")
                .padding()
        }
        .frame(maxWidth: .infinity, maxHeight: .infinity, alignment: .top)
        .padding()
    }
}
Explanation:
- The
SecureFieldaccepts input and stores it in the@Statevariablepassword. - The placeholder text “Enter your password” appears when the field is empty.
.textFieldStyle(RoundedBorderTextFieldStyle())applies a rounded border to the field for better styling.- The
Textbelow displays the entered password (for demonstration purposes). In a real application, you would avoid displaying passwords directly.
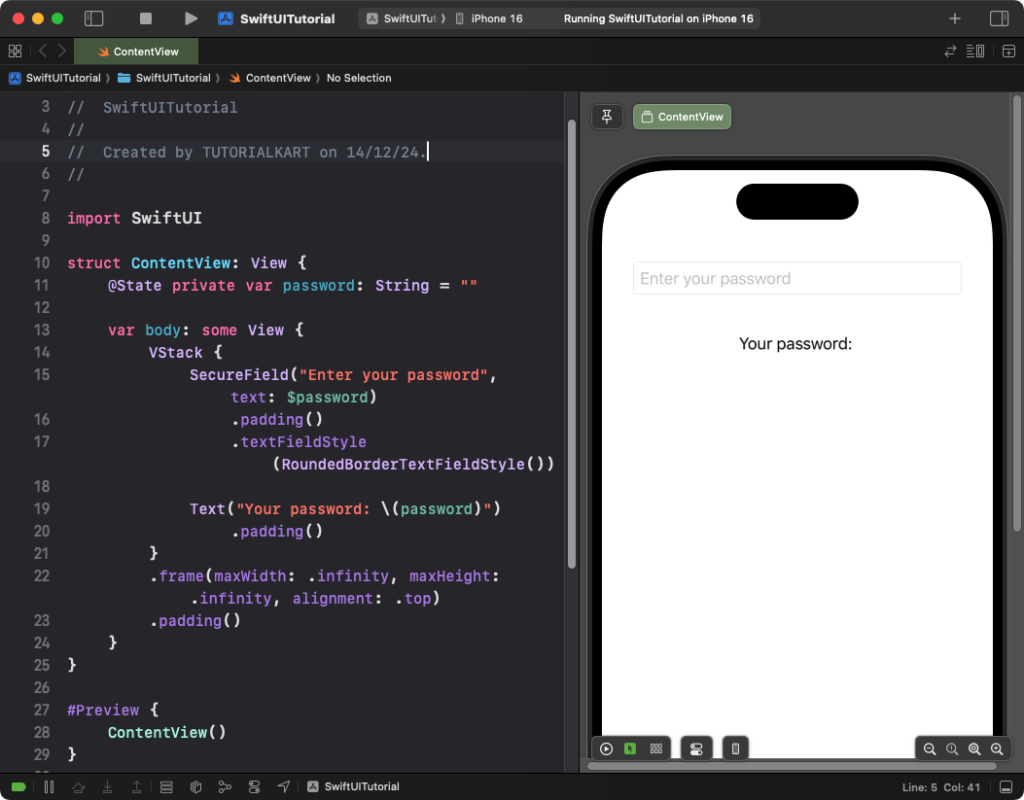
Xcode Screenshot:

Output:
Result: A secure input field with a rounded border appears, allowing users to type a password that is masked with dots or asterisks.
Example 2: SecureField with Action on Pressing Return Key
You can perform an action when the user presses the return key in the SecureField. Here’s how:
Code Example:
import SwiftUI

struct ContentView: View {
    @State private var password: String = ""
    @State private var message: String = "Enter your password."

    var body: some View {
        VStack {
            SecureField("Password", text: $password, onCommit: {
                validatePassword()
            })
            .padding()
            .textFieldStyle(RoundedBorderTextFieldStyle())

            Text(message)
                .padding()
        }
        .padding()
    }

    func validatePassword() {
        if password.isEmpty {
            message = "Password cannot be empty."
        } else {
            message = "Password accepted!"
        }
    }
}
Explanation:
- The
onCommitparameter triggers thevalidatePasswordfunction when the user presses the return key. - The validation checks if the password is empty and updates the message accordingly.
Output:
Result: When the user presses the return key, the app validates the input and displays an appropriate message.
Conclusion
The SecureField in SwiftUI is an essential component for creating secure text inputs such as password fields. With its simple implementation and flexibility, you can easily integrate it into your app to enhance user privacy and security.
