SwiftUI – Text Alignment
In SwiftUI, you can align text within a view using various alignment options. Whether you’re working with single lines of text, multi-line text, or arranging text within containers like stacks, SwiftUI provides easy-to-use tools for text alignment.

In this tutorial, we will cover how to use text alignment in SwiftUI for different scenarios, complete with beginner-friendly examples.
Basic Syntax for Text Alignment
The basic way to align text in SwiftUI is by using the multilineTextAlignment(_:) modifier for multi-line text or by leveraging container alignments for stacks and other layouts.
The syntax for aligning text is:
Text("Your text here")
    .multilineTextAlignment(.alignment)
Here:
"Your text here": The text content to be displayed.multilineTextAlignment: A modifier to align multi-line text within its frame..alignment: The alignment you want to apply, such as.leading,.center, or.trailing.
Additionally, alignment can be handled at the container level using properties like .frame, HStack, and VStack.
Examples
Let’s explore some examples to understand how text alignment works in SwiftUI.
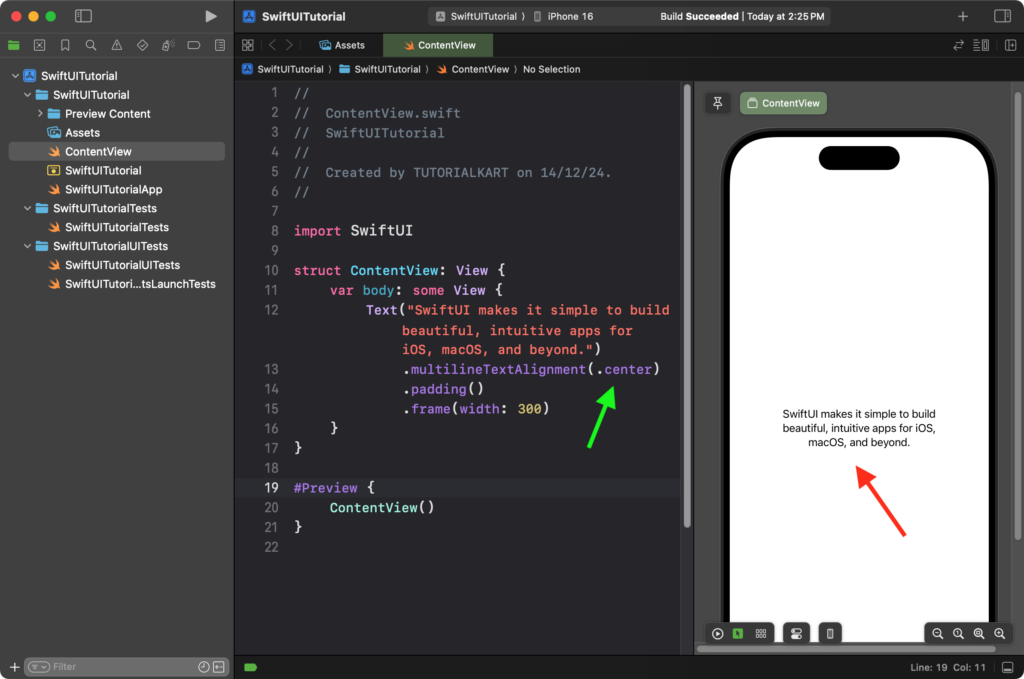
Example 1: Aligning Multi-Line Text
The multilineTextAlignment modifier is used for multi-line text. Here’s how to apply it:
Code Example: main.swift
import SwiftUI

struct ContentView: View {
    var body: some View {
        Text("SwiftUI makes it simple to build beautiful, intuitive apps for iOS, macOS, and beyond.")
            .multilineTextAlignment(.center)
            .padding()
            .frame(width: 300)
    }
}
Explanation:
- The text is aligned to the center using
.multilineTextAlignment(.center). - The
.frame(width: 300)restricts the width of the text, forcing it to wrap into multiple lines. - The
.padding()adds spacing around the text for a clean layout.
Result: The text will wrap within the specified width and align centrally in the frame.
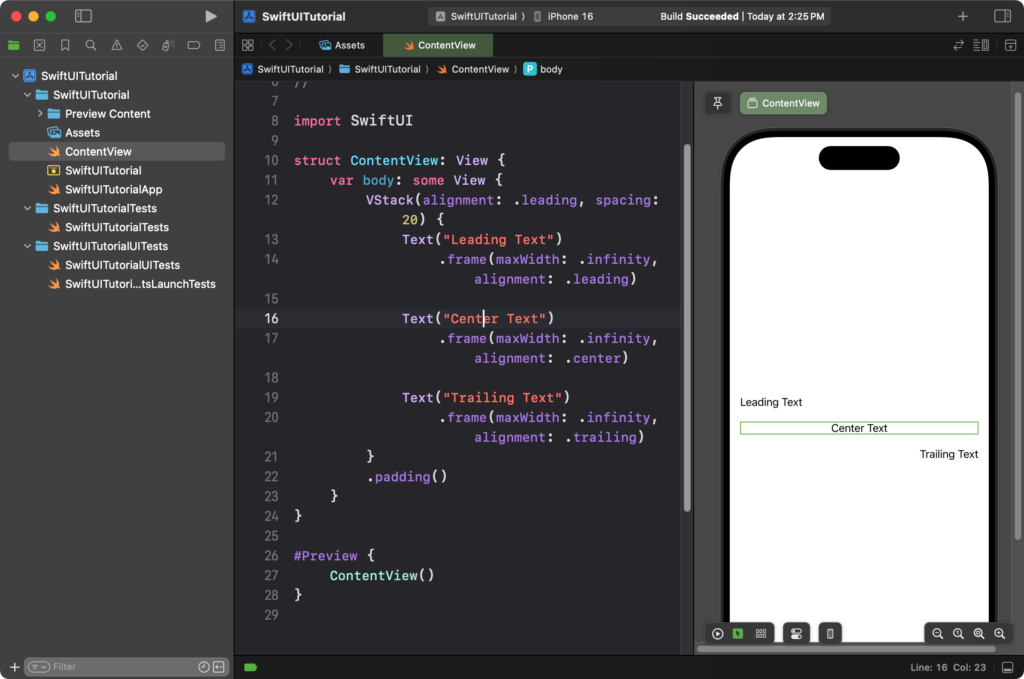
Example 2: Aligning Text in a VStack
When text is placed inside a container like a VStack, you can control the horizontal alignment of the text using the stack’s alignment property. Here’s how you can use a VStack to align text views differently.
Code Example:
import SwiftUI

struct ContentView: View {
    var body: some View {
        VStack(alignment: .leading, spacing: 20) {
            Text("Leading Text")
                .frame(maxWidth: .infinity, alignment: .leading)

            Text("Center Text")
                .frame(maxWidth: .infinity, alignment: .center)

            Text("Trailing Text")
                .frame(maxWidth: .infinity, alignment: .trailing)
        }
        .padding()
    }
}
Explanation:
- The
VStackarranges the text vertically. - The
alignment: .leadingproperty of theVStackensures that all text views are aligned to the left edge of the container by default. - Each text view’s horizontal alignment is overridden using
.frame(maxWidth: .infinity, alignment: ...), resulting in individual alignment styles:.leading: Aligns the text to the left..center: Centers the text..trailing: Aligns the text to the right.
Result: Three pieces of text are displayed vertically in a VStack. The first text is left-aligned, the second is centered, and the third is right-aligned within their respective frames.
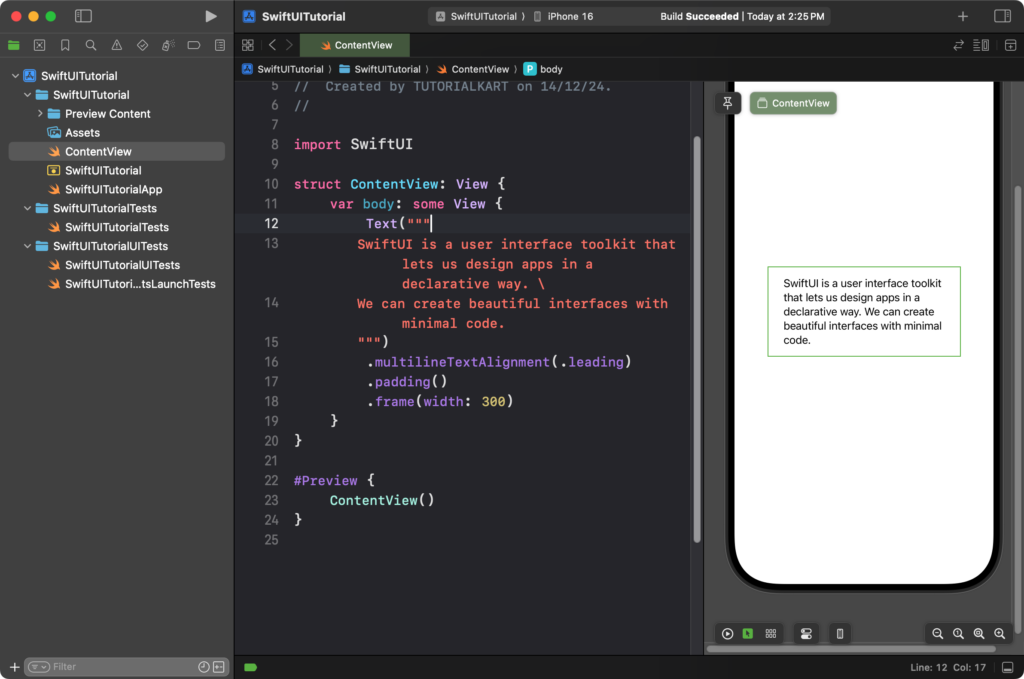
Example 3: Justifying Multi-Line Text
SwiftUI also provides an option to justify multi-line text using the .multilineTextAlignment(.leading) or other alignments:
Code Example:
import SwiftUI

struct ContentView: View {
    var body: some View {
        Text("""
        SwiftUI is a user interface toolkit that lets us design apps in a declarative way. \
        We can create beautiful interfaces with minimal code.
        """)
        .multilineTextAlignment(.leading)
        .padding()
        .frame(width: 300)
    }
}
Explanation:
- The
Textcontent uses multi-line text. - The
.multilineTextAlignment(.leading)ensures that all lines are aligned to the left. - The
.frame(width: 300)restricts the width, forcing the text to wrap.
Result: The multi-line text will be left-aligned within the specified frame width.
Conclusion
SwiftUI provides multiple ways to align text, making it easy to create well-structured and visually appealing layouts. Whether you’re aligning multi-line text or arranging text within stacks, modifiers like .multilineTextAlignment and container-level alignments offer flexible options to achieve the desired layout.
