SwiftUI – Text Line Limit
In SwiftUI, the lineLimit(_ limit: Int?) modifier allows you to control the number of lines a Text view can display. This is useful when you want to limit text to a specific number of lines to maintain a clean layout or handle long text in constrained spaces.
By default, SwiftUI text can span multiple lines if needed, but you can use lineLimit to restrict the number of lines.
Syntax for Text Line Limit
The basic syntax for using the lineLimit modifier is:
Text("Your text here")
    .lineLimit(numberOfLines)
Here:
"Your text here": The content of theTextview.numberOfLines: The maximum number of lines the text can display. Usenilfor no limit.
If the text exceeds the specified number of lines, it will be truncated with an ellipsis (…) at the end.
Examples
Let’s explore examples to understand how the lineLimit modifier works.
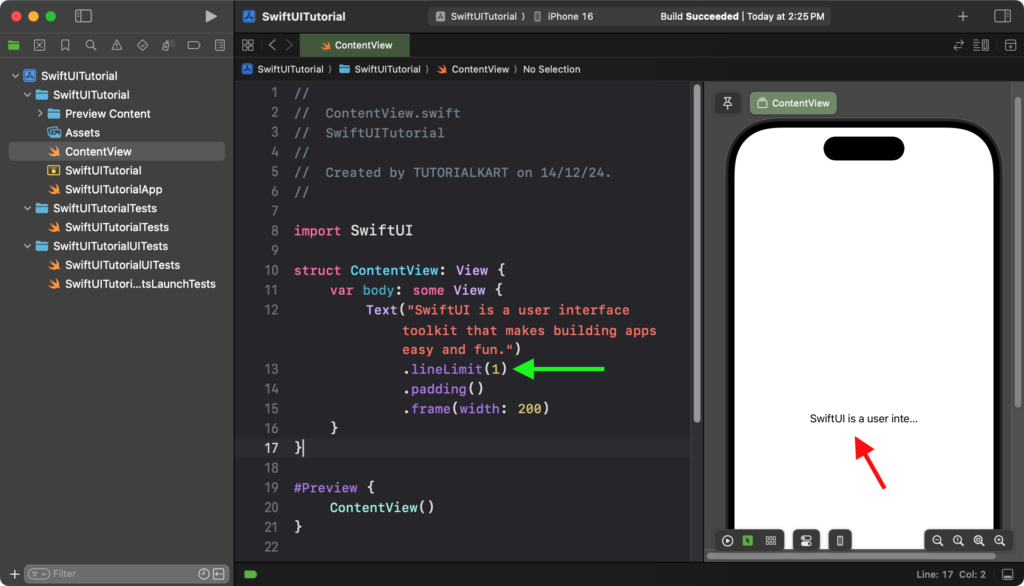
Example 1: Limiting Text to One Line
Here’s how you can limit text to a single line:
Code Example:
import SwiftUI

struct ContentView: View {
    var body: some View {
        Text("SwiftUI is a user interface toolkit that makes building apps easy and fun.")
            .lineLimit(1)
            .padding()
            .frame(width: 200)
    }
}
Explanation:
- The
.lineLimit(1)ensures the text is restricted to one line. - The
.frame(width: 200)constrains the width, which forces the text to truncate if it exceeds the width.
Result: The text will be displayed in one line, and an ellipsis (…) will appear at the end if the text is too long to fit.
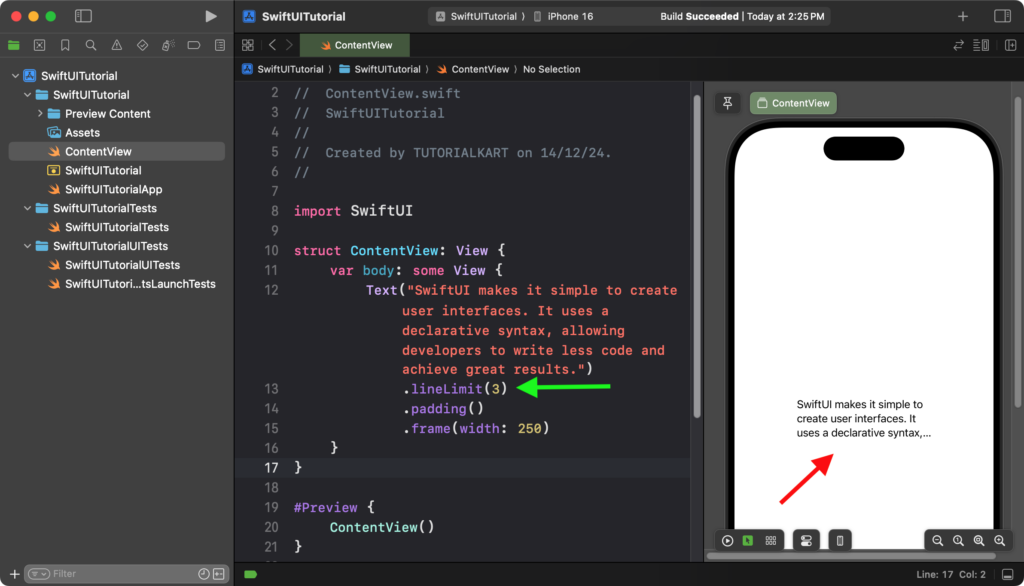
Example 2: Limiting Text to Multiple Lines
In this example, we’ll allow the text to span up to 3 lines:
Code Example:
import SwiftUI

struct ContentView: View {
    var body: some View {
        Text("SwiftUI makes it simple to create user interfaces. It uses a declarative syntax, allowing developers to write less code and achieve great results.")
            .lineLimit(3)
            .padding()
            .frame(width: 250)
    }
}
Explanation:
- The
.lineLimit(3)restricts the text to a maximum of three lines. - If the text exceeds three lines within the
.frame(width: 250), it truncates with an ellipsis at the end of the third line.
Result: The text will wrap and display up to three lines, truncating any additional content with an ellipsis.
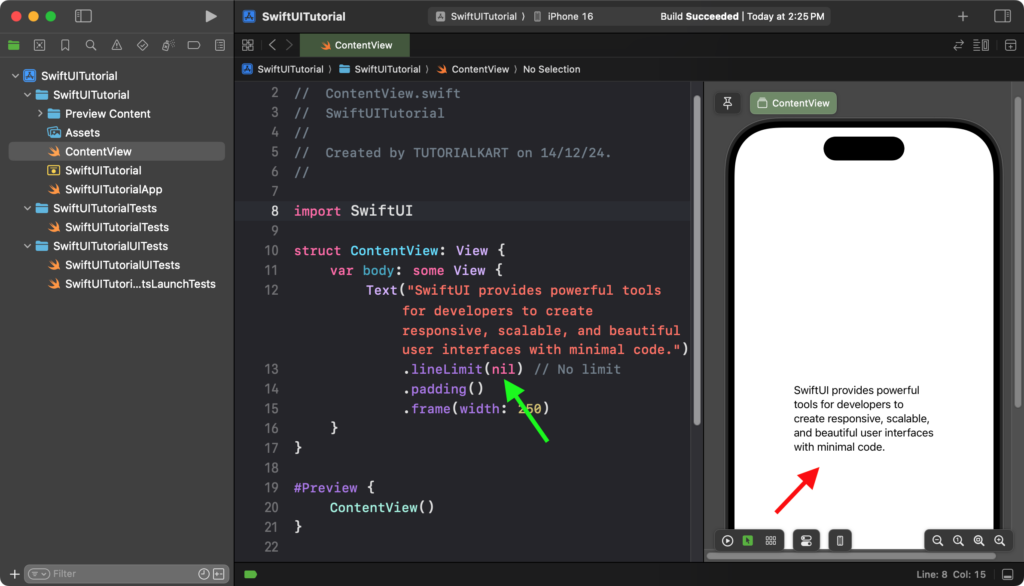
Example 3: Removing Line Limit
If you don’t want to limit the number of lines, you can set the line limit to nil:
Code Example:
import SwiftUI

struct ContentView: View {
    var body: some View {
        Text("SwiftUI provides powerful tools for developers to create responsive, scalable, and beautiful user interfaces with minimal code.")
            .lineLimit(nil) // No limit
            .padding()
            .frame(width: 250)
    }
}
Explanation:
- The
.lineLimit(nil)removes any restriction on the number of lines. - The text will wrap and occupy as many lines as needed to fit within the specified frame.
Result: The text will display fully, wrapping to fit within the frame width, with no truncation.
Conclusion
The .lineLimit modifier is used to control the number of lines a Text view displays in SwiftUI. Whether you want to display a single-line headline, a multi-line description, or unrestricted content, the lineLimit modifier gives you the flexibility.
