SwiftUI – Toggle Action
Toggle Action: In SwiftUI, a Toggle is used to manage on/off states in your app. When the state of a toggle changes, you can execute specific actions using a binding to a state variable or by combining it with closures. This enables you to trigger custom behaviours such as updating UI elements, saving preferences, or executing logic based on the toggle’s state.
This tutorial demonstrates how to implement actions when a Toggle is switched in SwiftUI.
Handling Toggle Actions
To handle a Toggle action, you bind the toggle to a state variable and use the variable’s didSet equivalent behavior in SwiftUI. Alternatively, you can directly execute actions inside the onChange modifier.
- Using a State Variable: Bind the toggle to a variable and observe changes.
- Using the
onChangeModifier: Execute code when the toggle value changes.
Examples
Let’s explore examples of handling toggle actions in SwiftUI.
Example 1: Toggle with a State Variable
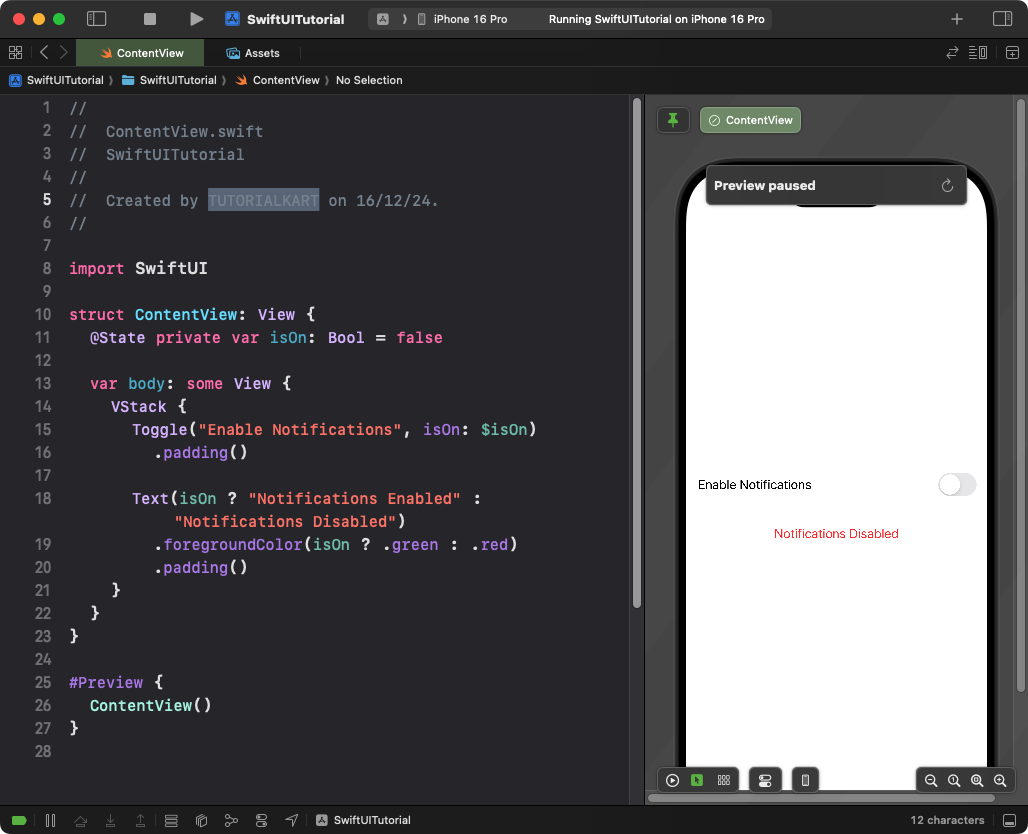
This example binds the toggle to a state variable and executes actions when the variable changes:
Code Example:
import SwiftUI

struct ContentView: View {
    @State private var isOn: Bool = false

    var body: some View {
        VStack {
            Toggle("Enable Notifications", isOn: $isOn)
                .padding()

            Text(isOn ? "Notifications Enabled" : "Notifications Disabled")
                .foregroundColor(isOn ? .green : .red)
                .padding()
        }
    }
}
Explanation:
- The
Toggleis bound to theisOnstate variable. - When the toggle is switched, the state variable updates automatically.
- The
Textview dynamically reflects the state of the toggle.
Result: A toggle that dynamically updates the label text to indicate its state.
Example 2: Toggle with onChange Modifier
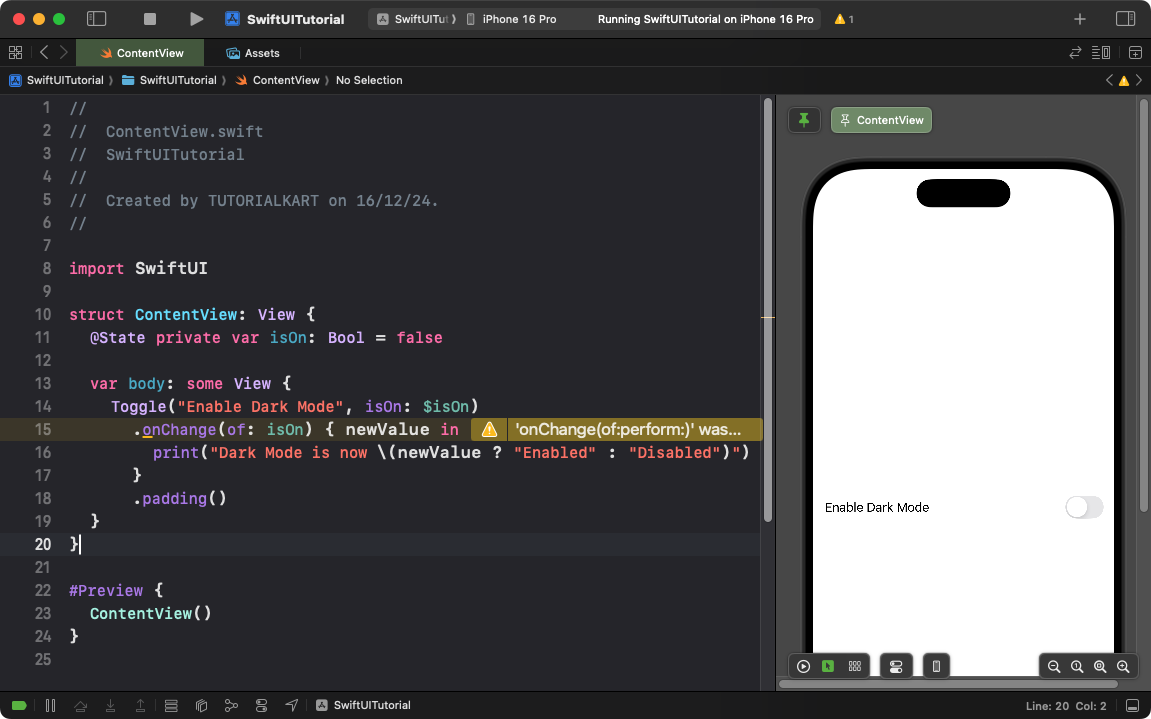
This example uses the onChange modifier to perform an action when the toggle’s state changes:
Code Example:
import SwiftUI

struct ContentView: View {
    @State private var isOn: Bool = false

    var body: some View {
        Toggle("Enable Dark Mode", isOn: $isOn)
            .onChange(of: isOn) { newValue in
                print("Dark Mode is now \(newValue ? "Enabled" : "Disabled")")
            }
            .padding()
    }
}
Explanation:
- The
onChange(of:)modifier listens for changes to theisOnstate variable. - The closure inside
onChangeis executed whenever the toggle is switched. - The
printstatement logs the toggle’s new state to the console.
Result: A toggle with an action that logs its state to the console when switched.
Example 3: Multiple Toggles with Independent Actions
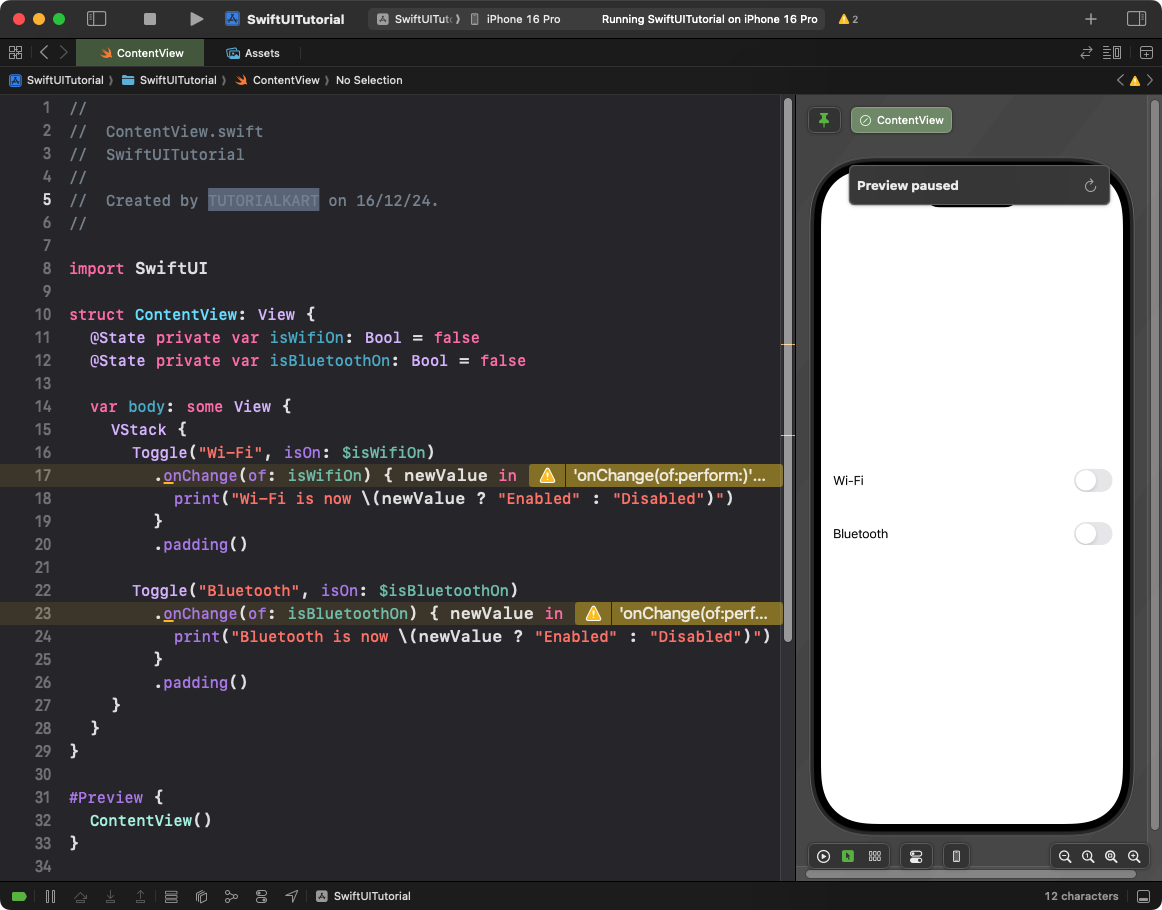
This example demonstrates two independent toggles, each performing separate actions:
Code Example:
import SwiftUI

struct ContentView: View {
    @State private var isWifiOn: Bool = false
    @State private var isBluetoothOn: Bool = false

    var body: some View {
        VStack {
            Toggle("Wi-Fi", isOn: $isWifiOn)
                .onChange(of: isWifiOn) { newValue in
                    print("Wi-Fi is now \(newValue ? "Enabled" : "Disabled")")
                }
                .padding()

            Toggle("Bluetooth", isOn: $isBluetoothOn)
                .onChange(of: isBluetoothOn) { newValue in
                    print("Bluetooth is now \(newValue ? "Enabled" : "Disabled")")
                }
                .padding()
        }
    }
}
Explanation:
- The
isWifiOnandisBluetoothOnstate variables track the states of their respective toggles. - The
onChangemodifier performs separate actions for each toggle. - The
printstatements log the state changes for both Wi-Fi and Bluetooth.
Result: Two toggles that independently trigger actions when their states change.
Conclusion
SwiftUI provides multiple ways to handle toggle actions, including using state bindings and the onChange modifier. These tools allow you to dynamically respond to user interactions and update your app’s behaviour in real time.
References:
