Solution: Xcode SwiftUI Project Not Showing List of iPhone Simulators
When working with SwiftUI projects in Xcode, you might encounter an issue where the list of iPhone simulators is not available.
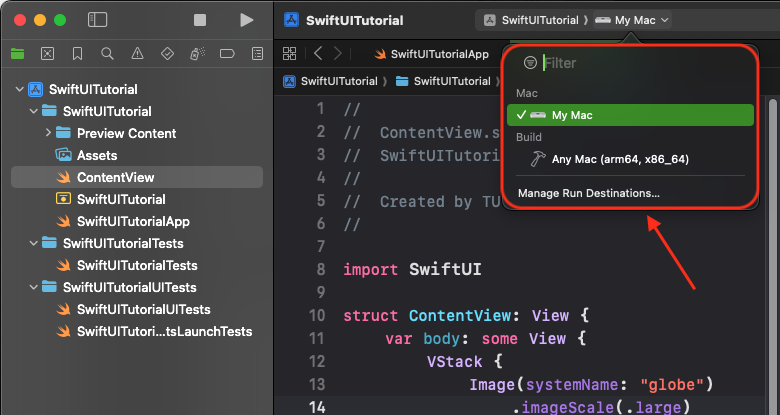
This usually happens when the Base SDK of the project is incorrectly set to macOS instead of iOS. By changing the Base SDK to iOS in the Build Settings, you can resolve this problem.
YouTube Video
Step by Step Solution
Follow the step-by-step guide below to fix the issue.
Step 1: Open Your Project in Xcode
Launch Xcode and open the project where you’re experiencing the issue. Ensure that the project is fully loaded in the Xcode workspace.
If you haven’t created a project yet, create a new SwiftUI project by selecting File > New > Project and choosing App under iOS.
Step 2: Navigate to the Build Settings
Once your project is open:
- Select the project name from the Project Navigator (the left panel in Xcode).
- In the center of the screen, you will see tabs like General, Signing & Capabilities, and Build Settings.
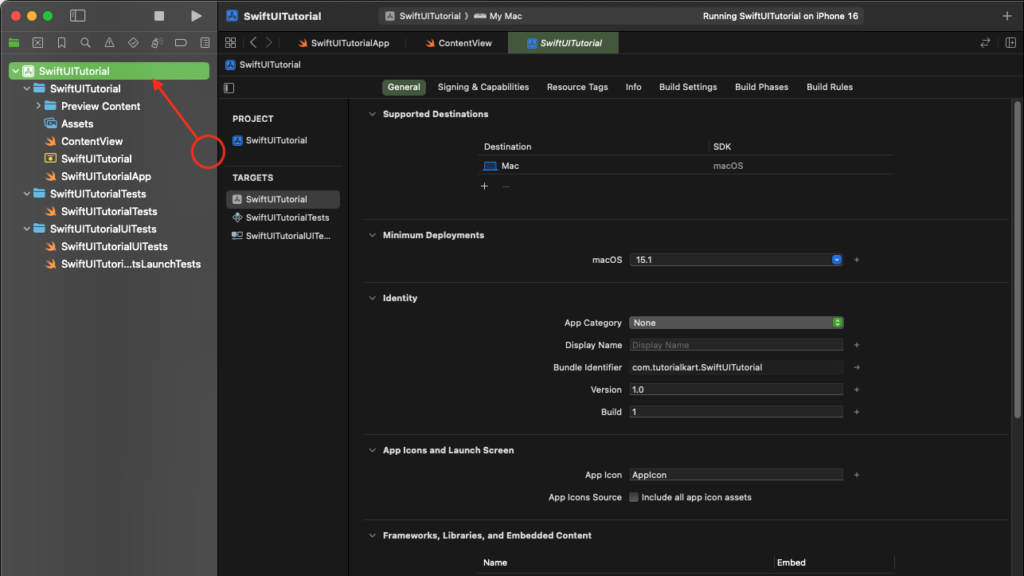
Click on the Build Settings tab.
Step 3: Locate the Base SDK Setting
In the Build Settings tab:
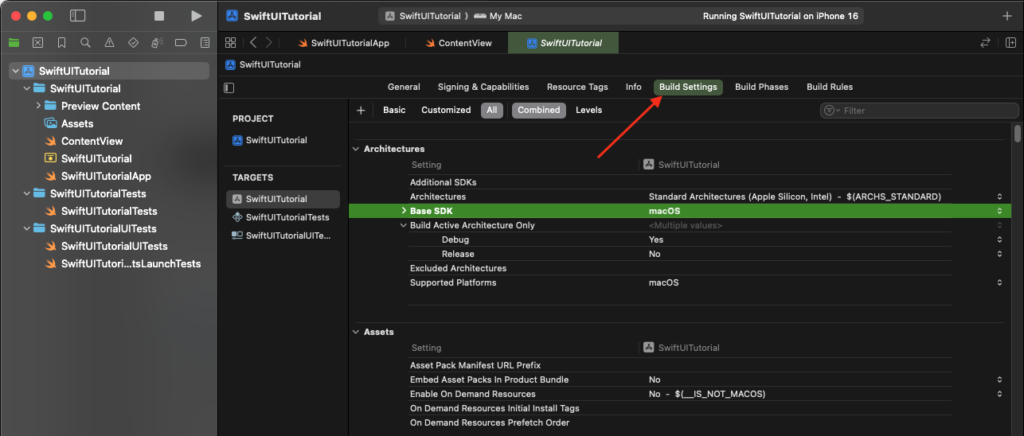
- Scroll down to the Architectures section or use the search bar at the top right to search for “Base SDK.”
- Find the Base SDK row under Architectures.
If the Base SDK is set to macOS, this is the cause of the issue.
Step 4: Change Base SDK to iOS
To resolve the issue:
- Click on the current value in the Base SDK row (e.g., macOS).
- A dropdown menu will appear. Select iOS from the list.
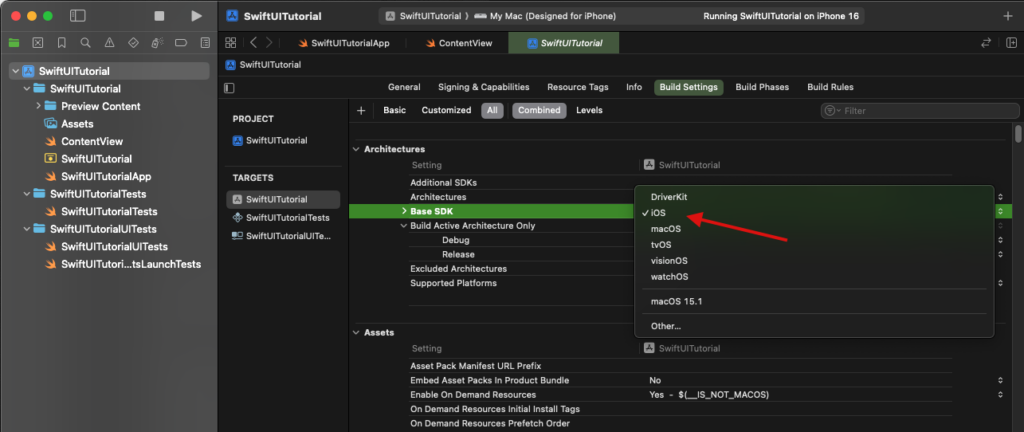
After changing the Base SDK to iOS, the project will now target iOS devices and simulators.
Step 5: Verify the iPhone Simulators List
Now that the Base SDK is set to iOS:
- Go to the toolbar at the top of Xcode and click on the dropdown menu where the device or simulator name is displayed.
- Verify that the list of iPhone simulators is now available.
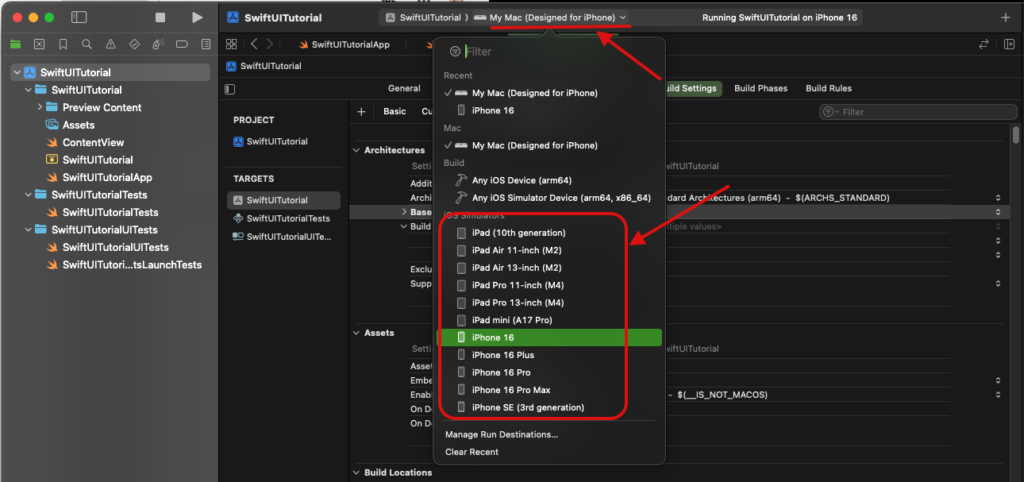
If the simulators still don’t appear, ensure that the iOS Simulator is installed via Xcode’s Preferences under Components.
Step 6: Run Your SwiftUI Project
Once you’ve verified the simulators are visible:
- Select an iPhone simulator from the list.
- Click the Run button (a triangle icon in the toolbar) to build and run your project.

Your project should now compile and run successfully on the chosen simulator.
Summary
Changing the Base SDK from macOS to iOS in the Build Settings resolves the issue of missing iPhone simulators in Xcode SwiftUI projects. This simple configuration ensures that your project targets iOS devices and enables you to develop and test efficiently on the desired simulators.
