If you’re looking to migrate data effortlessly from a legacy system into SAP, then LSMW (Legacy System Migration Workbench) is your go-to tool. This blog post covers everything you need to know about LSMW—from the basics to real-world examples, best practices, and a handy reference table. Whether you’re new to SAP or just looking for a refresher, this guide will help you master the fundamentals of LSMW.
Introduction to LSMW
LSMW (Legacy System Migration Workbench) is a powerful SAP tool that helps migrate large volumes of data from legacy systems into SAP with minimal effort. Whether you’re dealing with master data (like materials, customers, or vendors) or transaction data (such as sales orders or purchase orders), LSMW streamlines and automates the process, saving you time and reducing errors.
Key Benefits of LSMW:
- Reduced Manual Effort: Automates data entry through batch or direct input sessions.
- Consistent Formatting: Ensures uniform data validation and formatting.
- Scalable for Large Data Loads: Ideal for mass data migrations or periodic data updates.
Why LSMW is Essential for SAP Data Migration
- Data Consistency: LSMW ensures that your legacy data is accurately mapped and standardized to SAP’s data structures.
- Time-Efficient: Automating repetitive data entry tasks dramatically reduces migration timelines.
- Error Reduction: LSMW’s robust validation and logging features help catch data issues before they impact your SAP system.
- Reusable Projects: You can reuse the same LSMW project or recording for similar data loads in the future, saving even more time.
Pro Tip: For especially complex transformations, consider using BAPIs or IDocs via LSMW to ensure seamless integration with SAP.
How LSMW Works: Core Concepts
LSMW is divided into three primary elements:
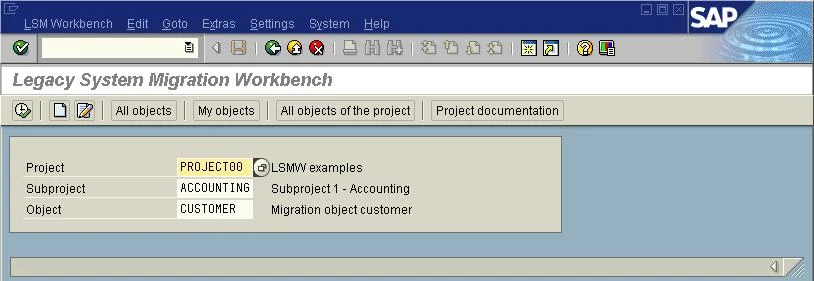
- Project: The highest-level container for your data migration tasks.
- Subproject: A logical subgrouping for specific tasks (e.g., “Material_Master”).
- Object: The specific data migration scenario (e.g., “Create_Vendor_Master”).
Within this framework, you record or define how data should flow from the legacy format (like Excel, CSV, or text file) into SAP tables.
Key Steps in the LSMW Process

1 Maintain Object Attributes
- Define Your Project, Subproject, and Object: Create a clear naming convention, such as
VENDOR_MIGRATION>MASTER_DATA>UPLOAD_VENDOR. - Select the Method: Common methods include Batch Input Recording, Standard Batch/Direct Input, IDoc Processing, or BAPI.
2 Maintain Source Structures
- Create the Hierarchy for Your Input Data: For a vendor master upload, you might have one structure for general data and another for purchasing-specific data.
3 Maintain Source Fields
- Specify Fields in Each Structure: Match the names and data types to how they appear in your legacy file.
- Example fields:
VENDOR_NO,NAME1,CITY,POSTAL_CODE, etc.
- Example fields:
4 Maintain Structure Relations
- Map Source Structures to SAP Target Structures: LSMW needs to know which SAP tables correspond to each source structure.
- Example: Map
VEND_DATA→LFA1(Vendor Master General Data table).
- Example: Map
5 Maintain Field Mapping and Conversion Rules
- Link Source Fields to SAP Fields: For instance,
VENDOR_NO→LFA1-LIFNR. - Define Conversion Logic: You might need to format dates (DD/MM/YYYY to YYYYMMDD) or transform text to uppercase.
6 Specify Files
- Identify Your Input File(s): Provide the file’s location and format (CSV, TXT, etc.).
- Determine Delimiters: Comma, semicolon, or tab, as needed.
7 Assign Files
- Attach Files to Source Structures: Ensure each source structure points to the correct file or file segment.
8 Read Data
- Load Data from the File into LSMW: Check logs for any read errors or formatting issues.
9 Display Read Data
- Preview Raw Data in LSMW: Confirm that fields are populated as expected.
10 Convert Data
- Apply Your Mapping Rules: LSMW transforms the data according to your specifications.
11 Display Converted Data
- Review Converted Records: Check if the transformed data matches SAP table requirements.
12 Create Batch Input Session
- Generate a Session: If using batch input, LSMW creates a session that you can process manually via transaction SM35.
13 Run Batch Input Session
- Process the Data in SAP: Monitor for any errors in the log. If records fail, correct them and re-run the session.
LSMW in Action: Example for Vendor Master Data
- Define a Project: Create one named
VENDOR_MIGRATION. - Setup Batch Input Recording: Record transaction XK01 (or BP in SAP S/4HANA) to capture vendor creation steps.
- Prepare Your CSV File: Columns might include
VendorID,Name1,Street,City,PostalCode, etc. - Map Fields: For instance,
VendorID→LFA1-LIFNR,Name1→LFA1-NAME1. - Upload and Test: Read data, convert, generate a batch input session, and run the session in SM35.
This process cuts down the time and effort it would take to manually create every vendor in SAP.
Real-World Scenario: Large-Scale Vendor Migration
Imagine your organization acquires another company with 10,000+ vendors in a non-SAP system. Rather than hiring a team to manually input each vendor, you:
- Extract Data from the legacy system in CSV format.
- Cleanse and Validate the data (correct addresses, remove duplicates).
- Map Fields in LSMW to align with SAP’s vendor master structure (LFA1, LFB1, LFM1).
- Execute Batch Input to create all 10,000 records in a fraction of the time.
Common Pitfalls and Challenges
- Poor Data Quality: Inaccurate or incomplete data can cause errors during upload. Always cleanse data beforehand.
- Mismatched File Formats: Inconsistent delimiters or special characters can lead to read errors.
- Insufficient User Authorizations: You may need special SAP roles to run batch input sessions and update master data.
- Complex Mapping Requirements: Non-aligned fields between legacy and SAP tables may require additional transformation rules.
Best Practices for Successful LSMW Projects
- Start Small with a Test File: Validate the process on a handful of records before attempting large uploads.
- Document Mapping Rules: Keep a record of each source-to-target mapping for future reference or audits.
- Create Data Validation Checks: Build logical rules to ensure data consistency (e.g., correct date formats, mandatory fields populated).
- Monitor Logs: After each run, check LSMW logs to pinpoint and correct errors quickly.
- Use Version Control: Maintain different versions of your LSMW project for easy rollback and comparison.
Reference Table: Sample Field Mapping
Below is an example table demonstrating how legacy vendor data maps to SAP’s LFA1 table. Adjust the Conversion Rule column to fit your specific needs (e.g., uppercase, date formatting).
| Source Field | Data Type | SAP Target Field | Length | Example Value | Conversion Rule |
|---|---|---|---|---|---|
| VendorID | Numeric | LFA1-LIFNR | 10 | 100001 | Zero-pad to 10 digits |
| Name1 | Text | LFA1-NAME1 | 35 | ABC Suppliers | Convert to uppercase |
| Street | Text | LFA1-STRAS | 60 | Main Street | None |
| City | Text | LFA1-ORT01 | 35 | Los Angeles | Title Case (if required) |
| PostalCode | Numeric | LFA1-PSTLZ | 10 | 90001 | Ensure no special characters |
Conclusion
LSMW is a proven, reliable, and user-friendly tool for migrating massive datasets into SAP. By following the structured approach outlined in this blog—defining a project, recording transactions, preparing source files, and mapping fields—you can transform a tedious manual task into a streamlined automated process.
Next Steps:
- Cleanse and validate your source data to ensure a smooth migration.
- Start with a small test batch to confirm your mappings.
- Document each step of your LSMW setup for future reference.
With these best practices in mind, you’ll be well-equipped to tackle even the most challenging data migration projects. Whether you’re migrating vendor master data or any other type of master or transaction data, LSMW can help you save time, reduce errors, and maintain data integrity in your SAP environment.