Cypress Tutorial
Welcome to Cypress Tutorial by TutorialKart.com.
Cypress is an end to end testing framework. It helps to perform front end testing on web applications with ease.
In this Cypress Tutorial, we will get a hands on experience with using Cypress framework to perform an end to end testing on a web application.
Cypress – Setup
You should have node.js installed prior to using Cypress. Node.js is a prerequisite. To install node.js on your computer, refer Node.js Tutorial.
Sample Web Application for this Cypress Tutorial
To demonstrate the working of Cypress framework, we shall consider a web application. The web application is a to do application. All the HTML, CSS and JavaScript is in the following file.
We shall try using Cypress framework to perform end to end testing on this application.
Create a HTML file with the following content in a directory.
<!DOCTYPE html>
<html><head>
<meta name="viewport" content="width=device-width, initial-scale=1">
<style>
body {
  margin: 0;
  min-width: 250px;
}

* {
  box-sizing: border-box;
}
ul {
  margin: 50px;
  padding: 0;
  border: 1px solid #000;
}

ul li {
  cursor: pointer;
  position: relative;
  padding: 12px 8px 12px 40px;
  list-style-type: none;
  background: #eee;
  font-size: 18px;
  transition: 0.2s;

  -webkit-user-select: none;
  -moz-user-select: none;
  -ms-user-select: none;
  user-select: none;
}

ul li:nth-child(odd) {
  background: #f9f9f9;
}

ul li:hover {
  background: #ddd;
}

ul li.checked {
  background: #888;
  color: #fff;
  text-decoration: line-through;
}

ul li.checked::before {
  content: '';
  position: absolute;
  border-color: #fff;
  border-style: solid;
  border-width: 0 2px 2px 0;
  top: 10px;
  left: 16px;
  transform: rotate(45deg);
  height: 15px;
  width: 7px;
}

.close {
  position: absolute;
  right: 0;
  top: 0;
  padding: 12px 16px 12px 16px;
}

.close:hover {
  background-color: #f44336;
  color: white;
}

.header {
  background-color: #455ba2;
  padding: 30px 40px;
  color: white;
  text-align: center;
}

.header:after {
  content: "";
  display: table;
  clear: both;
}

input {
  margin: 0;
  border: none;
  border-radius: 0;
  width: 75%;
  padding: 10px;
  float: left;
  font-size: 16px;
}

.addBtn {
  padding: 10px;
  width: 25%;
  background: #d9d9d9;
  color: #555;
  float: left;
  text-align: center;
  font-size: 16px;
  cursor: pointer;
  transition: 0.3s;
}

.addBtn:hover {
  background-color: #bbb;
}
</style>
</head>
<body contenteditable="false">

<div id="myDIV" class="header">
  <h2 style="margin:5px">My To Do List</h2>
  <input type="text" id="myInput" placeholder="Title...">
  <span onclick="newElement()" class="addBtn">Add</span>
</div>

<ul id="myUL">
</ul>

<script>
var myNodelist = document.getElementsByTagName("LI");
var i;
for (i = 0; i < myNodelist.length; i++) {
  var span = document.createElement("SPAN");
  var txt = document.createTextNode("\u00D7");
  span.className = "close";
  span.appendChild(txt);
  myNodelist[i].appendChild(span);
}

var close = document.getElementsByClassName("close");
var i;
for (i = 0; i < close.length; i++) {
  close[i].onclick = function() {
    var div = this.parentElement;
    div.style.display = "none";
  }
}

var list = document.querySelector('ul');
list.addEventListener('click', function(ev) {
  if (ev.target.tagName === 'LI') {
    ev.target.classList.toggle('checked');
  }
}, false);

function newElement() {
  var li = document.createElement("li");
  var inputValue = document.getElementById("myInput").value;
  var t = document.createTextNode(inputValue);
  li.appendChild(t);
  if (inputValue === '') {
    alert("You must write something!");
  } else {
    document.getElementById("myUL").appendChild(li);
  }
  document.getElementById("myInput").value = "";

  var span = document.createElement("SPAN");
  var txt = document.createTextNode("\u00D7");
  span.className = "close";
  span.appendChild(txt);
  li.appendChild(span);

  for (i = 0; i < close.length; i++) {
    close[i].onclick = function() {
      var div = this.parentElement;
      div.style.display = "none";
    }
  }
}
</script>
</body></html>
Open this directory in a Visual Studio Code IDE and run the following command in a Terminal.
$ npm install http-server -gRun the following command to make the HTML page available at a URL.
$ http-server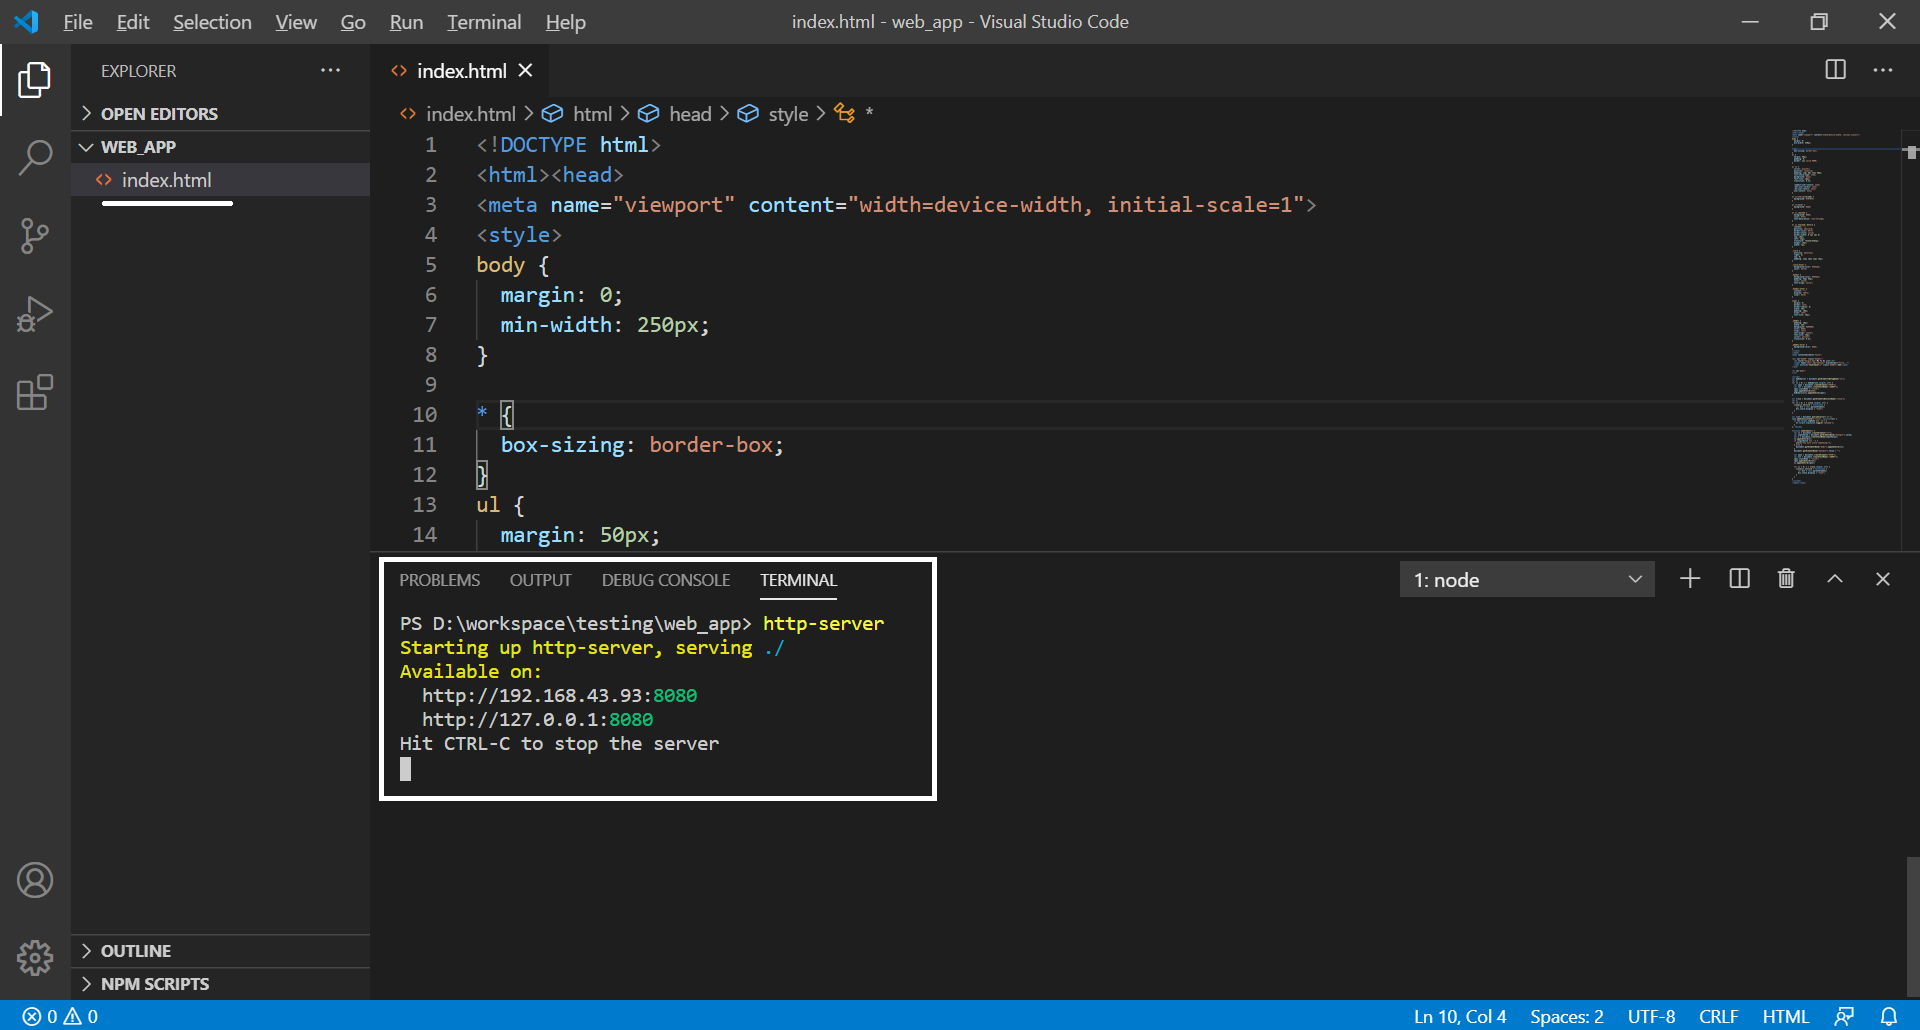
Now the index.html will be available at http://127.0.0.1:8080/index.html.
Cypress – Create Project
Create a directory for placing your project. We shall use this directory as project folder in Visual Studio Code.
Open Visual Studio Code IDE.
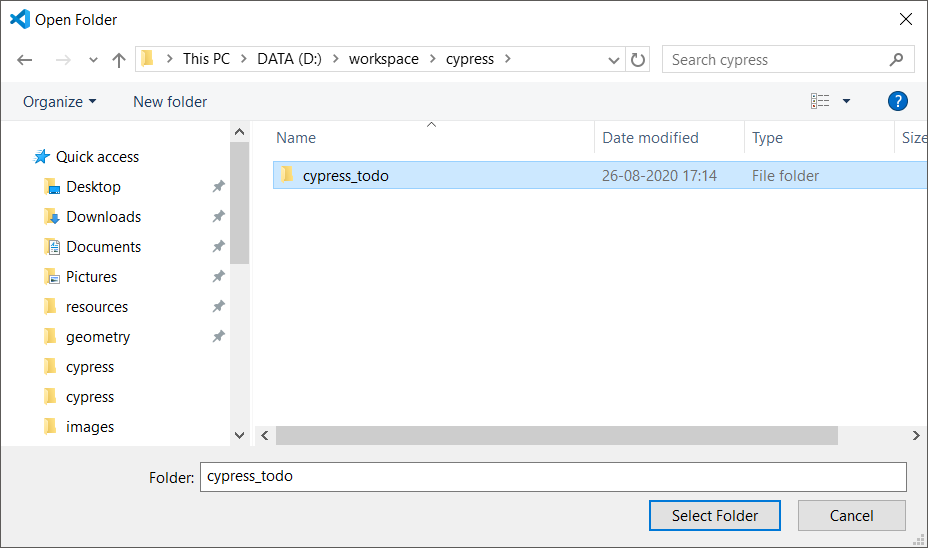
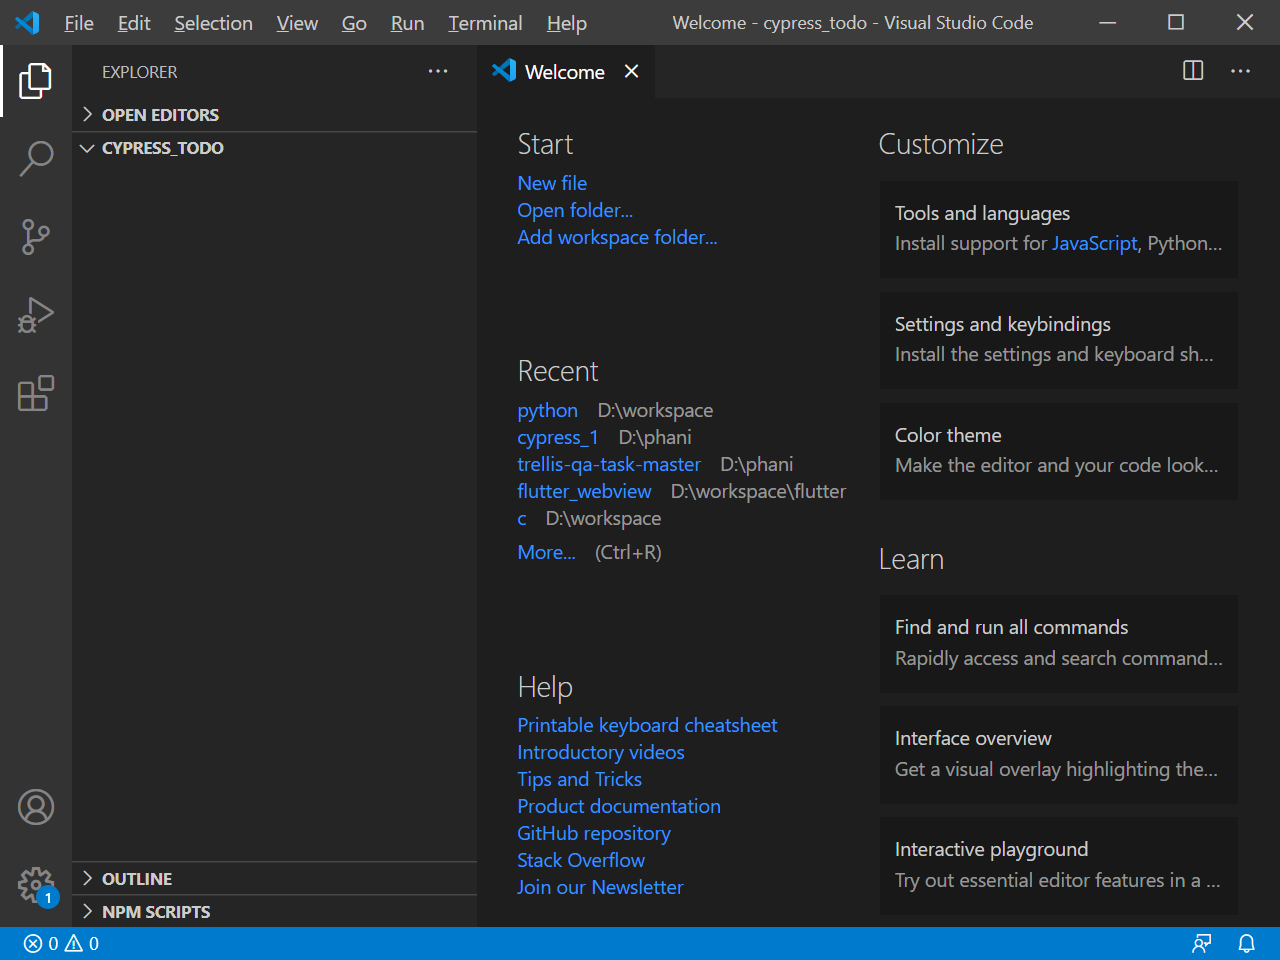
Click on Open folder… and navigate to the directory we created for keeping project files.
The project folder would be empty, as we have not created any files in it.
Open Terminal window. From top menu click on Terminal -> New Terminal.
You can install Cypress using npm. Run the following command in the Terminal Window, that we just opened in Visual Studio Code.
$ npm install cypress --save-dev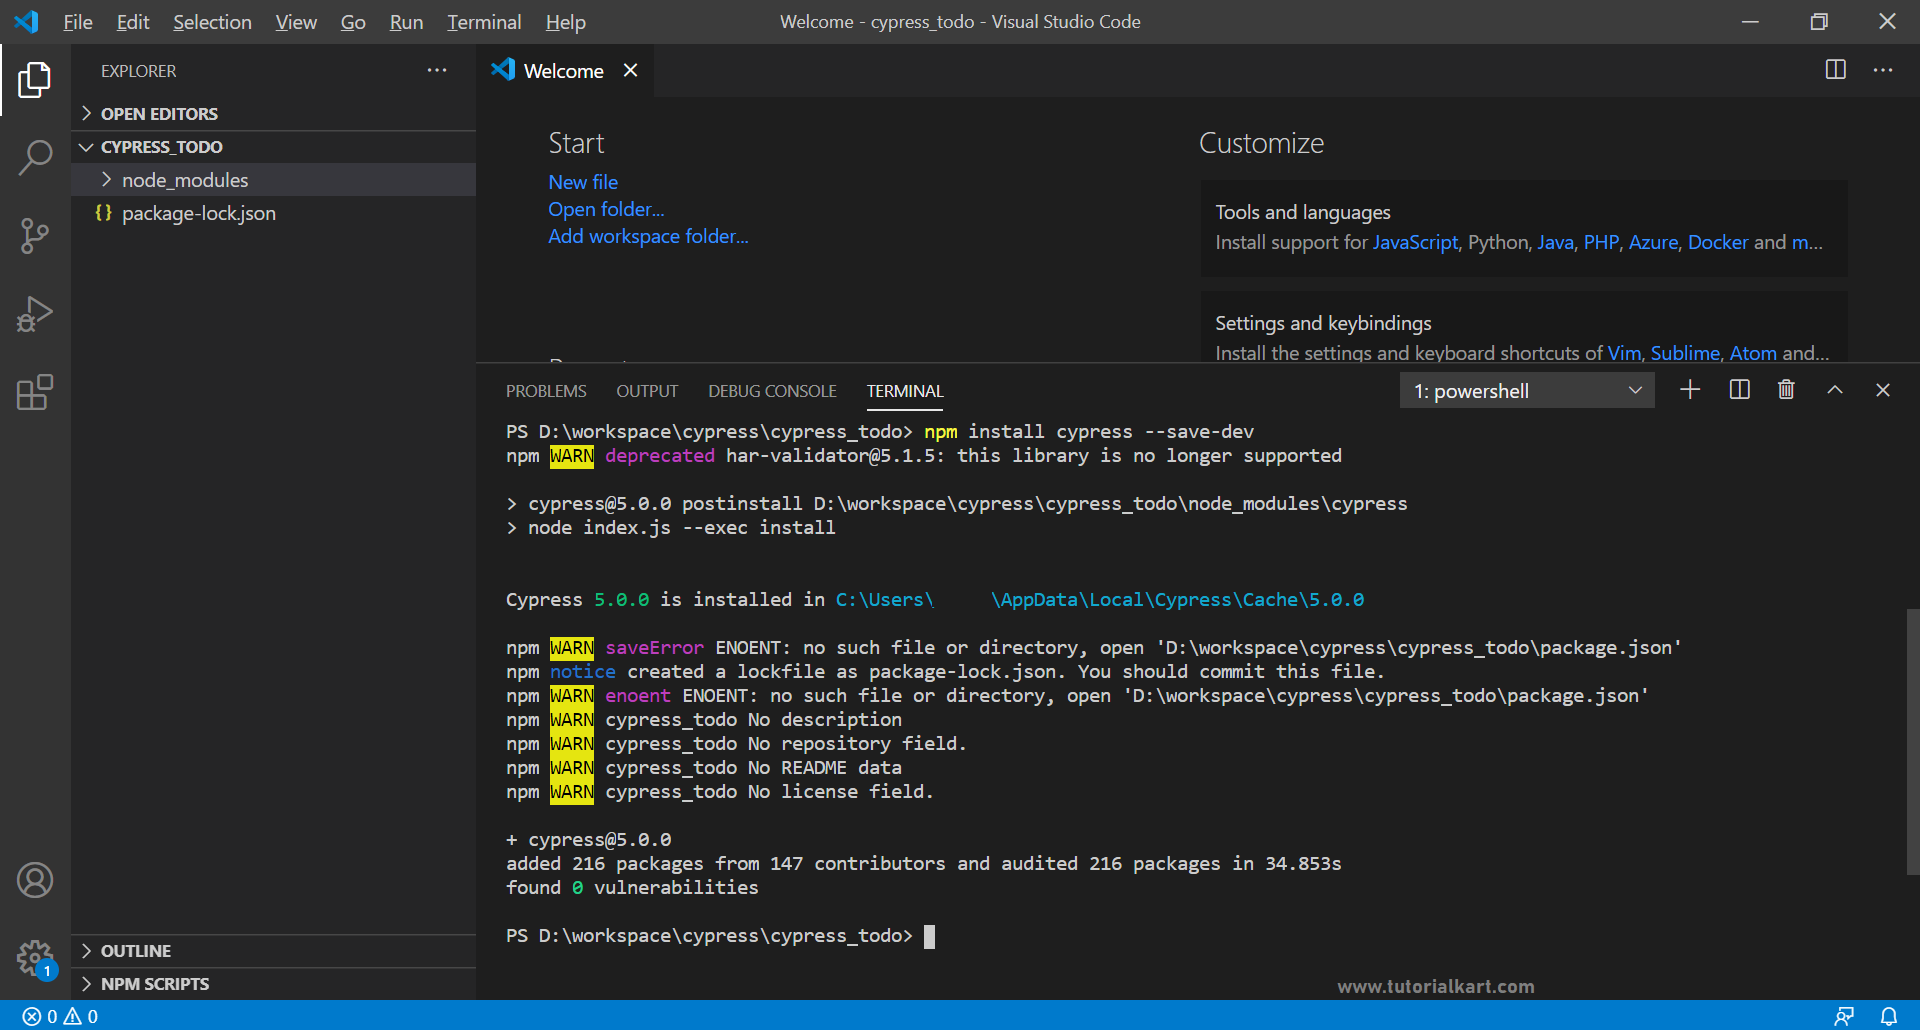
During Cypress installation, package.json file and node_modules directory are created in our project.
Run the following command, to create Cypress related file structure in the project.
$ node_modules/.bin/cypress openCypress project files would be created and a Cypress window would open as shown below.
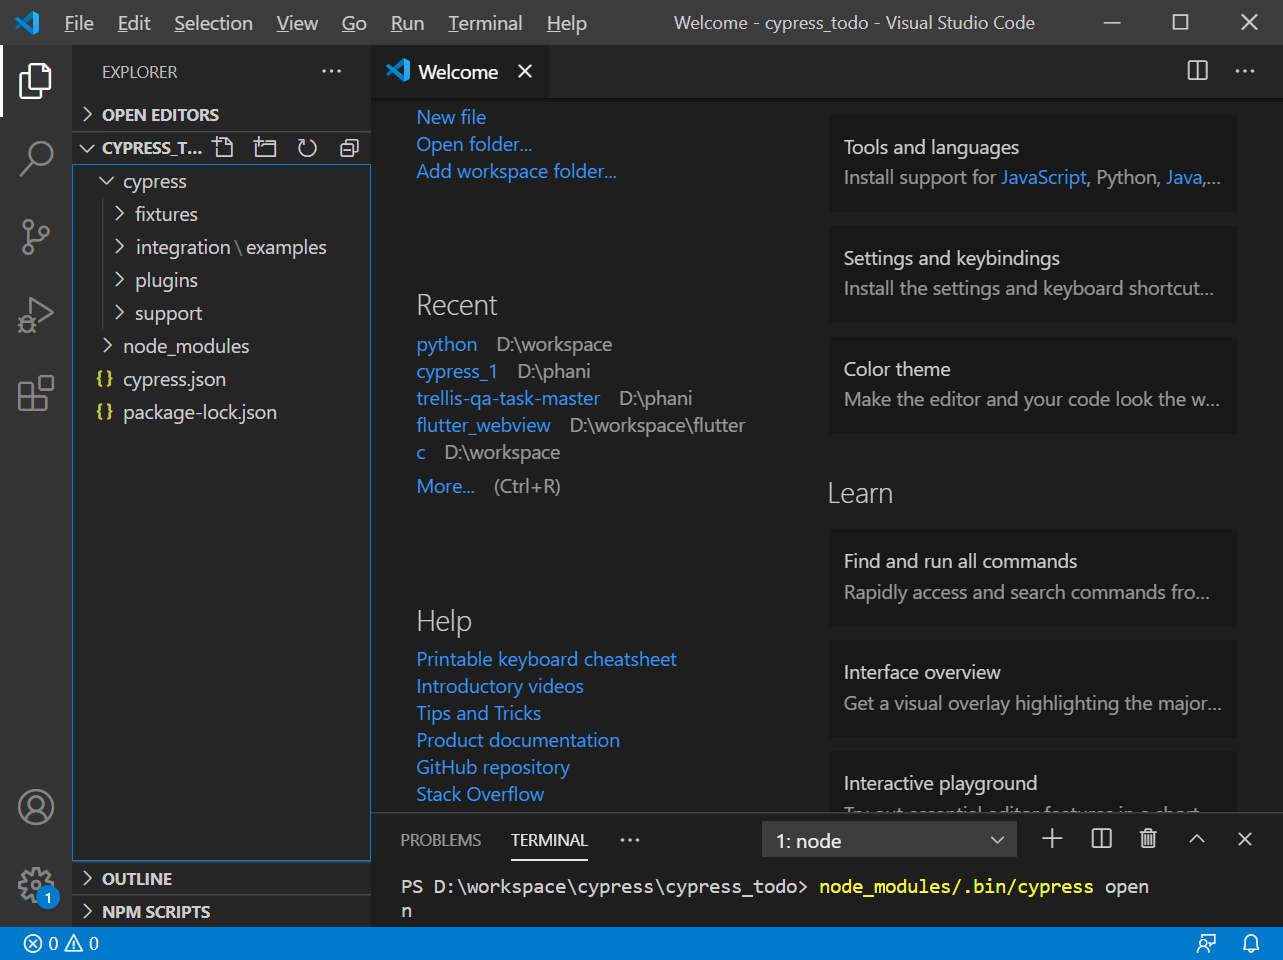
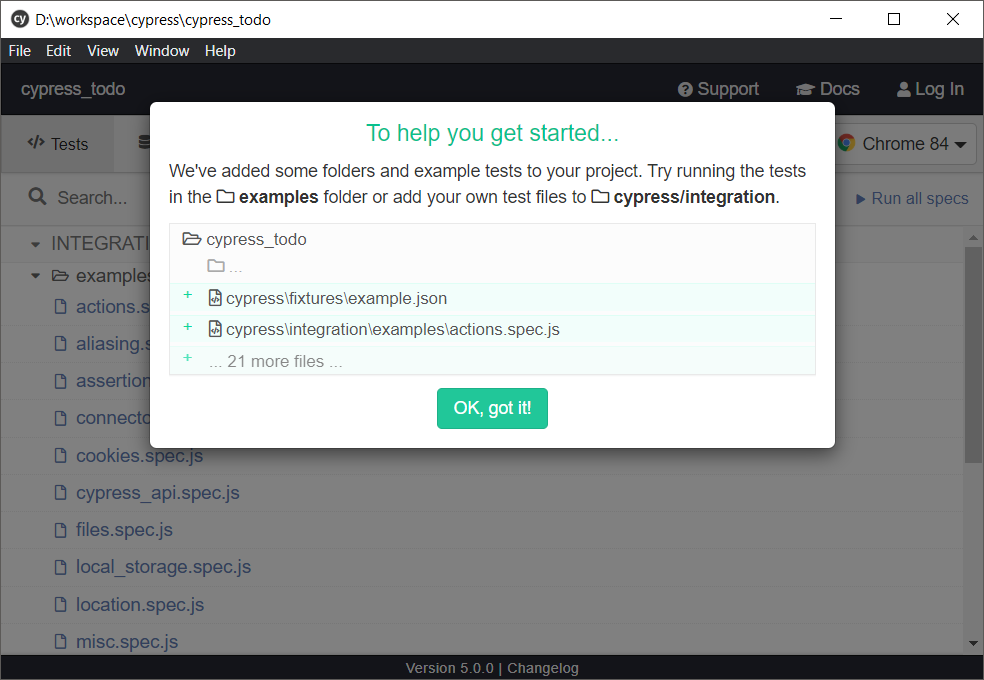
cypress/integration directory holds the test files. By default, examples folder is created with some sample test files. Delete the examples folder.
Now we are ready to start writing our first test file in Cypress.
Cypress – Writing Tests
Create a file named app.spec.ts in cypress/integration directory. Now, we shall write a simple test case in this file as shown below.

/// <reference types="Cypress" />

it("Home Page", function(){
    cy.visit('http://127.0.0.1:8080/index.html')
    cy.get('h1').contains('ToDo List').should('be.visible')
})
it() is used to define a test case. The first argument to is title for the test case, and the second argument is a function, that contains the logic to validate this test case.
cy.visit(url) loads the url.
cy.get(selector) traverses the html document loaded by the url and returns the nodes based on the argument to it. In this example, we have given the selector as “h1”, which means cy.get() gets all the h1 headings in the html document.
cy.contain(text) method gets the elements containing the text. The text is given as argument to it. Here, cy.get(‘h1’).contains(‘ToDo List’) filters all the elements returned by cy.get(‘h1’) based on the condition that the element should contain the text “ToDo List”.
should(‘be.visible’) asserts that atleast one of the elements should be visible.
All the cy methods we used in this example are chainable. Hence, we have written them as a single statement.
Cypress – Run Tests
To run Cypress tests, run the following command in terminal, from the root of your project folder.
$ node_modules/.bin/cypress openWe have already used this command to create the default folder structure and files for Cypress project.
After you run this command, Cypress window appears as shown below.
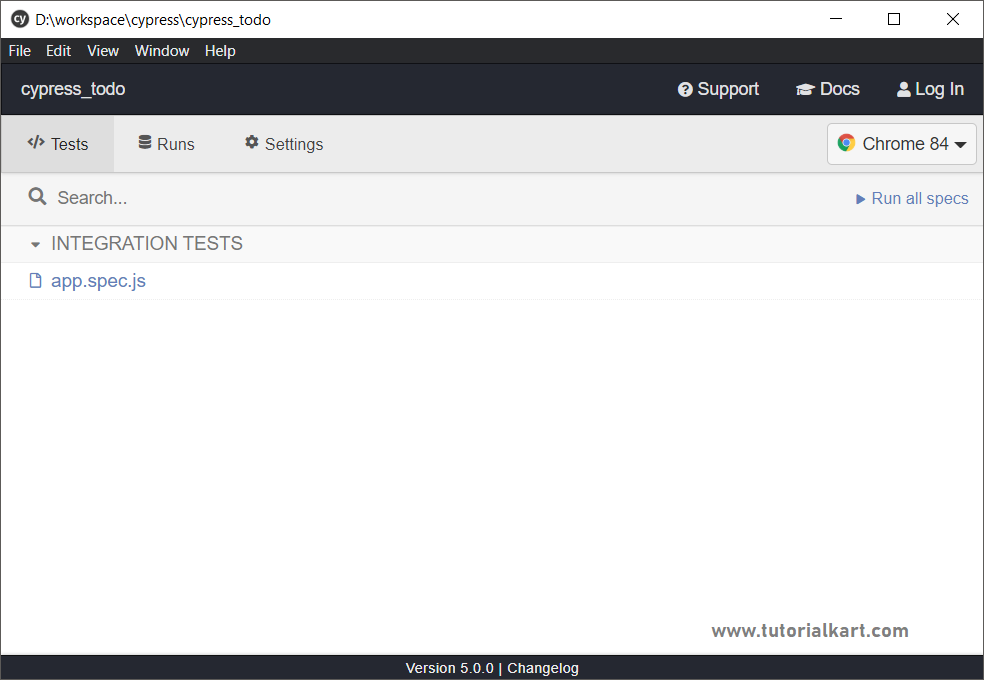
In the above screenshot, under INTEGRATION TESTS, we have only one entry ‘app.spec.js’. That is because, we have only one spec file in the integration folder. If we have multiple test files in this folder, all those files would appear as entries under INTEGRATION TESTS.
Now, you may click on Run all specs (present on the top right corner) to run all the test files or click on an entry to run that specific test file.
A new browser window appears and runs the specs with the default browser.
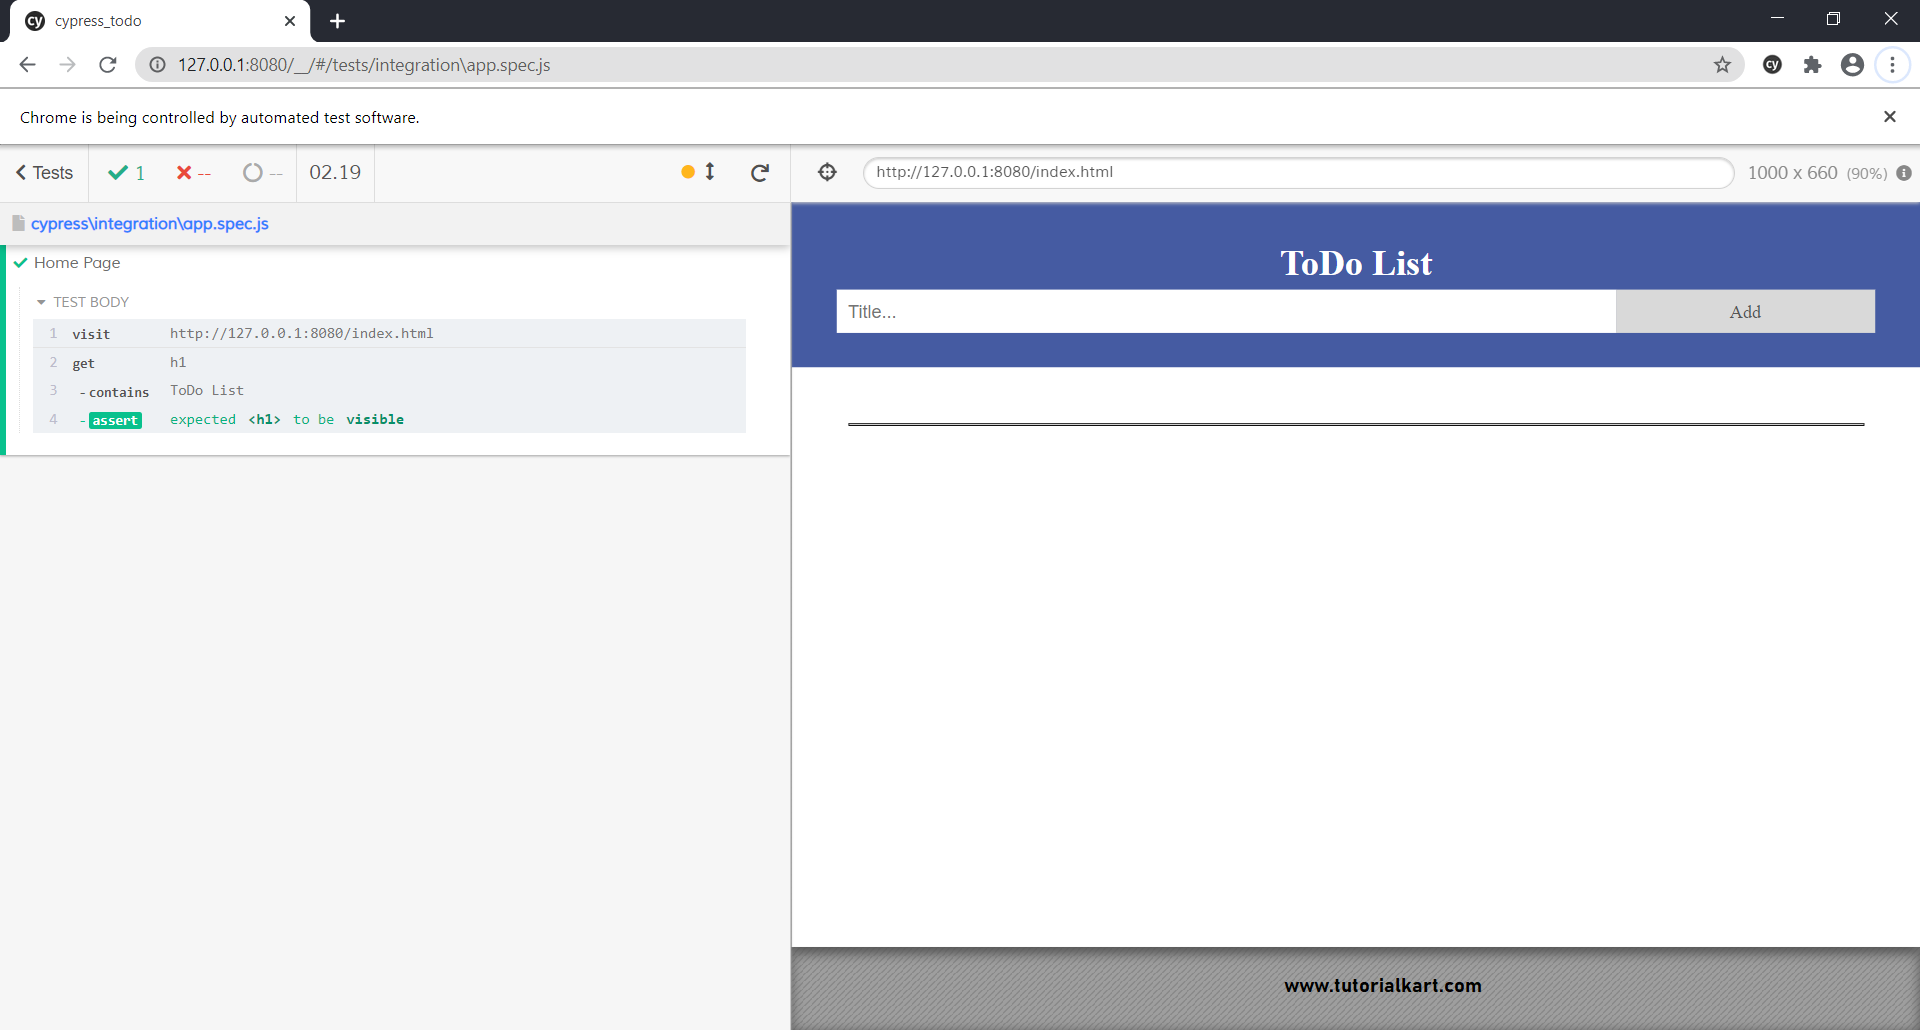
On the left hand side, you will see the individual test cases, along with test results, and on the right hand side you will see the actual steps being executed in real time in a browser.
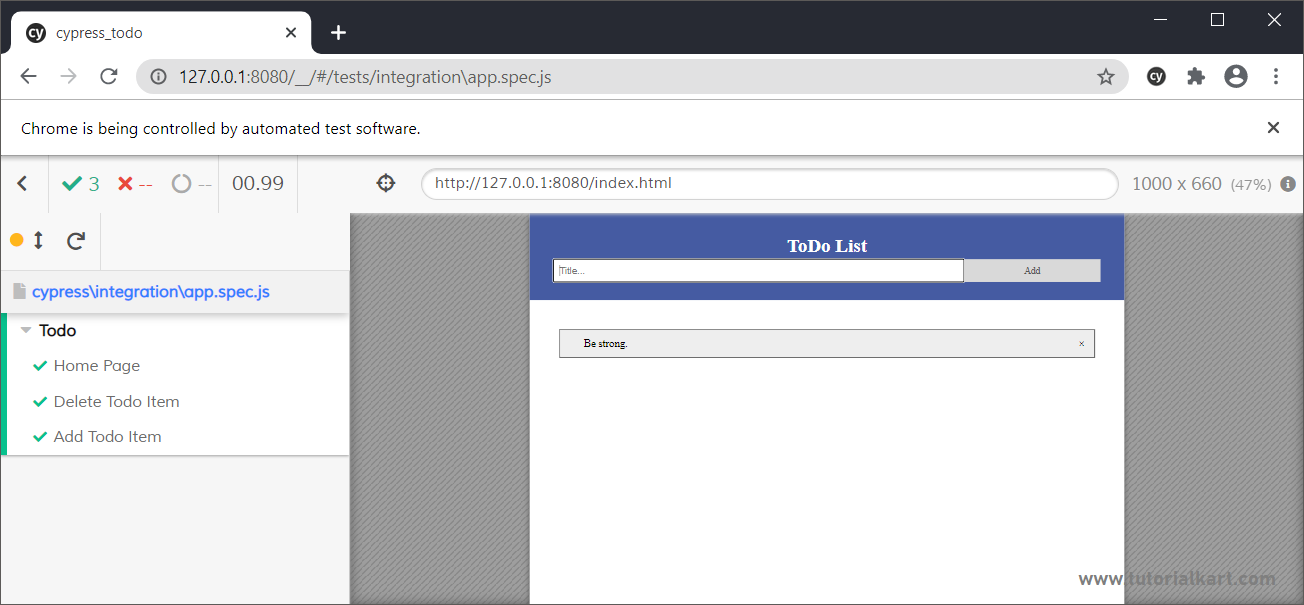
You can write a test suite (multiple tests), using describe().
In the following app.spec.js, we have written following testcases.
- Check if the ToDo List page is loading.
- Check if we can Delete Item from ToDo List.
- Check if we are able to Add Item to ToDo List.
/// <reference types="Cypress" />

describe("Todo", function(){
    it("Home Page", function(){
        cy.visit('http://127.0.0.1:8080/index.html')
        cy.get('h1').contains('ToDo List').should('be.visible')
    })
    it("Delete Todo Item", function(){
        var todoItem = 'Get yourself a treat.'
        cy.get('#myInput').type(todoItem)
        cy.get('#myDIV .addBtn').first().click()
        cy.get('#myUL li').contains(todoItem).should('be.visible')
        cy.get('#myUL li span').click()
        cy.get('#myUL li').contains(todoItem).should('not.be.visible')
    })
    it("Add Todo Item", function(){
        var todoItem = 'Be strong.'
        cy.get('#myInput').type(todoItem)
        cy.get('#myDIV .addBtn').first().click()
        cy.get('#myUL li').contains(todoItem).should('be.visible')
    })
})
If you have closed the Cypress window, run the following command again. It will open Cypress window.
$ node_modules/.bin/cypress openRun the app.spec.js file by clicking on it. The output would be as shown in the following screenshot.
Conclusion
In this Cypress Tutorial, we learned how to use Cypress to perform end to end testing on your web application.