Java MySQL – UPDATE Row
In this tutorial, we’ll go through updating rows in a MySQL table using Java. We will cover various examples, including updating a single row, updating multiple rows based on a condition, and updating multiple columns. Each example will include detailed steps and code snippets.
Prerequisites
- MySQL installed and running
- Java Development Kit (JDK) installed
- MySQL Connector/J (JDBC Driver) downloaded
- MySQL Workbench to verify the row updates
Step 1: Set Up MySQL Server and Create a Sample Table
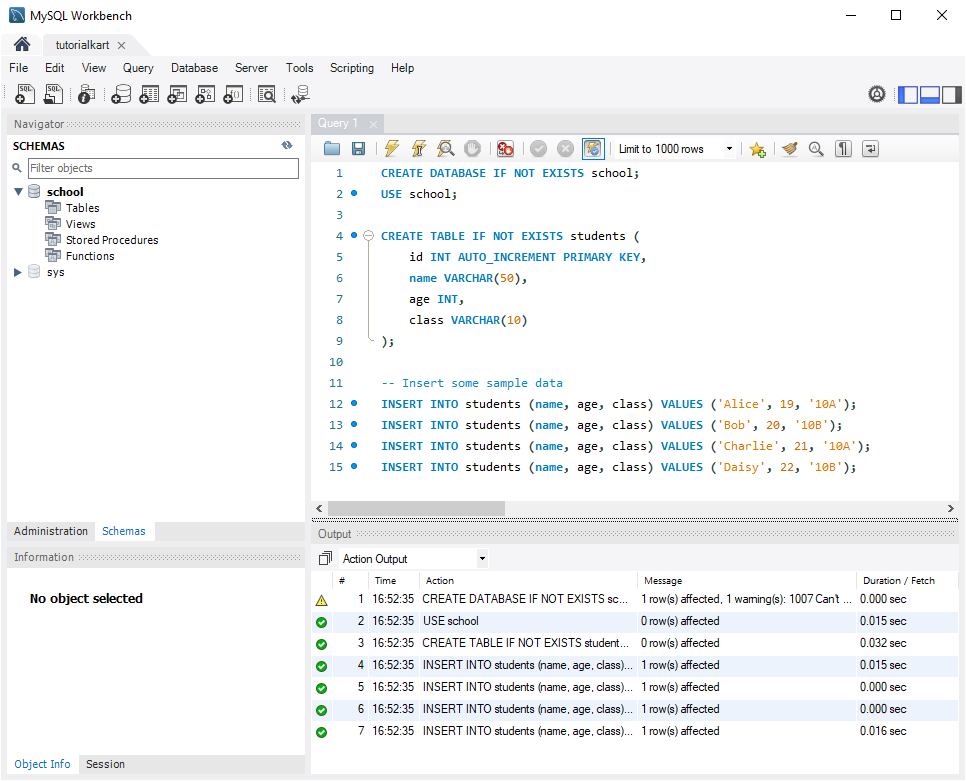
Before running the Java code, create a sample table in MySQL. In this tutorial, we’ll use a table named students with columns for ID, name, age, and class. Run the following SQL commands in MySQL Workbench:
CREATE DATABASE IF NOT EXISTS school;
USE school;

CREATE TABLE IF NOT EXISTS students (
    id INT AUTO_INCREMENT PRIMARY KEY,
    name VARCHAR(50),
    age INT,
    class VARCHAR(10)
);

-- Insert some sample data
INSERT INTO students (name, age, class) VALUES ('Alice', 19, '10A');
INSERT INTO students (name, age, class) VALUES ('Bob', 20, '10B');
INSERT INTO students (name, age, class) VALUES ('Charlie', 21, '10A');
INSERT INTO students (name, age, class) VALUES ('Daisy', 22, '10B');
This setup creates the school database and a students table with sample data to use in our examples.
Step 2: Set Up MySQL Connection in Java
To connect to MySQL from Java, you need the MySQL Connector/J library. Add this library to your Java project to establish the connection.
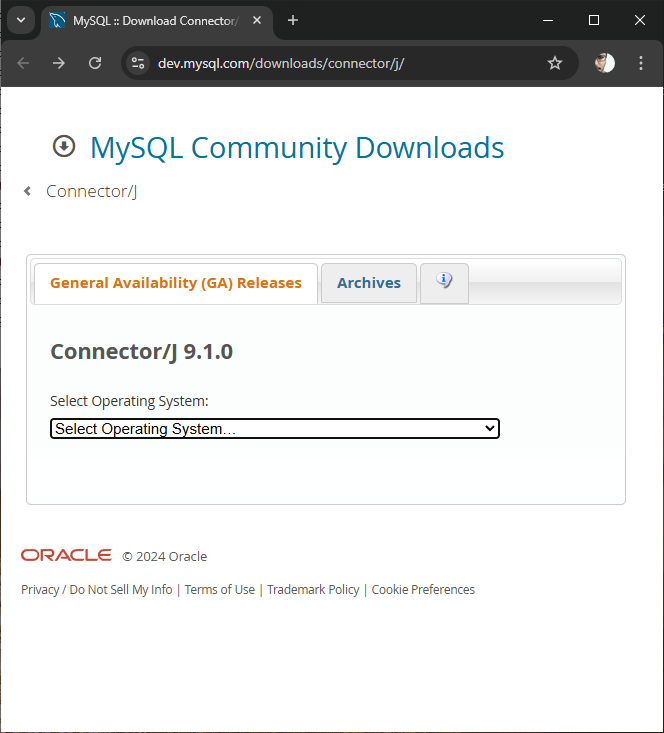
1. Download MySQL Connector/J
Go to the official MySQL Connector/J download page, download the connector, and add the JAR file to your Java project’s classpath.
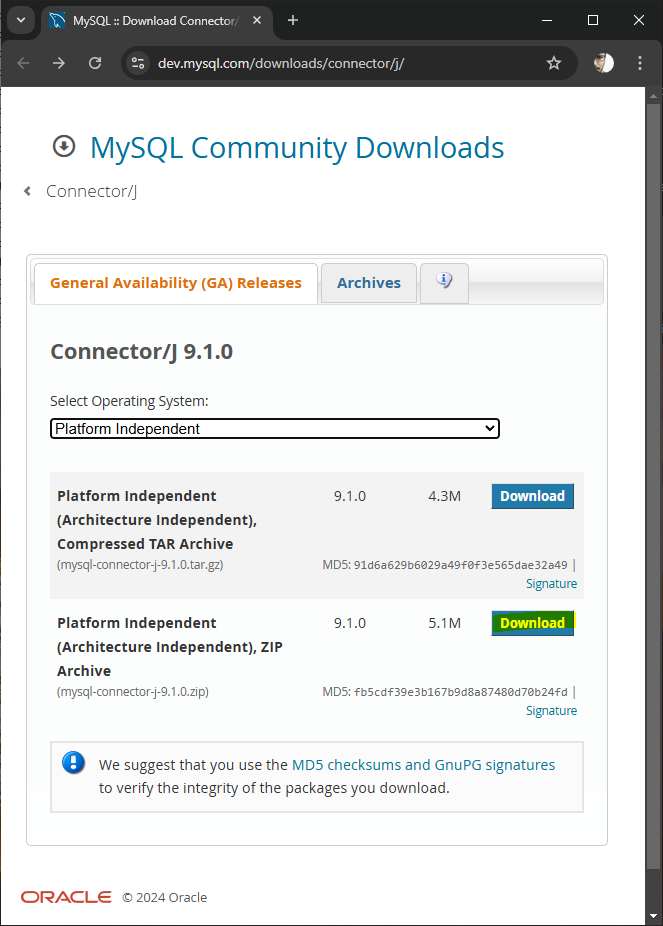
Click on the Download button.
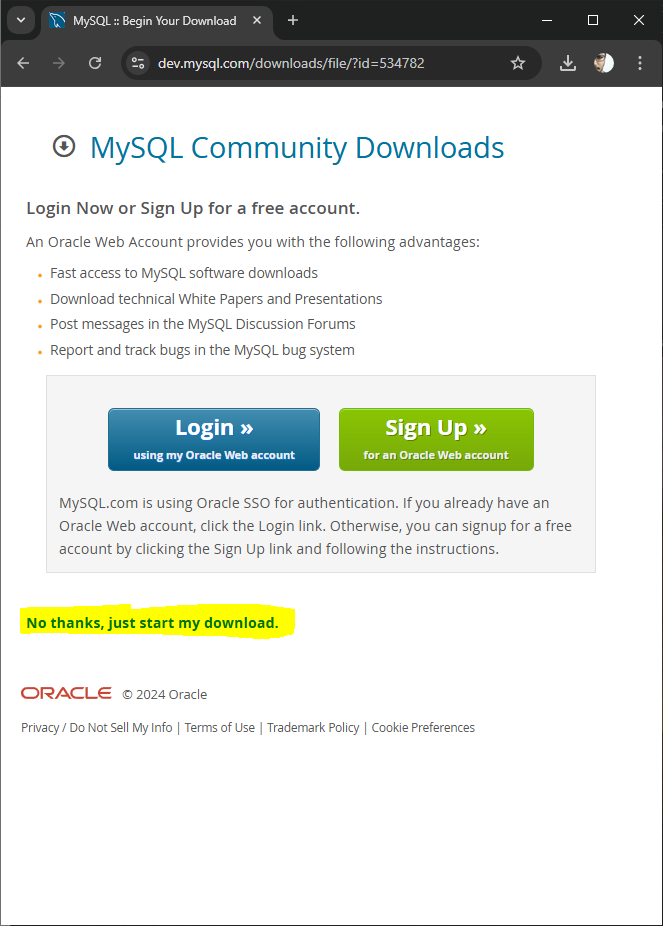
You may click No thanks, just start my download.
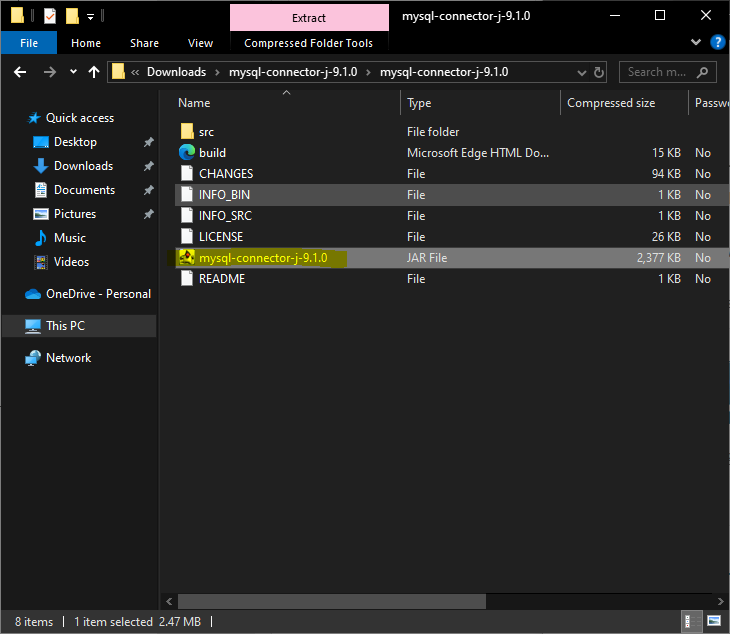
In the downloaded package, there should be a jar file.
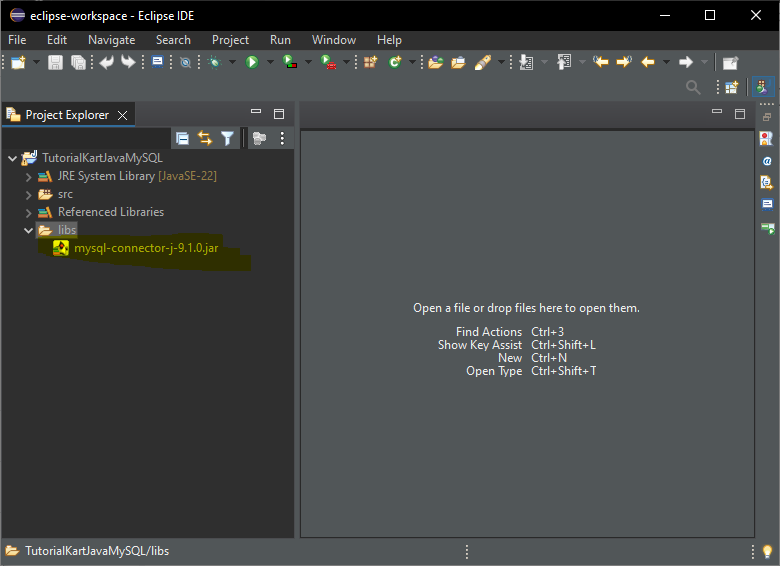
2. Add the Connector to Your Java Project
For the sake of convenience, let us copy the jar file to libs folder in the Java Project.
Right-click on your Java project and go to Properties.
Select Java Build Path > Libraries.
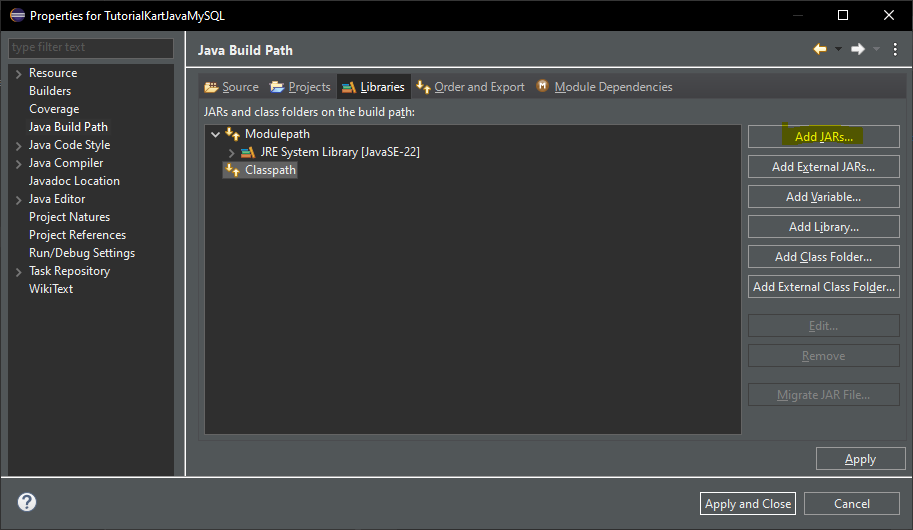
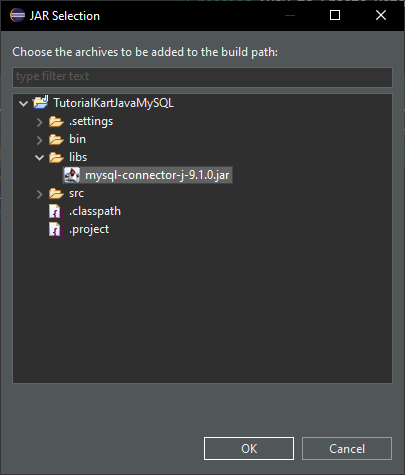
Add the MySQL Connector/J JAR file you downloaded.
Click OK.
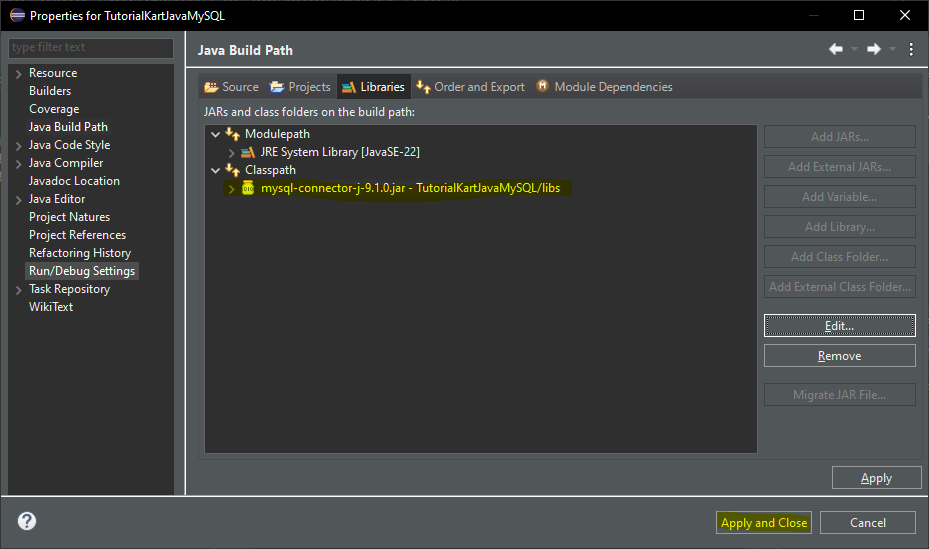
Click Apply and Close.
Step 3: Java Code to Update Rows
Let’s go through different examples of updating rows in the students table.
Example 1: Update a Single Row
In this example, we’ll update the age of a specific student, identified by their ID.
import java.sql.Connection;
import java.sql.DriverManager;
import java.sql.PreparedStatement;

public class UpdateSingleRowExample {
    public static void main(String[] args) {
        String jdbcUrl = "jdbc:mysql://localhost:3306/school";
        String user = "root";
        String password = "your_password";

        try {
            // Establish a connection to MySQL
            Connection connection = DriverManager.getConnection(jdbcUrl, user, password);

            // SQL command to update a single row
            String sql = "UPDATE students SET age = ? WHERE id = ?";

            // Prepare the statement
            PreparedStatement preparedStatement = connection.prepareStatement(sql);
            preparedStatement.setInt(1, 23);  // New age value
            preparedStatement.setInt(2, 1);  // ID of the student (e.g., Alice with id 1)

            // Execute the update
            int rowsUpdated = preparedStatement.executeUpdate();

            // Output the result
            if (rowsUpdated > 0) {
                System.out.println("A row was updated successfully.");
            }

            // Close resources
            preparedStatement.close();
            connection.close();
        } catch (Exception e) {
            e.printStackTrace();
        }
    }
}
Run the program.
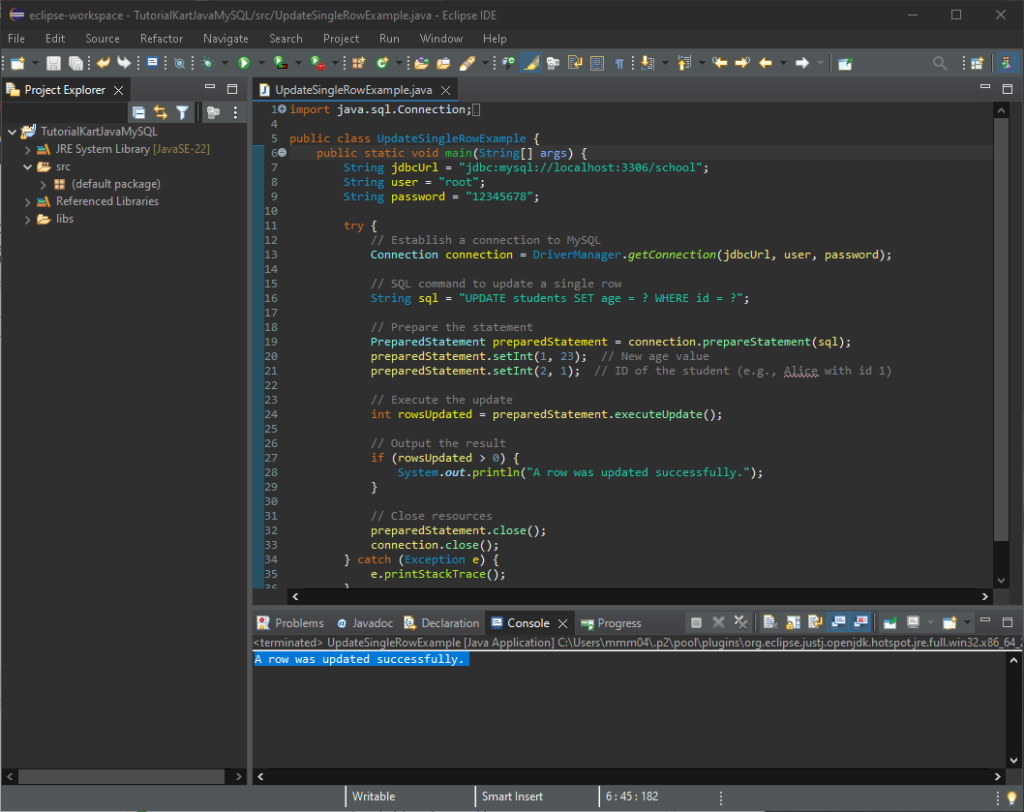
This code updates the age of the student with id = 1 to 23.
After running the Java program, open MySQL Workbench and execute the following query to check the updated data:
SELECT * FROM students;You should see the changes reflected based on the Java code you executed.

Example 2: Update Multiple Rows Based on a Condition
In this example, we’ll increase the age of all students in class 10A by 1 year.
import java.sql.Connection;
import java.sql.DriverManager;
import java.sql.PreparedStatement;

public class UpdateMultipleRowsExample {
    public static void main(String[] args) {
        String jdbcUrl = "jdbc:mysql://localhost:3306/school";
        String user = "root";
        String password = "your_password";

        try {
            // Establish a connection to MySQL
            Connection connection = DriverManager.getConnection(jdbcUrl, user, password);

            // SQL command to update multiple rows
            String sql = "UPDATE students SET age = age + 1 WHERE class = ?";

            // Prepare the statement
            PreparedStatement preparedStatement = connection.prepareStatement(sql);
            preparedStatement.setString(1, "10A");  // Update all students in class 10A

            // Execute the update
            int rowsUpdated = preparedStatement.executeUpdate();

            // Output the result
            System.out.println(rowsUpdated + " rows were updated successfully.");

            // Close resources
            preparedStatement.close();
            connection.close();
        } catch (Exception e) {
            e.printStackTrace();
        }
    }
}
This code updates the age of all students in class 10A, incrementing each age by 1.
Run the program.
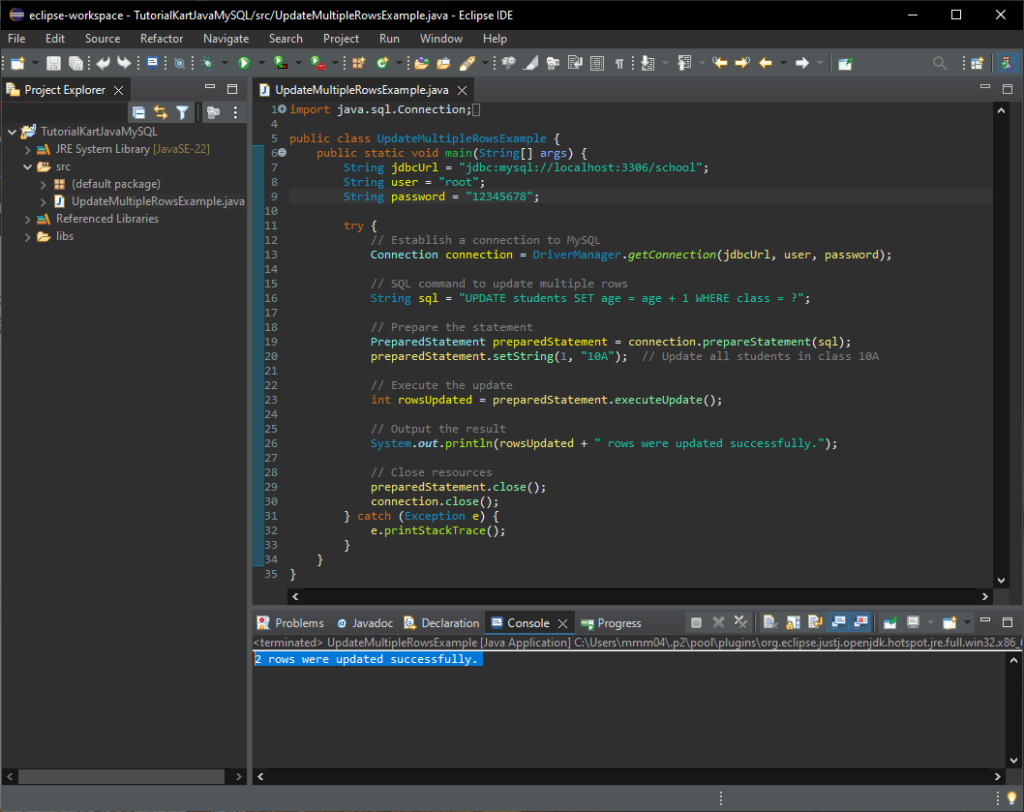
After running the Java program, open MySQL Workbench and execute the following query to check the updated data:
SELECT * FROM students;You should see the changes reflected based on the Java code you executed.
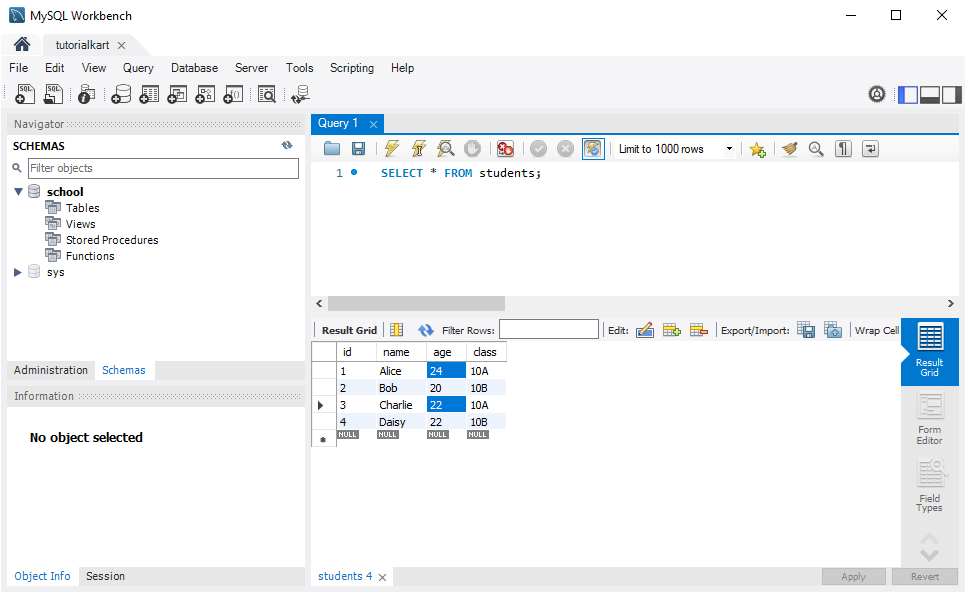
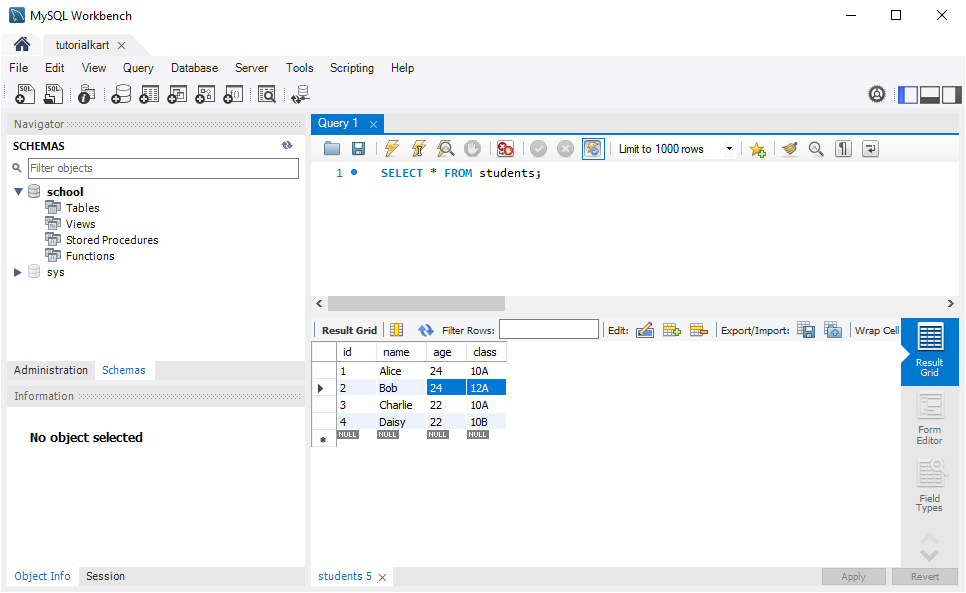
In our previous example, we updated the age of Alice with id=1 to 23. Therefore, when the age is incremented, it became 24.
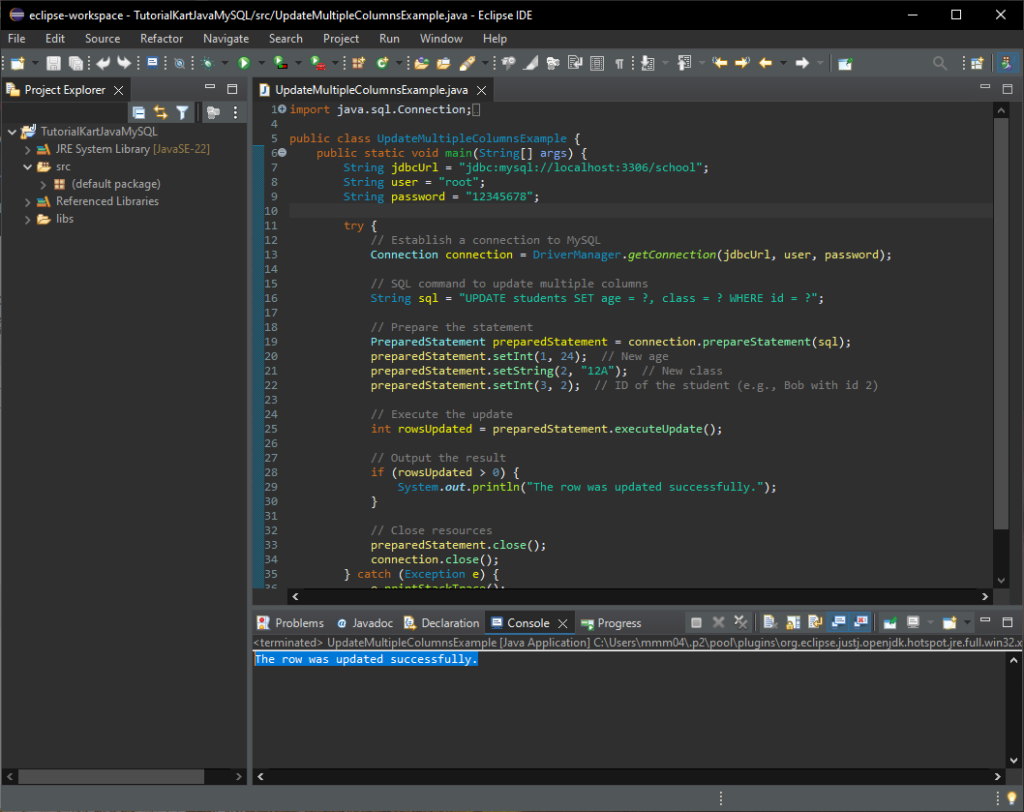
Example 3: Update Multiple Columns
In this example, we’ll update both the age and class of a specific student identified by their id.
import java.sql.Connection;
import java.sql.DriverManager;
import java.sql.PreparedStatement;

public class UpdateMultipleColumnsExample {
    public static void main(String[] args) {
        String jdbcUrl = "jdbc:mysql://localhost:3306/school";
        String user = "root";
        String password = "your_password";

        try {
            // Establish a connection to MySQL
            Connection connection = DriverManager.getConnection(jdbcUrl, user, password);

            // SQL command to update multiple columns
            String sql = "UPDATE students SET age = ?, class = ? WHERE id = ?";

            // Prepare the statement
            PreparedStatement preparedStatement = connection.prepareStatement(sql);
            preparedStatement.setInt(1, 24);  // New age
            preparedStatement.setString(2, "12A");  // New class
            preparedStatement.setInt(3, 2);  // ID of the student (e.g., Bob with id 2)

            // Execute the update
            int rowsUpdated = preparedStatement.executeUpdate();

            // Output the result
            if (rowsUpdated > 0) {
                System.out.println("The row was updated successfully.");
            }

            // Close resources
            preparedStatement.close();
            connection.close();
        } catch (Exception e) {
            e.printStackTrace();
        }
    }
}
This code updates the age and class of the student with id = 2 to 24 and “12A,” respectively.
Run the program.
After running the Java program, open MySQL Workbench and execute the following query to check the updated data:
SELECT * FROM students;You should see the changes reflected based on the Java code you executed.
Explanation of the Code
- jdbcUrl: The URL to connect to the MySQL database. Replace
localhost:3306/schoolwith your MySQL server address if it’s different. - PreparedStatement preparedStatement: Used to execute the
UPDATEcommand with placeholders for secure updates. - executeUpdate(): Executes the update command and returns the number of rows affected.
Troubleshooting Common Issues
- SQLException: Access denied: Ensure that your MySQL username and password are correct, and that the user has permission to update the table.
- ClassNotFoundException: com.mysql.cj.jdbc.Driver: Ensure that the MySQL Connector/J JAR file is added to your project’s classpath.
- SQLException: Table ‘school.students’ doesn’t exist: Ensure that the
studentstable is created in theschooldatabase.
Conclusion
Updating rows in MySQL from Java is straightforward with JDBC. This tutorial covered examples for updating a single row, updating multiple rows based on a condition, and updating multiple columns in a row. Using this approach, you can manage data updates in a MySQL database directly from your Java applications.