How to Add Columns to a Table in pgAdmin 4
As your data requirements evolve, you may need to modify the structure of your PostgreSQL tables by adding new columns. In pgAdmin 4, adding columns to an existing table is a straightforward process that can be done through the graphical interface.
In this tutorial, we will provide a step-by-step guide to adding columns to a table in pgAdmin 4.
Note: Adding a column to a table does not affect the existing data, but you must define default values or update the new column for existing rows if needed.
Prerequisites
Before proceeding, ensure the following:
You have pgAdmin 4 installed and running on your system. You are connected to the PostgreSQL server and database where the table resides. You have sufficient privileges to modify the table structure.
Once these prerequisites are met, follow the steps below to add columns to your table.
Step 1: Launch pgAdmin 4
Open pgAdmin 4 from your applications menu or access it via your web browser. Once launched, the dashboard will display a tree structure in the left-hand navigation panel, listing available servers and their databases.

Ensure you are connected to the PostgreSQL server hosting the table. If not, right-click on the server node and select Connect.
Step 2: Locate the Table
In the left-hand navigation panel, expand the server node to view its databases. Expand the Databases node and select the database containing the table you wish to modify.

Within the selected database, navigate to Schemas, expand the public schema (or the schema containing your table), and locate the Tables node. Click on the Tables node to display the list of tables in the schema. Find the table to which you want to add a column.
Step 3: Open the Table Properties Dialog
Right-click on the table name and select Properties from the context menu. This action opens the “Table Properties” dialog box, where you can view and modify the structure of the table.
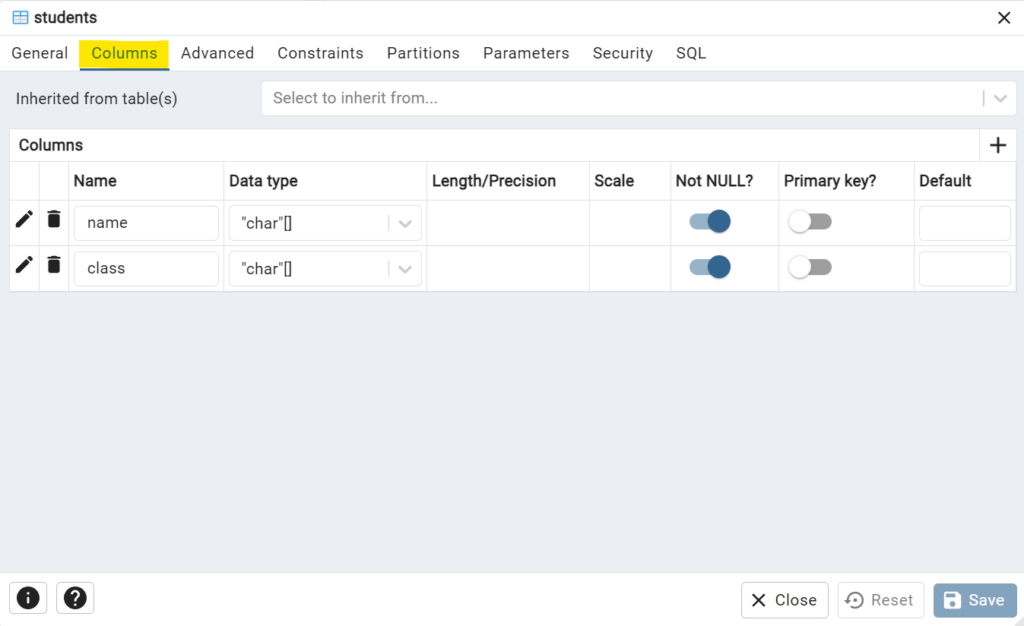
To add new columns, navigate to the Columns tab in the “Table Properties” dialog.

Step 4: Add a New Column
In the Columns tab, you can add a new column as follows:
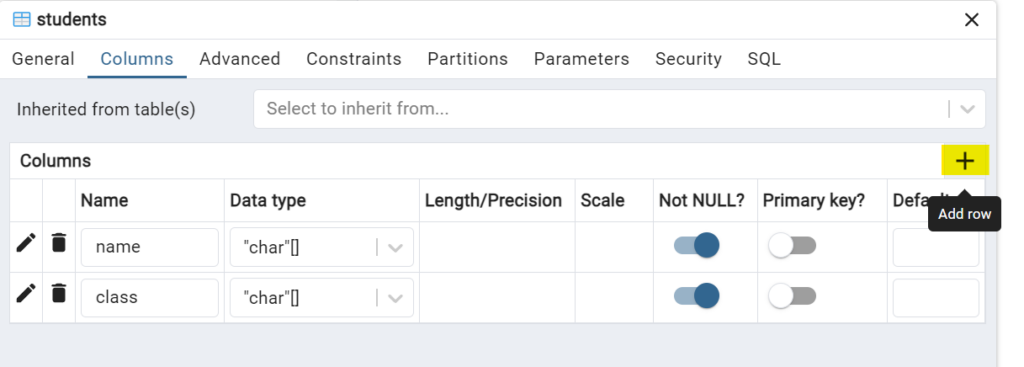
Click the + (Add) button to create a new column.

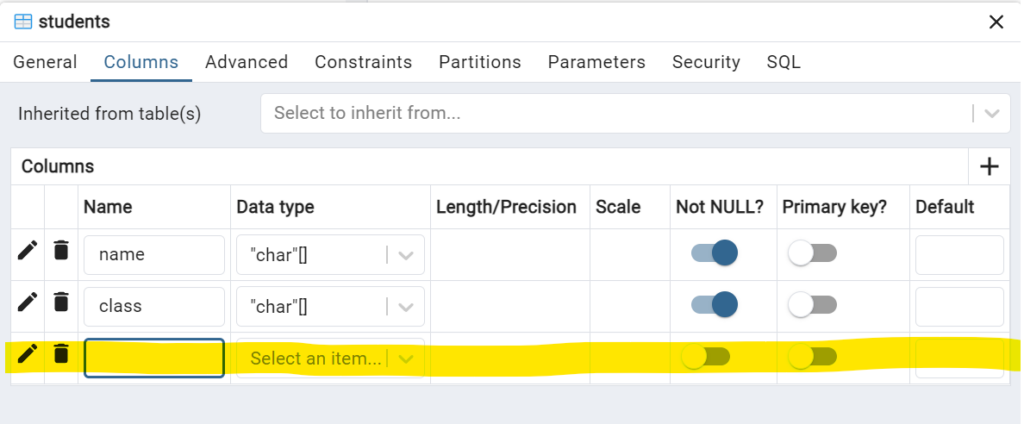
In the row that appears,

configure the following details:
Name: Enter the name of the column (e.g., email, hire_date).
Data Type: Select the appropriate data type for the column from the dropdown menu (e.g., text, integer, date, etc.).
Constraints: Optionally, define constraints such as NOT NULL, UNIQUE, or DEFAULT.
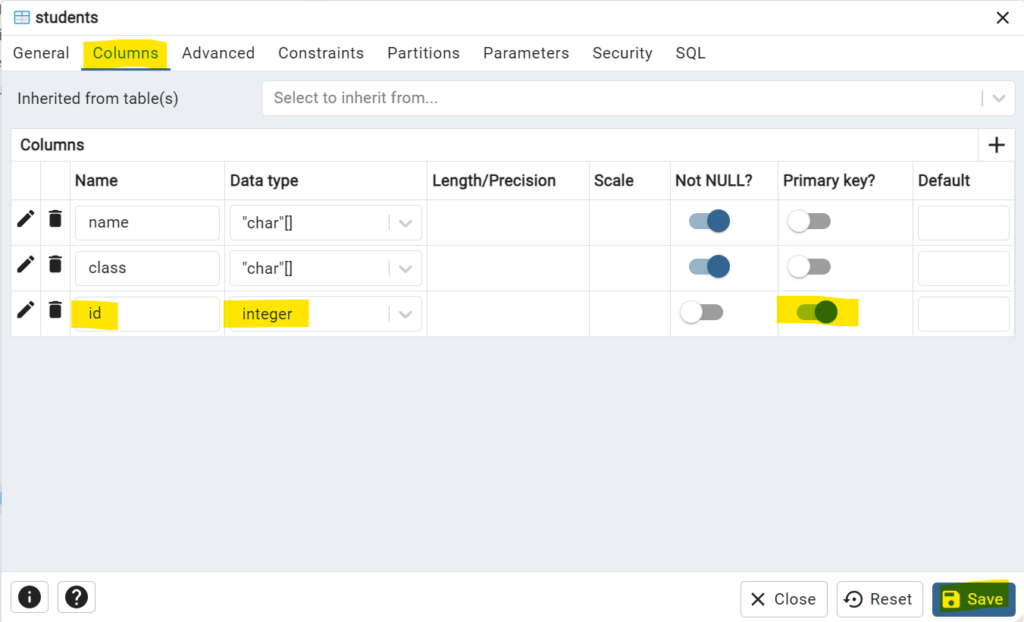
Let us add a column named “student_id” as integer and Primary key constraint.

You can add as many new columns as needed by repeating this process.
Once you have added all the columns, click Save to apply the changes. pgAdmin will execute the appropriate SQL commands in the background.
Step 5: Verify the Changes
To confirm the changes, you can view the table structure using the Query Tool. Open the Query Tool and run the SELECT command as shown in the following screenshot:

This command displays the table’s structure, including the new columns.
You can also verify the addition by right-clicking on the table, selecting View/Edit Data, and choosing All Rows.

The new columns should appear as part of the table structure, initialized with default values or NULL, depending on the constraints you defined.
Conclusion
Adding columns to a table in pgAdmin 4 is a simple process that allows you to extend your database schema as needed. By using the graphical interface, you can define column names, data types, and constraints without writing SQL manually. Always review the table structure after making changes to ensure accuracy and consistency.
