Back Up a Database in pgAdmin 4
Backing up a database is an essential task to safeguard your data and ensure you can restore it in case of unexpected failures, accidental deletions, or corruption.
pgAdmin 4 provides an intuitive way to back up databases with a graphical interface, making the process simple for PostgreSQL users.
In this tutorial, we will guide you through the steps to back up a database using pgAdmin 4.
Prerequisites
Before starting the backup process, ensure you meet the following prerequisites:
You have pgAdmin 4 installed on your system and can access it. You have sufficient privileges on the database you intend to back up. The PostgreSQL server is running and accessible from pgAdmin 4. Adequate disk space is available to store the backup file.
Once these prerequisites are met, you can proceed with the backup steps.
Step 1: Launch pgAdmin 4
Open pgAdmin 4 from your applications menu or access it via your web browser, depending on your installation method. Once pgAdmin 4 is launched, you will see the dashboard displaying the available servers and databases on the left-hand navigation panel.
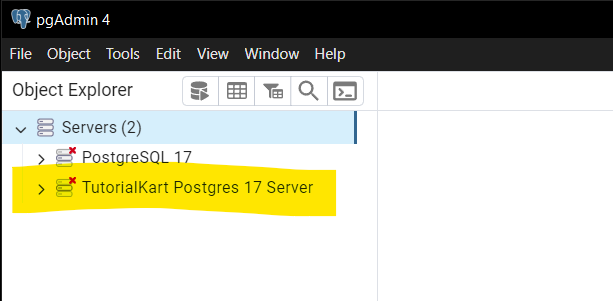
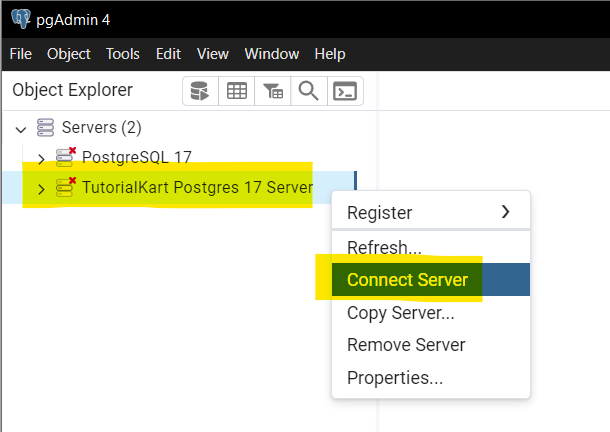
Ensure that the server hosting the database you want to back up is connected. If it is not, right-click on the server node and select Connect to establish a connection.
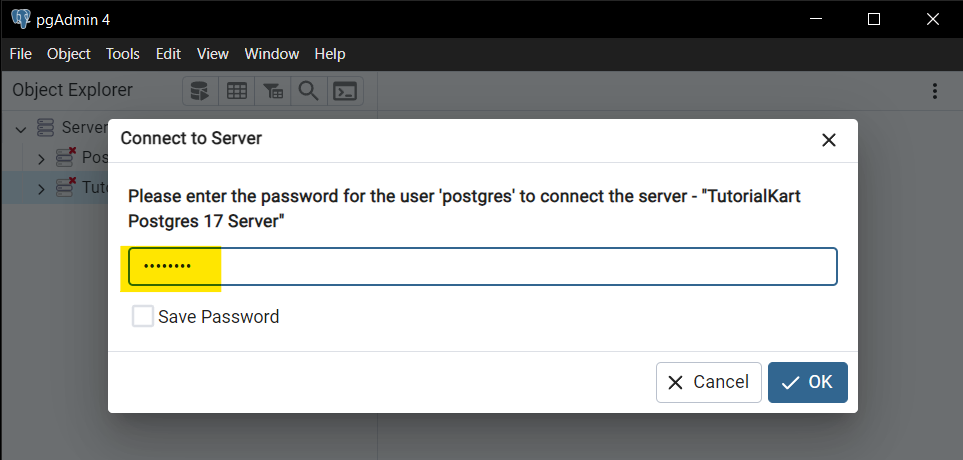
Enter password, if prompted for, and click OK.
Step 2: Locate the Database to Back Up
In the left-hand navigation panel, expand the “Servers” node to view the list of connected servers. Next, expand the server node where the target database resides. Click on the Databases node to see all the databases available on that server. Select the database you wish to back up by clicking on its name.
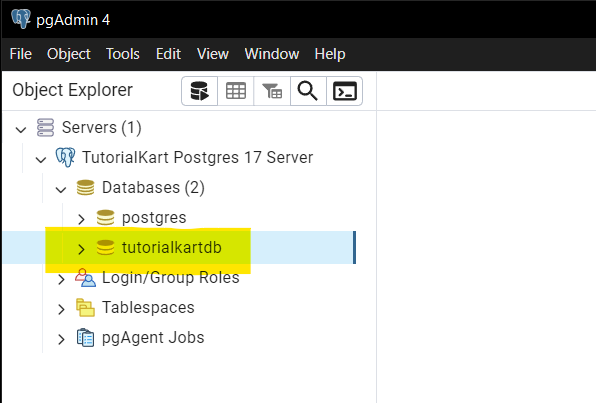
Verify the database details in the main panel to ensure you have selected the correct one.
Step 3: Open the Backup Dialog
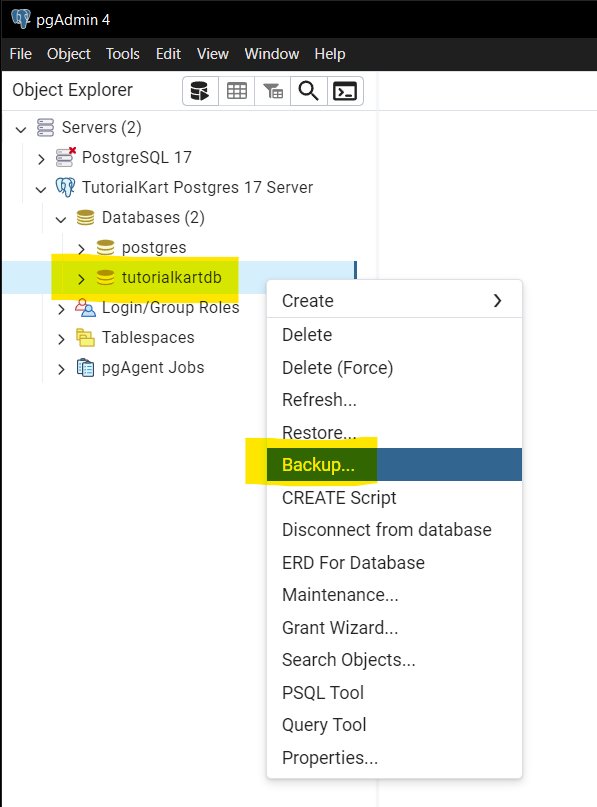
Right-click on the selected database to open its context menu. From the menu, choose Backup.... This action will open the “Backup” dialog box, where you can specify the backup options.
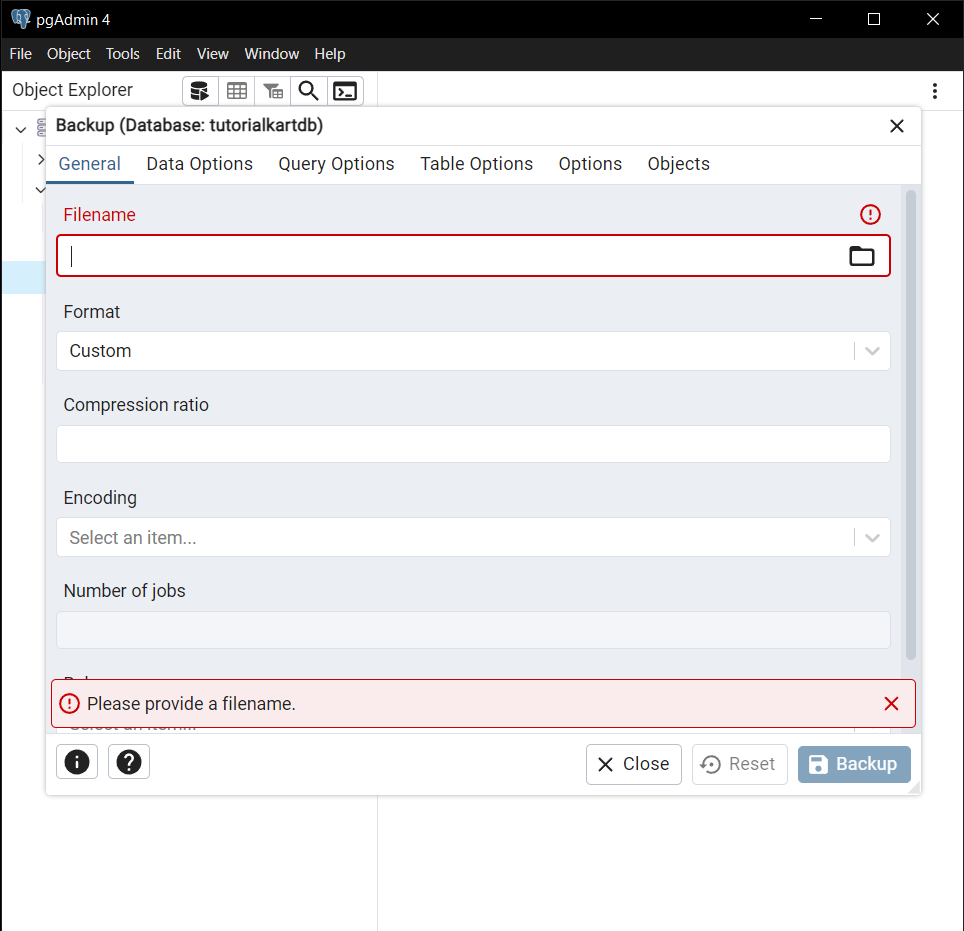
The “Backup” dialog provides several fields and options to configure the backup process according to your needs.
Step 4: Configure Backup Options
In the “Backup” dialog, configure the following options:
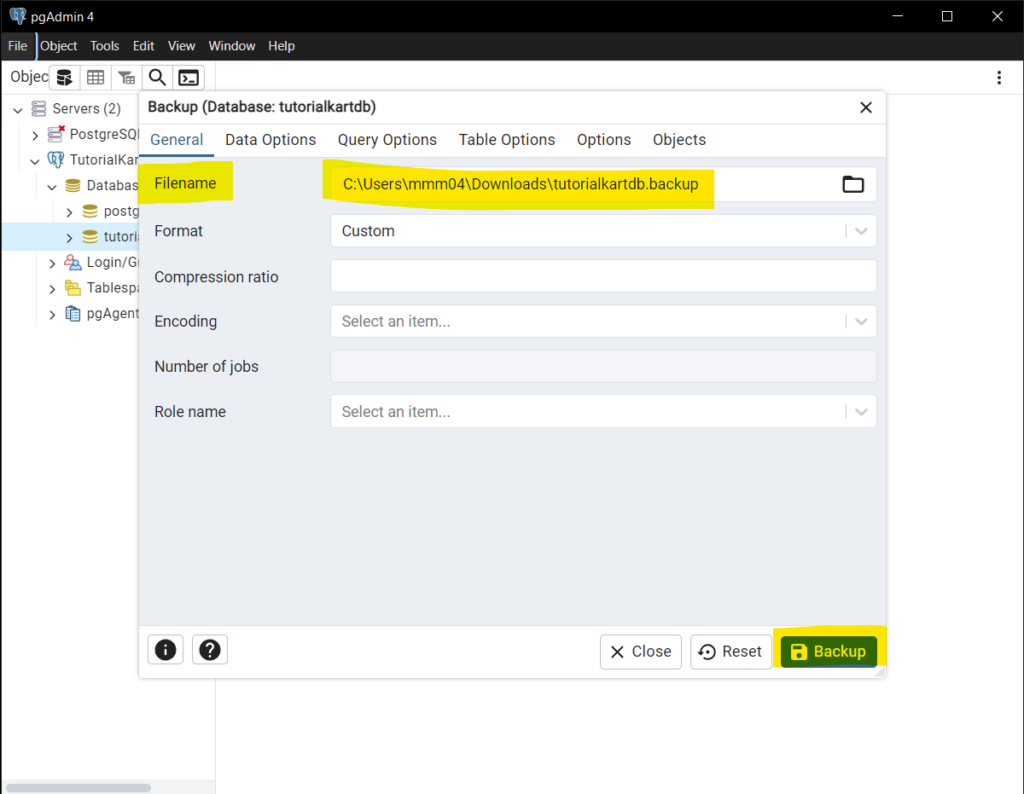
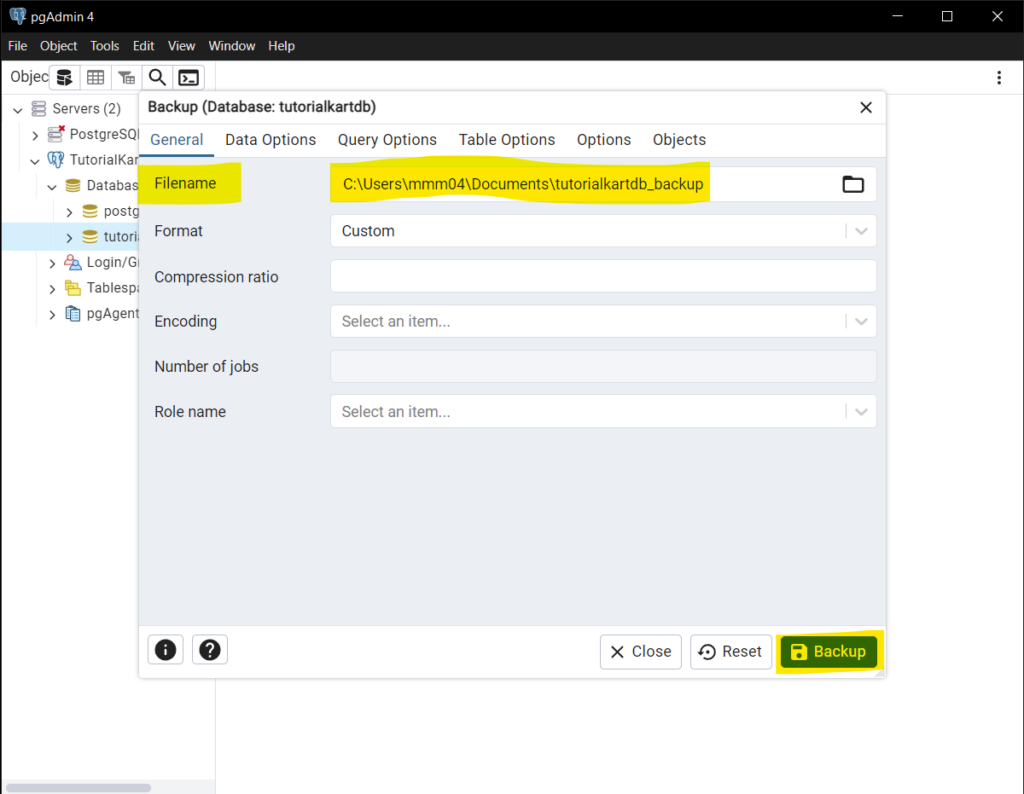
Filename: Specify the file path and name where the backup will be stored. You can use the file picker to choose a directory or manually enter the path (e.g., C:/backups/my_database.backup or /home/user/backups/my_database.backup).
Format: Select the format of the backup file from the dropdown menu. The available formats are:
Custom: Recommended for most scenarios. It allows selective restoration of specific objects or data.
Plain: Creates a plain-text SQL file. This is human-readable but does not support selective restoration.
Directory: Produces a directory structure containing the backup data.
Other Options: You can adjust additional settings such as compression ratio, excluding or including certain data, and parallel jobs. For most users, the default options are sufficient.
After configuring the options, click Backup to start the backup process.
Step 5: Monitor the Backup Process
Once you initiate the backup, pgAdmin 4 will display a progress dialog showing the status of the operation. This includes the percentage completed and any messages generated during the process.
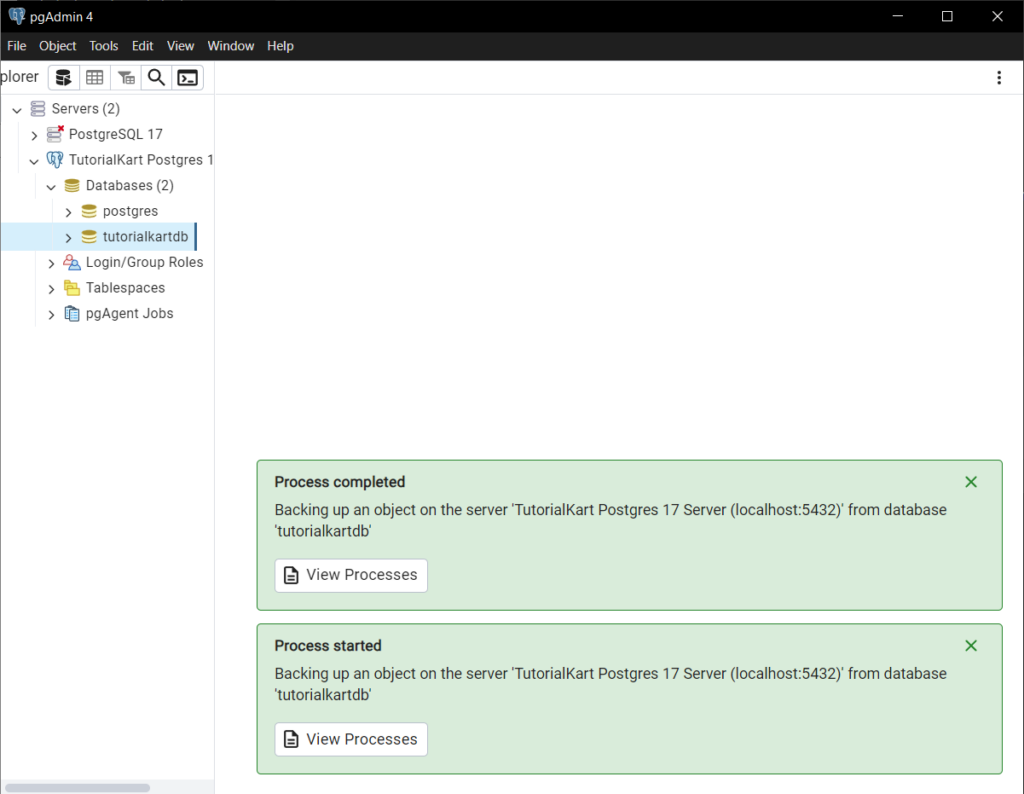
The backup duration depends on the size of the database and the options you selected. Once the process completes, a success message will appear in the dialog box as shown in the following screenshot.
If there are any errors, they will also be displayed, allowing you to troubleshoot if necessary.
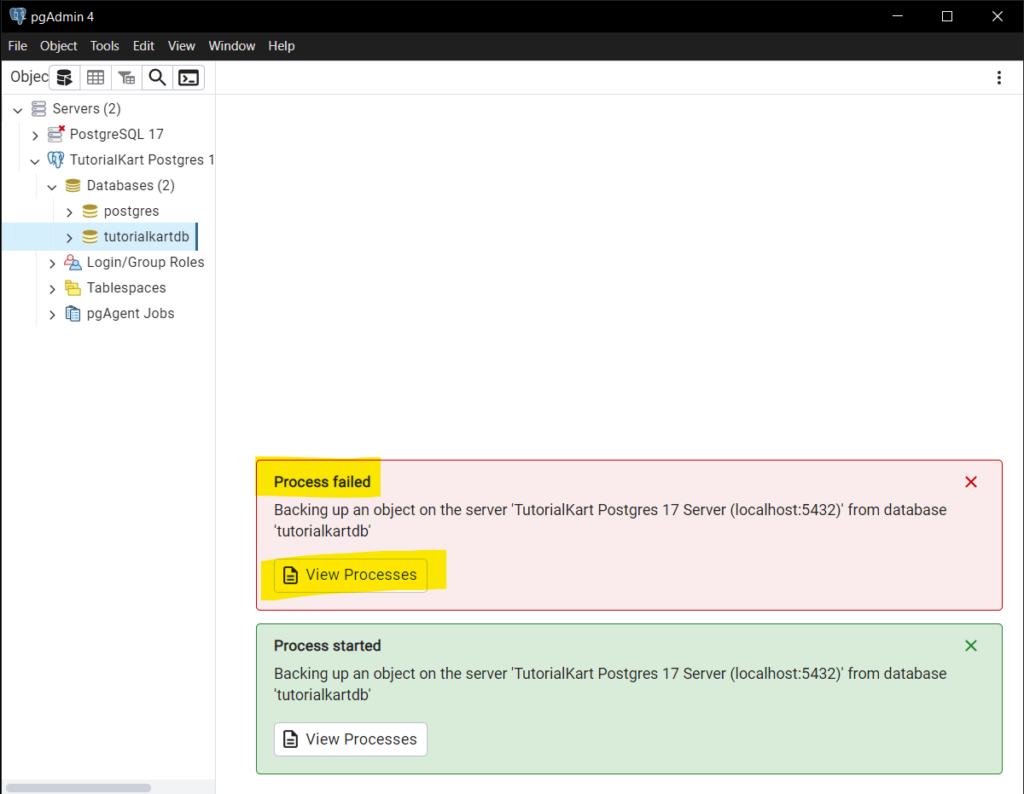
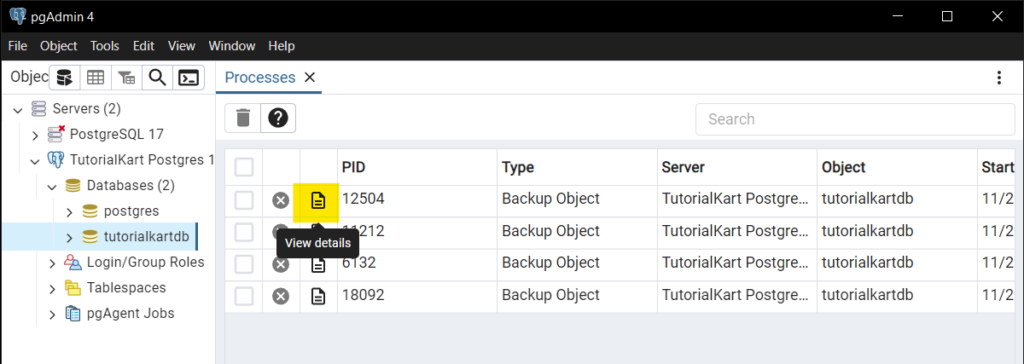
Click on the View Processes in the Process failed dialog. Then click on the View details icon as shown in the following.
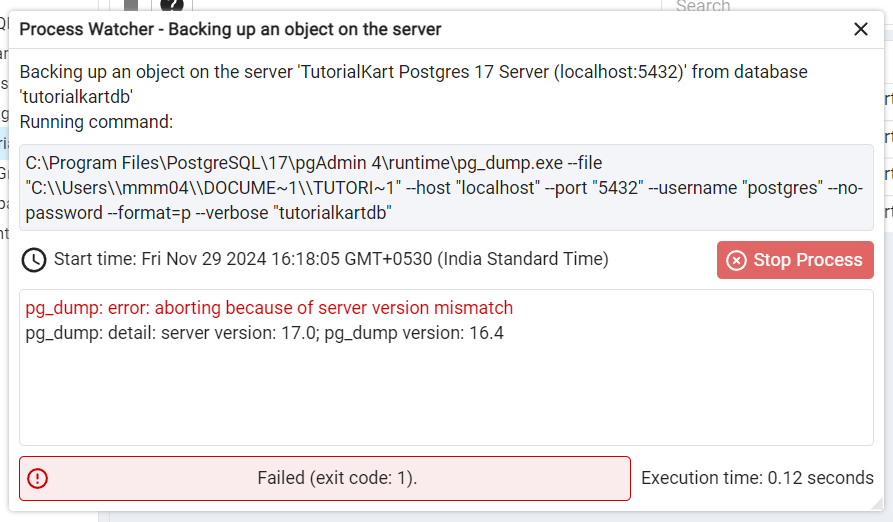
You would see an error description as shown in the following. The error may not be exactly what is shown in the below screenshot, but it gives a lead on how to solve the issue.
Step 6: Verify the Backup File
Navigate to the directory where you saved the backup file. Ensure that the file exists and matches the name and format you specified. For added confidence, you can test the backup by restoring it to a different database to verify data integrity.
Testing backups periodically ensures they can be relied upon in case of data recovery needs.
Conclusion
Backing up a database in pgAdmin 4 is a straightforward and essential process for safeguarding your PostgreSQL data. By following the steps outlined in this guide, you can create reliable backups tailored to your needs. Regularly backing up your databases ensures that your data is secure and recoverable, providing peace of mind for developers and administrators alike.
