Create a Table in pgAdmin 4
Tables are fundamental components of a database, used to store structured data in rows and columns. pgAdmin 4 provides a simple and intuitive interface for creating tables in PostgreSQL databases.
In this tutorial, we will walk you through the step-by-step process of creating a table in pgAdmin 4, complete with configuration options and explanations.
Prerequisites
Before creating a table, ensure you meet the following prerequisites:
You have pgAdmin 4 installed and running on your system. You are connected to the PostgreSQL server containing the database where you want to create the table. You have appropriate privileges to create tables in the database.
Step 1: Launch pgAdmin 4
Open pgAdmin 4 from your applications menu or access it via your web browser if installed as a web-based tool. The dashboard displays a tree structure on the left-hand side, showing the available servers, databases, and other database objects.
Ensure you are connected to the PostgreSQL server hosting the database where you want to create the table. If the server is not connected, right-click on the server node and select Connect.
Step 2: Locate the Database
In the left-hand navigation panel, expand the server node to view the databases hosted on the server.
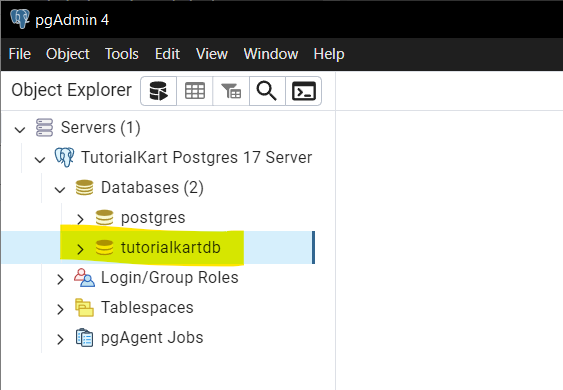
Click on the Databases node, and then expand the specific database where you want to create the table.
Let us say that we would like create a table in tutorialkartdb database.
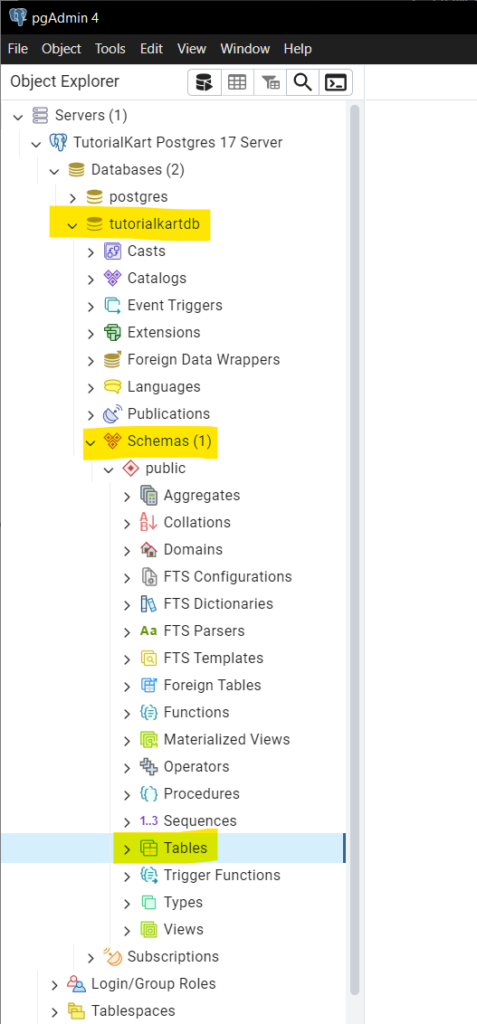
Within the expanded database, locate the Schemas node, and expand it to see its child nodes. Expand the public schema (or the schema where you want the table) to view its existing tables and other objects.
Step 3: Open the Create Table Dialog
Right-click on the Tables node under the schema and select Create, then choose Table.... This action opens the “Create – Table” dialog box, where you can configure the table’s properties and columns.
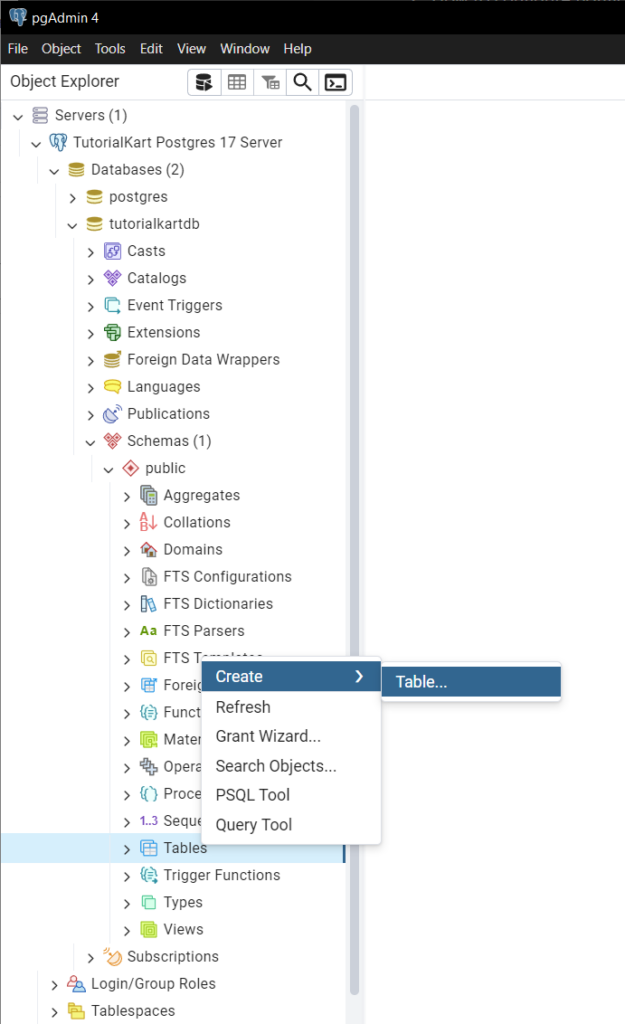
The “Create – Table” dialog provides several tabs to specify the table’s details, including columns, constraints, and other configurations.
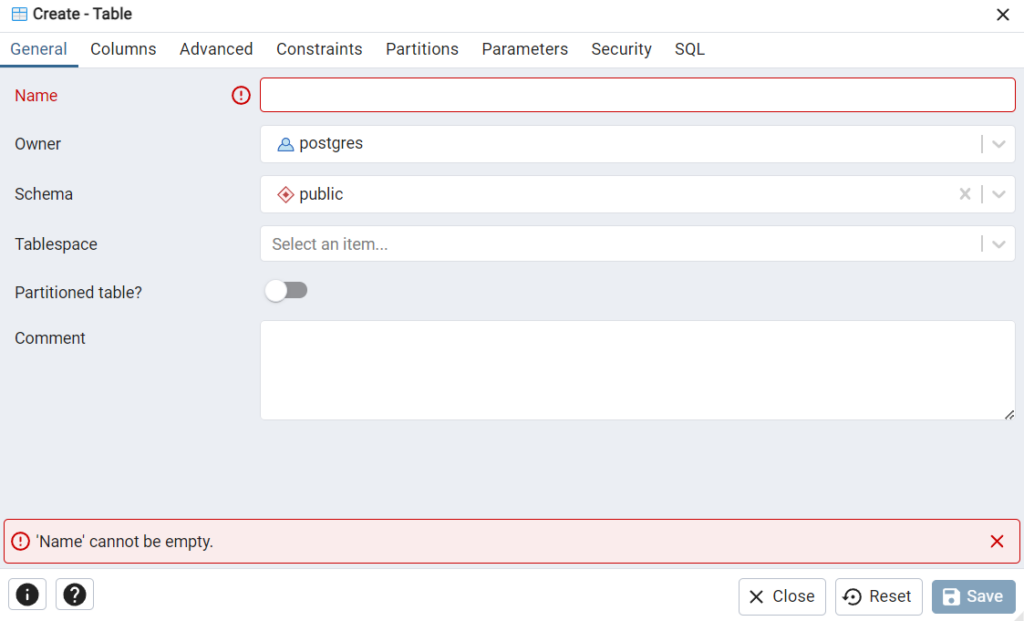
Step 4: Configure the Table Properties
In the “General” tab of the “Create – Table” dialog:
Name: Enter the name of the table. For example, employees.
Owner: Specify the owner of the table. By default, this is the user you are currently logged in as.
Schema: Select the schema where the table will be created. By default, this is public.
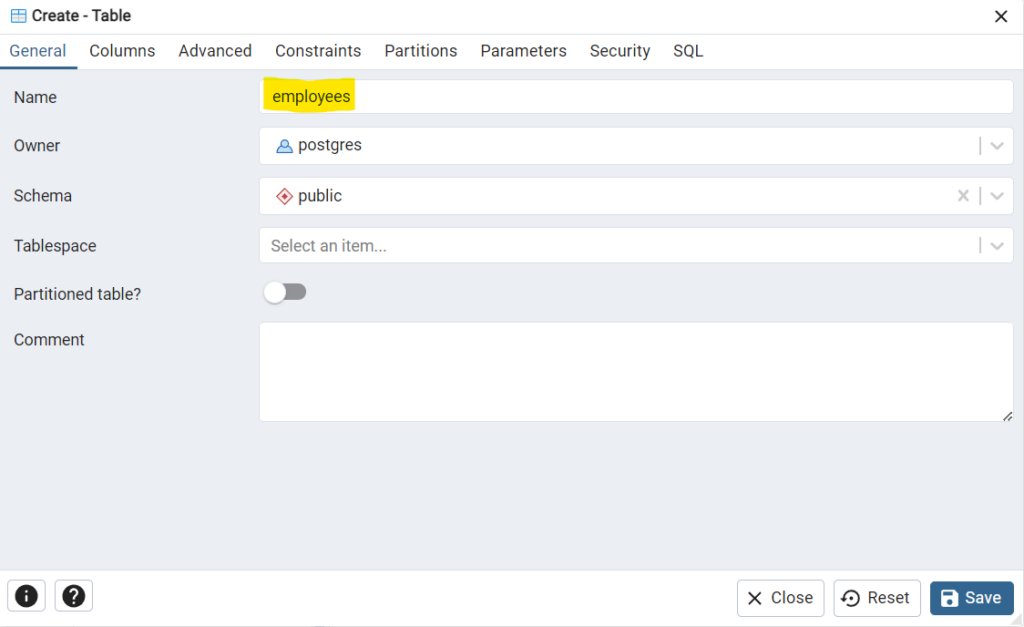
You can optionally add a comment describing the purpose of the table in the Comment field.
Step 5: Define Table Columns
Switch to the Columns tab to define the structure of the table. Here, you can add the columns that will make up the table:

Click the + (Add) button to add a new column. For each column, specify the following: Name: Enter the name of the column, such as id, name, or salary. Data Type: Select the data type of the column, such as integer, text, or numeric. Constraints: Add constraints as needed, such as NOT NULL, Primary Key, or Unique.
For example, you might define the following columns:
id: Integer, Primary Key, NOT NULL, Auto-increment. name: Text, NOT NULL. salary: Numeric, optional.
Add all the columns you need and configure their properties.
Step 6: Save the Table
Once you’ve configured the table properties and defined its columns, click Save to create the table. The dialog will close, and the new table will appear under the Tables node in the left-hand navigation panel.
You can expand the table node to view its columns, constraints, indexes, and other properties.
Step 7: Verify the Table
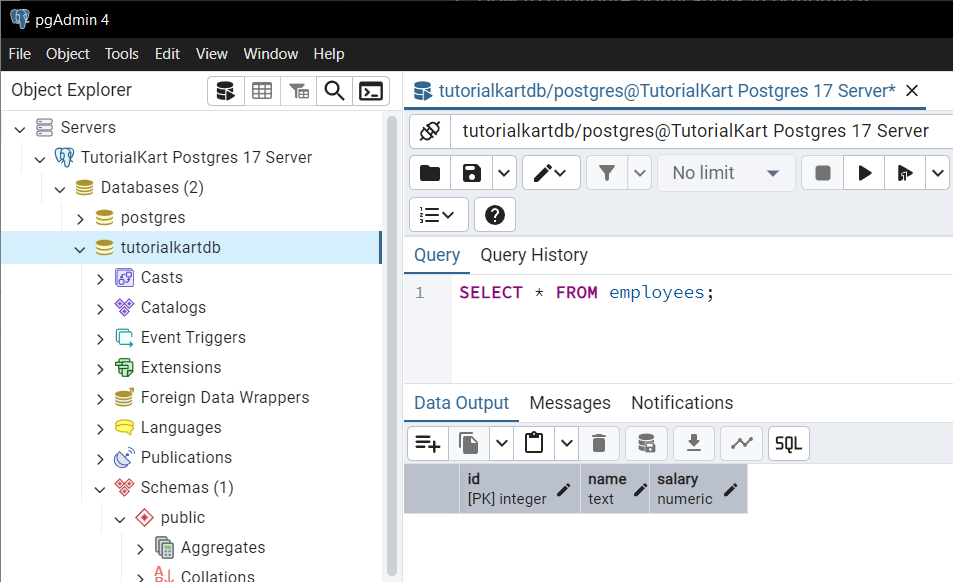
To verify that the table has been created successfully, right-click on the table name and select View/Edit Data, then choose All Rows. This will display the table’s structure and any data it contains (it will be empty initially).
You can also use the Query Tool to run the following SQL command:
SELECT * FROM employees;The result should show the table structure with no rows if the table was created successfully.
