Delete a Database in pgAdmin 4
In this tutorial, we will guide you through the detailed steps to delete a database in pgAdmin 4.
This process involves connecting to your PostgreSQL server, locating the database you wish to delete, and executing the deletion.
Please proceed with caution, as deleting a database is irreversible and will result in the loss of all data contained within it.
Prerequisites
Before you begin, ensure that you have pgAdmin 4 installed on your system and that you have the necessary permissions to delete databases on your PostgreSQL server. You should also back up any important data, as deleting a database cannot be undone.
Step 1: Launch pgAdmin 4
Start by opening pgAdmin 4 on your computer. You can find it in your applications menu or launch it via your web browser if it’s set up as a web-based application.
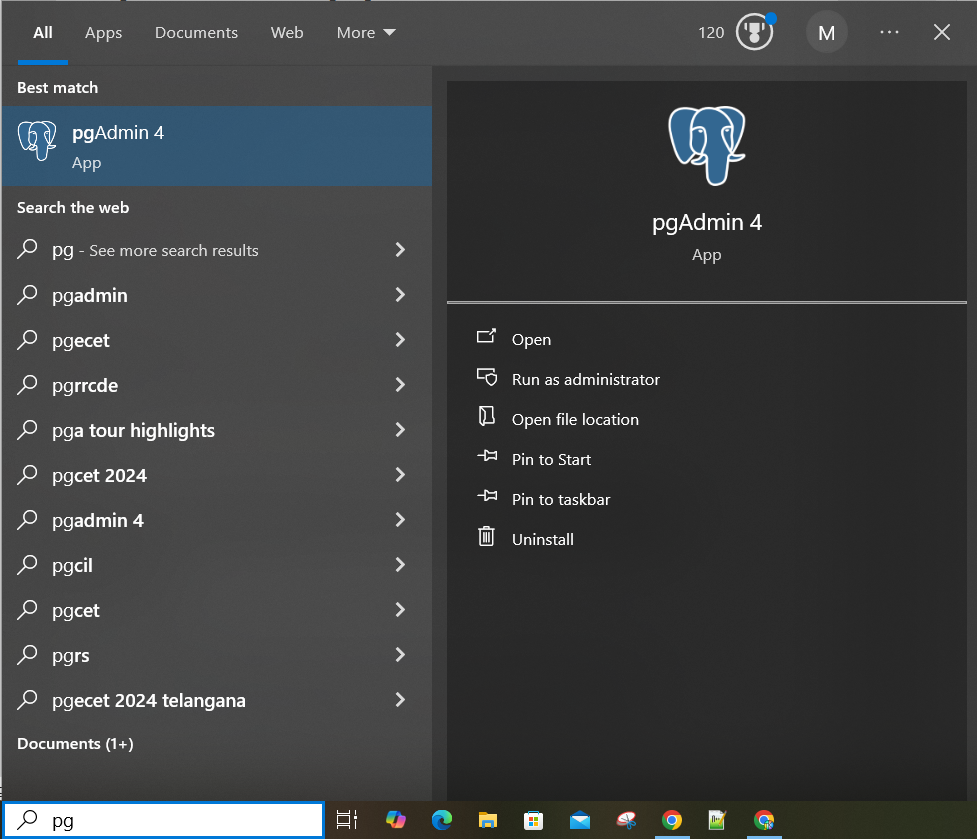
Once pgAdmin 4 is open, you’ll be greeted with the dashboard, which displays your server groups and PostgreSQL servers.
The dashboard serves as the central hub for all your database management activities. It provides a hierarchical view of your servers, databases, schemas, and other database objects.
Step 2: Connect to Your PostgreSQL Server
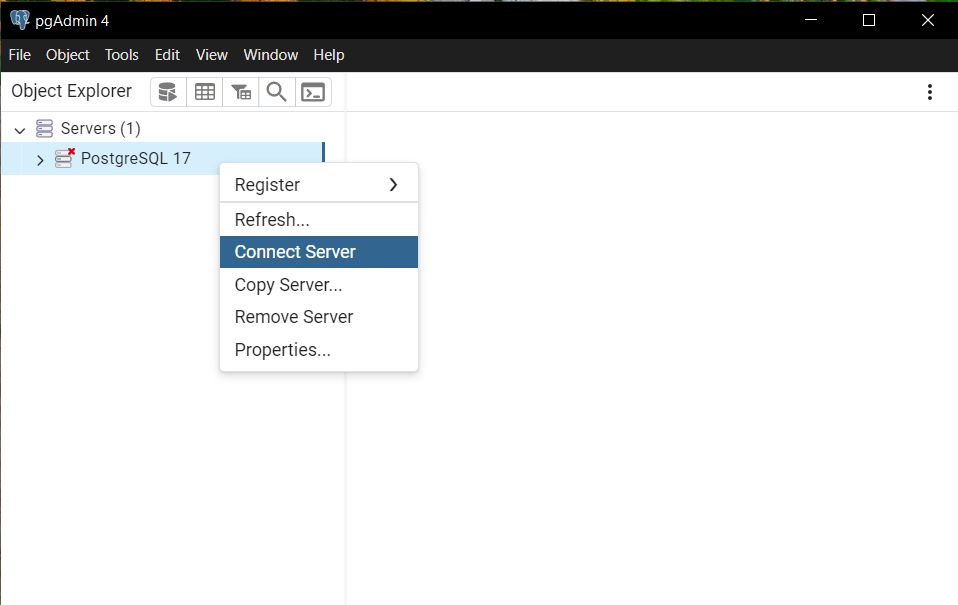
If your PostgreSQL server is not already connected, navigate to the “Servers” section in the left-hand tree control. Locate the server you want to connect to. Right-click on the server name and select the Connect option from the context menu.
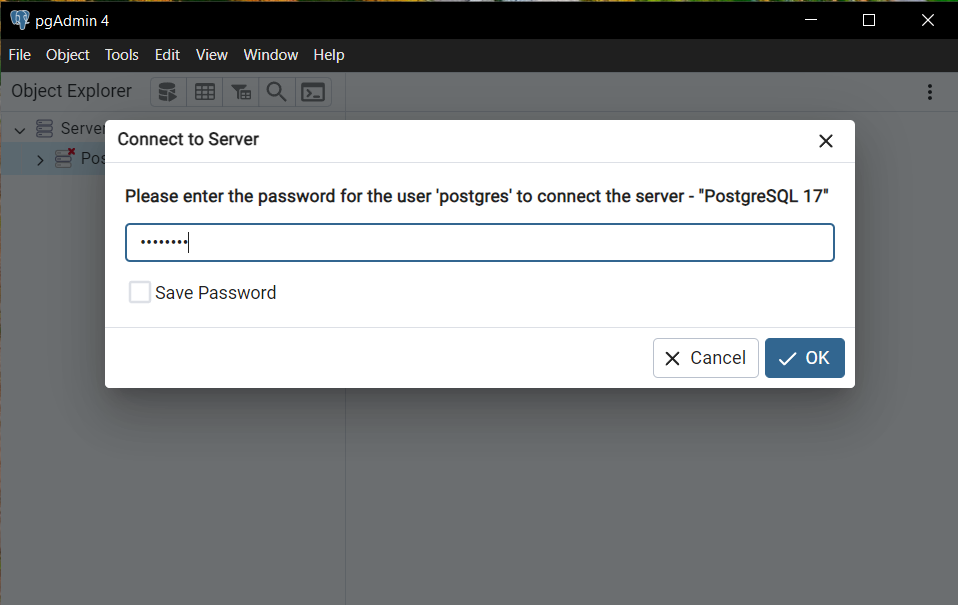
If prompted, enter the password associated with the server and click OK.
Upon successful authentication, the server node will expand, revealing its databases and other components.
Ensure that you have administrative privileges on the server to perform database deletion. Without the appropriate permissions, you may encounter errors during the deletion process.
Step 3: Locate the Database to Delete
In the expanded server tree, find the Databases node and click on it to display the list of databases available on the server. Scroll through the list to locate the database you wish to delete. Take care to select the correct database, as deleting the wrong one could lead to unintended data loss.
Clicking on the database name will display its properties and statistics in the main panel, allowing you to verify that you’ve selected the correct database.
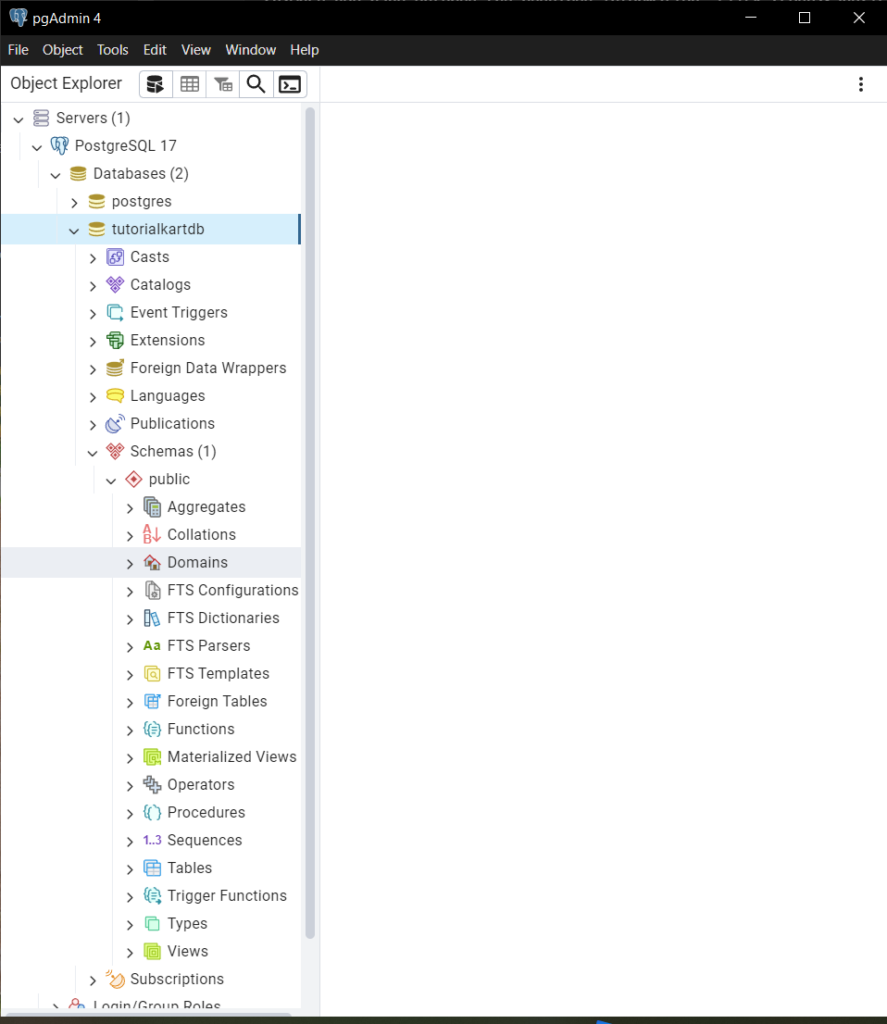
Note that you cannot delete the database if you are currently connected to it. Ensure that you are connected to a different database, such as the default postgres database, before proceeding.
Step 4: Disconnect Active Sessions (If Necessary)
Consider that we would like to delete tutorialkartdb.
Before you can delete a database, all active connections to it must be terminated. If other users or processes are connected to the database, you will need to disconnect them.
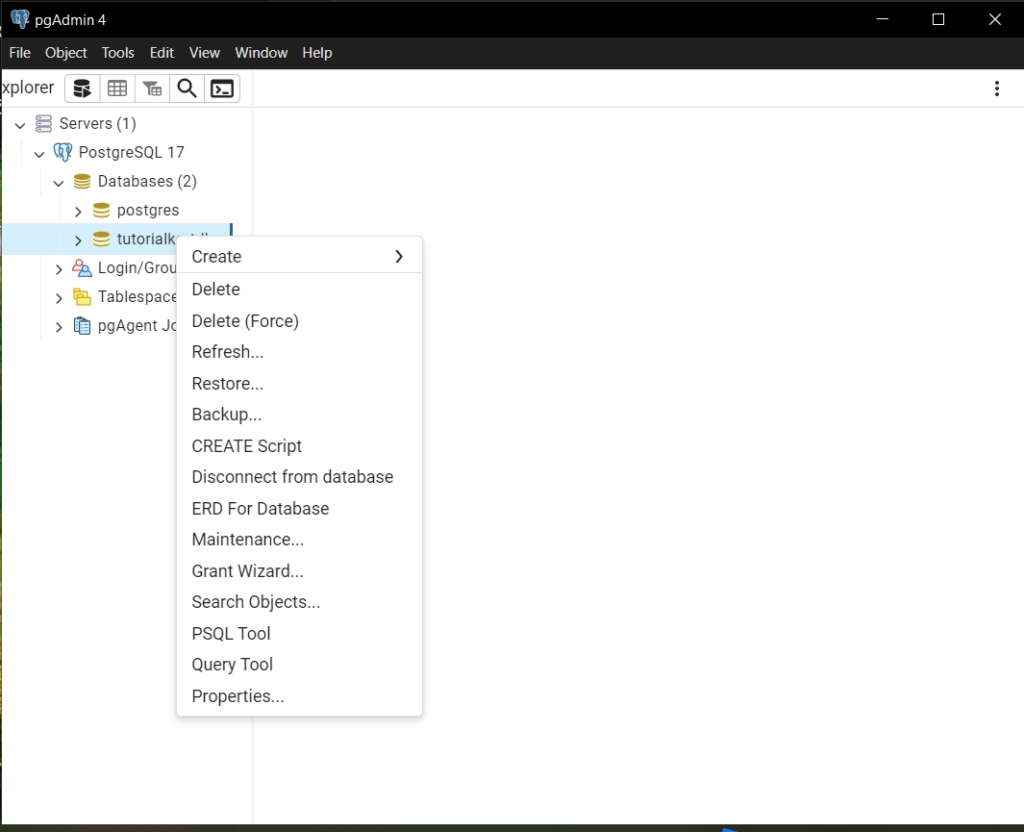
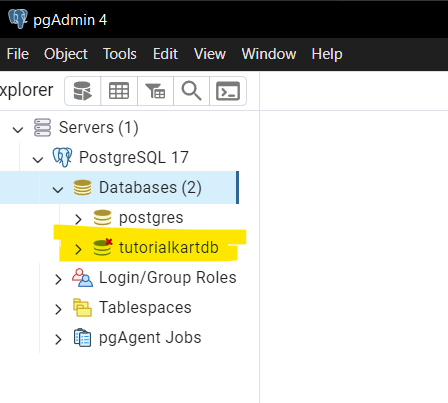
Click on Disconnect form database. You would see a red cross mark on the database as shown in the following.
To view active connections, you can run a query on the pg_stat_activity system view in a different database. In this case we select postgres database and then open the Query Tool.
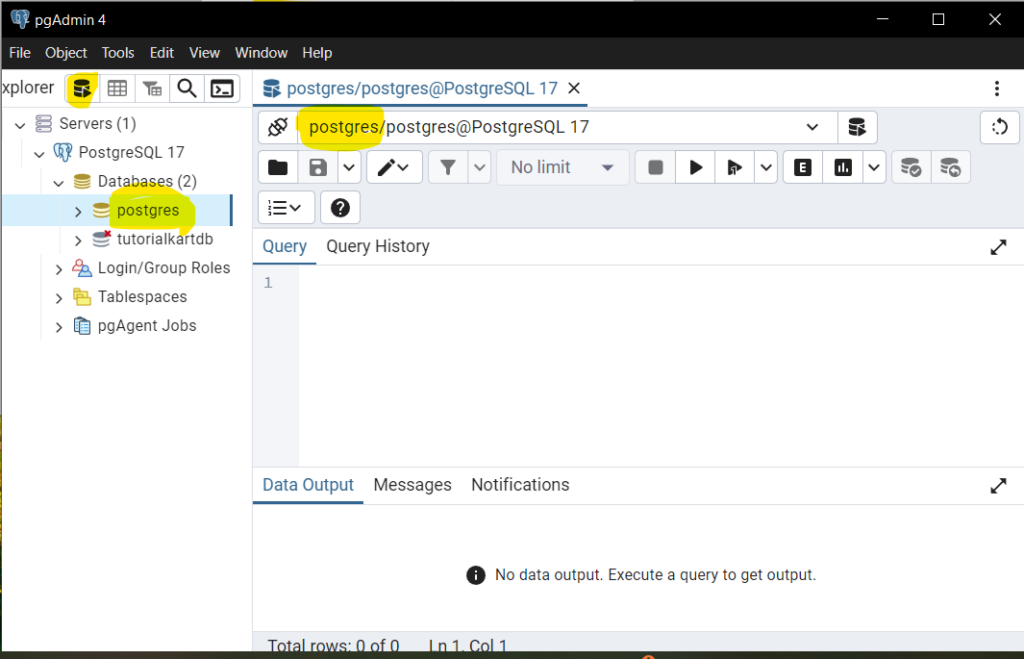
Open the Query Tool by clicking on the Tools menu and selecting Query Tool. In the Query Editor, enter the following SQL command:
SELECT pid, pg_terminate_backend(pid)
FROM pg_stat_activity
WHERE datname = 'your_database_name';
Replace 'your_database_name' with the name of the database you intend to delete. In this example, since we are going to delete tutorialkartdb, we will use the following command.
SELECT pid, pg_terminate_backend(pid)
FROM pg_stat_activity
WHERE datname = 'tutorialkartdb';
This command will terminate all active connections to the specified database.
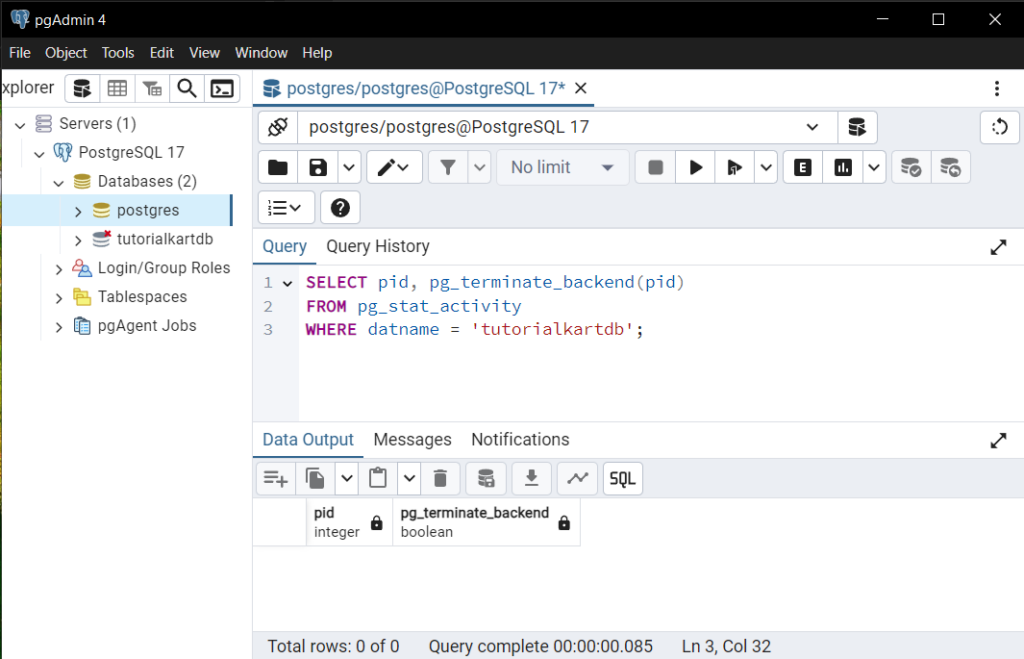
Execute the query by clicking the Execute button (usually represented by a lightning bolt icon). The result pane will display the terminated processes, confirming that all connections have been closed.
Be cautious when terminating connections, as this may disrupt active users or applications connected to the database.
Step 5: Delete the Database
With all active connections terminated, you can now proceed to delete the database. In the left-hand tree control, right-click on the name of the database you wish to delete. From the context menu that appears, select the Delete/Drop option.
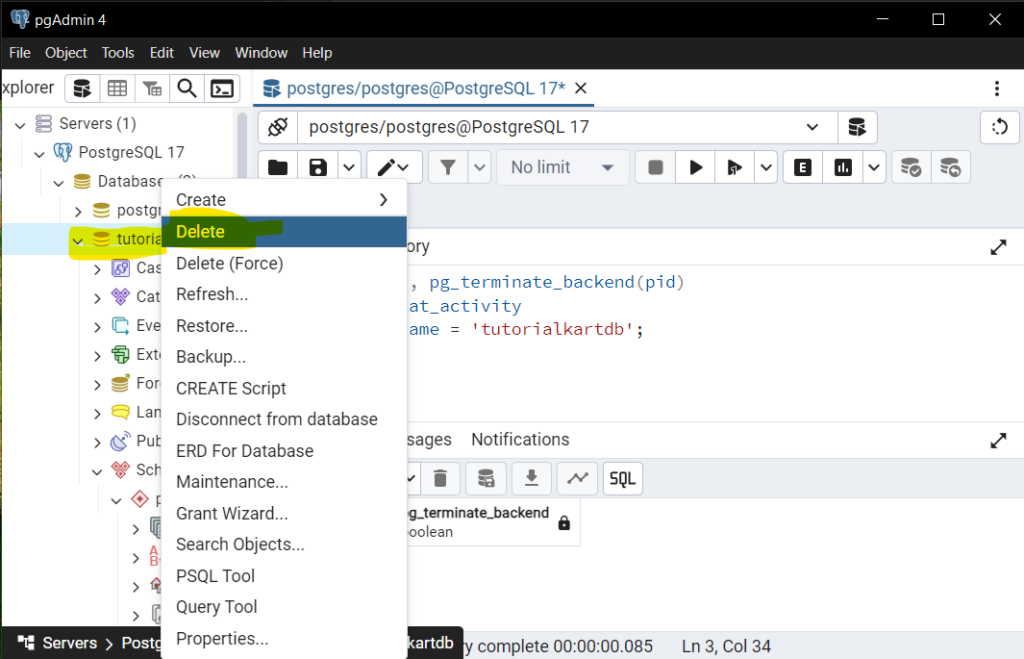
A confirmation dialog box will appear, asking you to confirm the deletion. The dialog will display a warning message indicating that this action is irreversible and that all data within the database will be permanently lost. To proceed, click the Yes button.
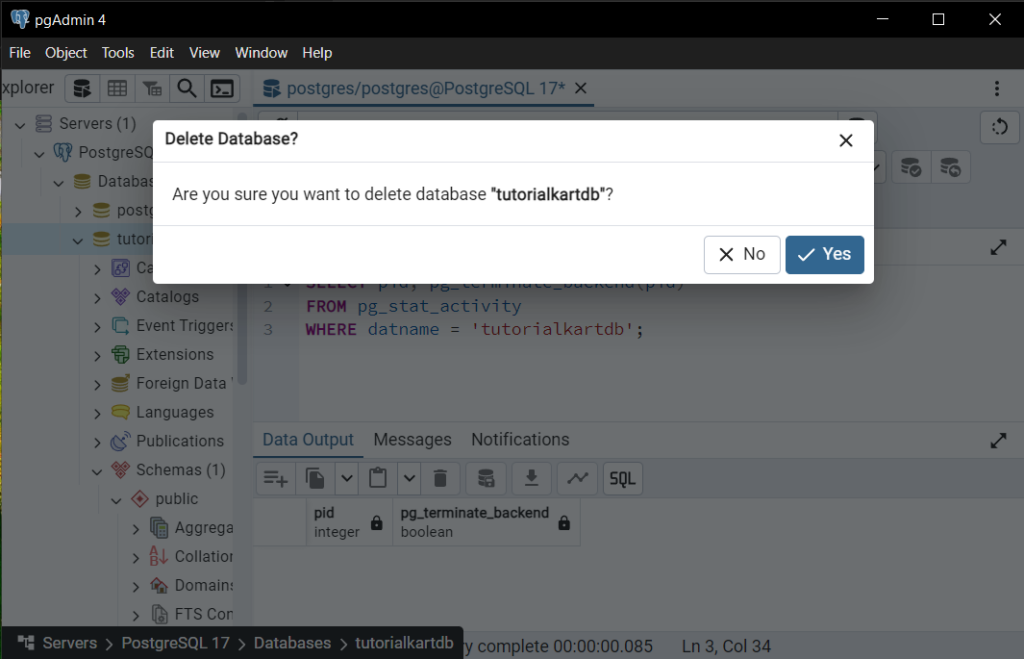
pgAdmin 4 will execute the DROP DATABASE command to remove the database from the server. If the operation is successful, the database will disappear from the list under the “Databases” node.
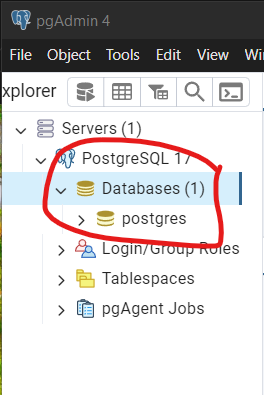
If you encounter any errors during this step, double-check that all active connections have been terminated and that you have the necessary permissions to delete the database.
Step 6: Verify the Deletion
To confirm that the database has been successfully deleted, refresh the “Databases” node in the left-hand tree control. You can do this by right-clicking on the “Databases” node and selecting Refresh.
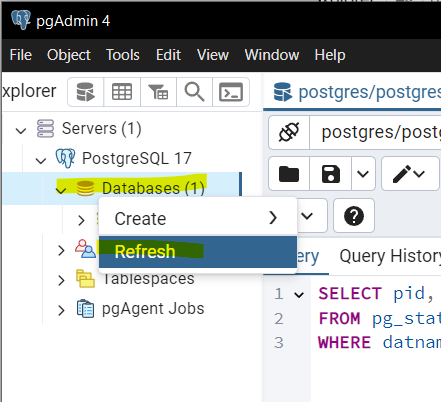
The deleted database should no longer appear in the list. Additionally, you can attempt to connect to the database to ensure it is no longer accessible.
Conclusion
Deleting a database in pgAdmin 4 involves connecting to your PostgreSQL server, ensuring no active connections exist to the database, and executing the deletion through the GUI. By following these detailed steps, you can safely and effectively remove unwanted databases from your server.
