Delete a Table in pgAdmin 4
In PostgreSQL, deleting a table removes the table definition and all its data permanently from the database. pgAdmin 4 offers an intuitive graphical interface for managing tables, including deleting them when they are no longer needed.
In this PostgreSQL tutorial, we will provide a detailed step-by-step guide on how to delete a table in pgAdmin 4.
Important: Deleting a table is irreversible and will result in the loss of all data stored in the table. Ensure you have backups if needed before proceeding.
Step 1: Launch pgAdmin 4
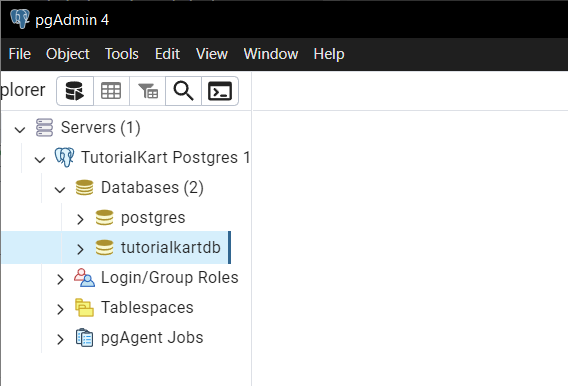
Open pgAdmin 4 from your applications menu or access it via your web browser. Once the application is launched, the dashboard displays a tree structure on the left-hand side showing the connected servers, databases, schemas, and tables.

Ensure that you are connected to the PostgreSQL server hosting the table you wish to delete. If not, right-click on the server node and select Connect.
Step 2: Locate the Table
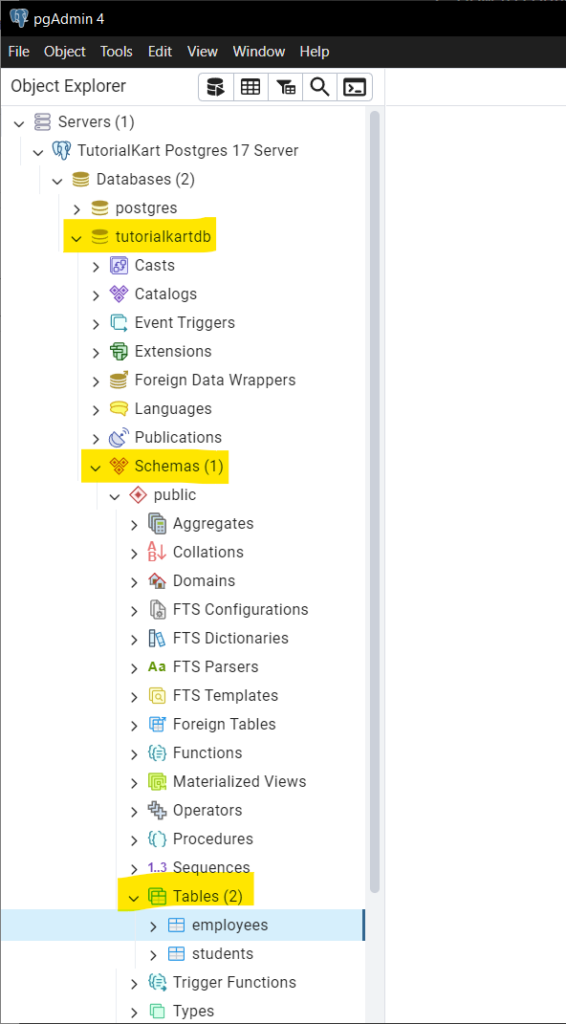
In the left-hand navigation panel, expand the server node where your target database resides. Under the server, expand the Databases node and select the database containing the table you wish to delete. Expand the database to reveal the Schemas node.
Expand the public schema (or the schema containing the table) and locate the Tables node. Click on the Tables node to view the list of tables within the schema.

Find the table you want to delete in this list. Let us delete employees table.
Step 3: Open the Context Menu
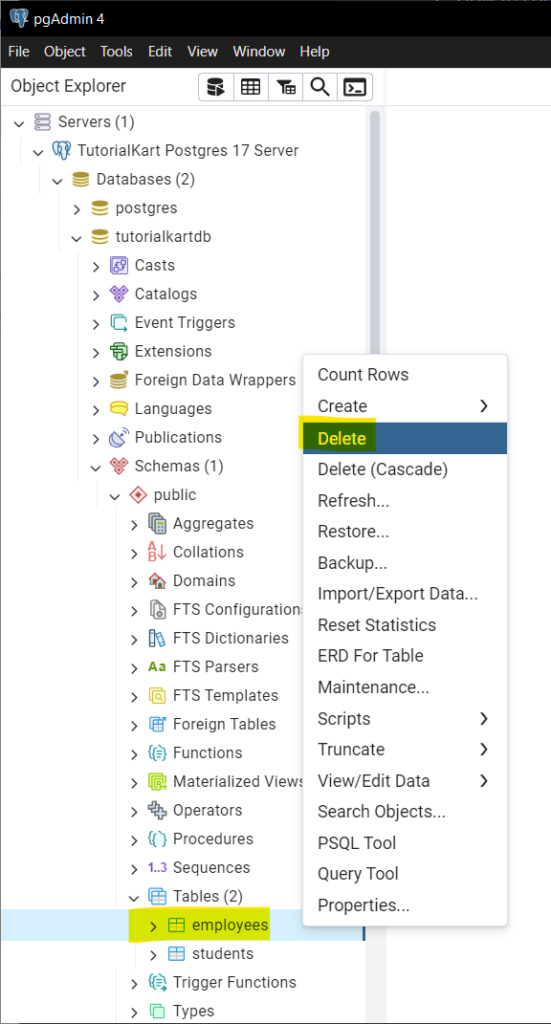
Right-click on the table name you wish to delete. A context menu will appear, showing several options for managing the table. From this menu, select the Delete/Drop option.

This action initiates the table deletion process and prompts a confirmation dialog.
Step 4: Confirm the Deletion
After selecting Delete/Drop, a confirmation dialog box will appear. The dialog warns you that deleting the table is irreversible and will remove all its data permanently.

To proceed with the deletion, click Yes. If you are unsure or selected the wrong table, click No to cancel the operation.
Once you confirm the deletion, pgAdmin 4 will execute the DROP TABLE command in the background, and the table will be removed from the database.
DROP TABLE public.table_name;Replace table_name with the name of the table you deleted. This command is executed automatically by pgAdmin when you confirm the deletion.
Step 5: Verify the Deletion
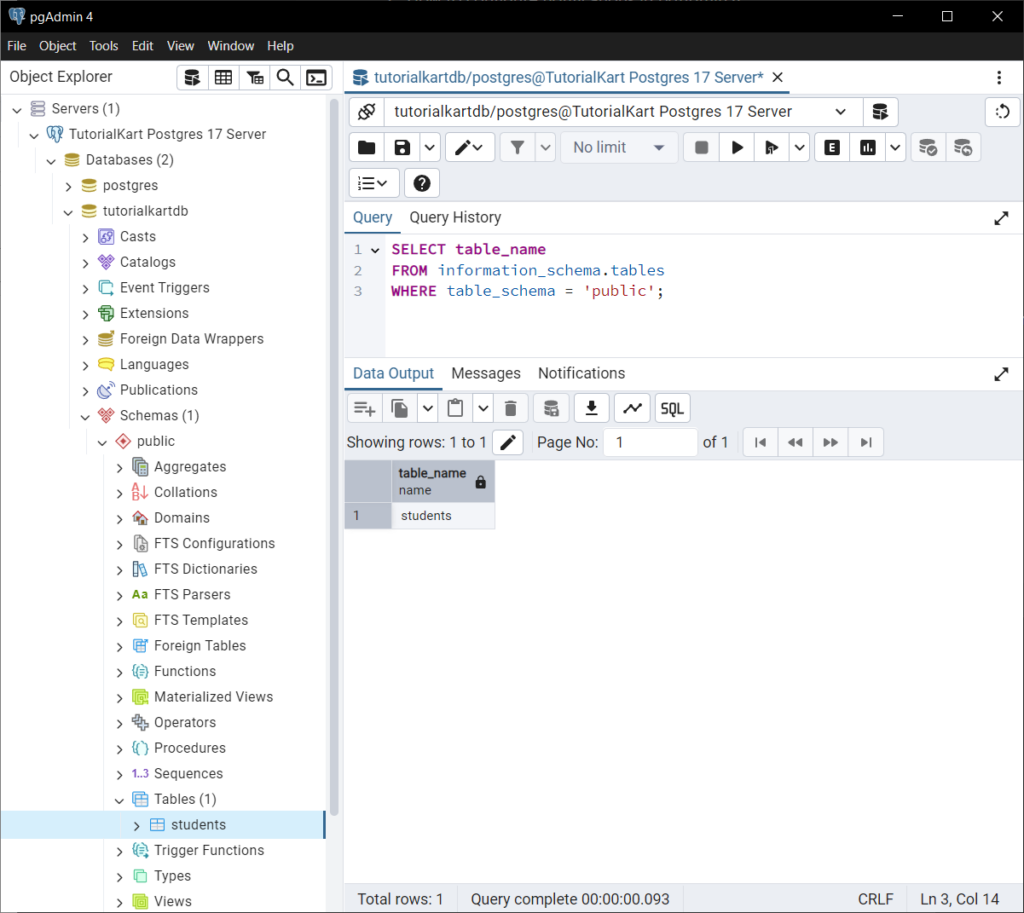
To ensure the table has been successfully deleted, refresh the Tables node by right-clicking on it and selecting Refresh. The deleted table should no longer appear in the list of tables.
Additionally, you can verify the deletion using the Query Tool. Run the following SQL query to check if the table exists:
SELECT table_name
FROM information_schema.tables
WHERE table_schema = 'public';
The result should no longer include the name of the deleted table.

Conclusion
Deleting a table in pgAdmin 4 involves selecting the table, using the context menu, and confirming the deletion. This operation is irreversible, so it’s essential to double-check your selection and back up any important data before proceeding. By following the steps in this guide, you can safely and efficiently delete unwanted tables from your PostgreSQL database.
