Delete Columns from a Table in pgAdmin 4
In PostgreSQL, deleting a column removes it permanently from a table along with its data. This operation can be necessary when restructuring a table or removing unused data fields. pgAdmin 4 provides an intuitive graphical interface for modifying table structures, including deleting columns.
In this PostgreSQL tutorial, we will go through a step-by-step guide on how to delete columns from a table in pgAdmin.
Note: Deleting a column is irreversible, and all data in the column will be lost. Ensure you back up your data or database if necessary before proceeding.
Prerequisites
Before deleting a column, ensure the following:
You have pgAdmin 4 installed and running on your system. You are connected to the PostgreSQL server and database containing the table. You have sufficient privileges to modify the table structure.
Once these prerequisites are met, follow the steps below to delete columns from your table.
Step 1: Launch pgAdmin 4
Open pgAdmin 4 from your applications menu or web browser. The dashboard displays a tree structure on the left-hand navigation panel, showing connected PostgreSQL servers and databases.

Ensure the PostgreSQL server hosting the table is connected. If not, right-click on the server node and select Connect.
Step 2: Locate the Table
In the left-hand navigation panel, expand the server node to view its databases. Click on the database containing the table you want to modify. Expand the Schemas node, then expand the public schema (or the schema containing your table), and locate the Tables node.
Click on the Tables node to display the list of tables in the schema. Select the table from which you want to delete a column.

Step 3: Open the Table Properties Dialog
Right-click on the table name and select Properties from the context menu. This action opens the “Table Properties” dialog box, where you can view and modify the table’s structure.
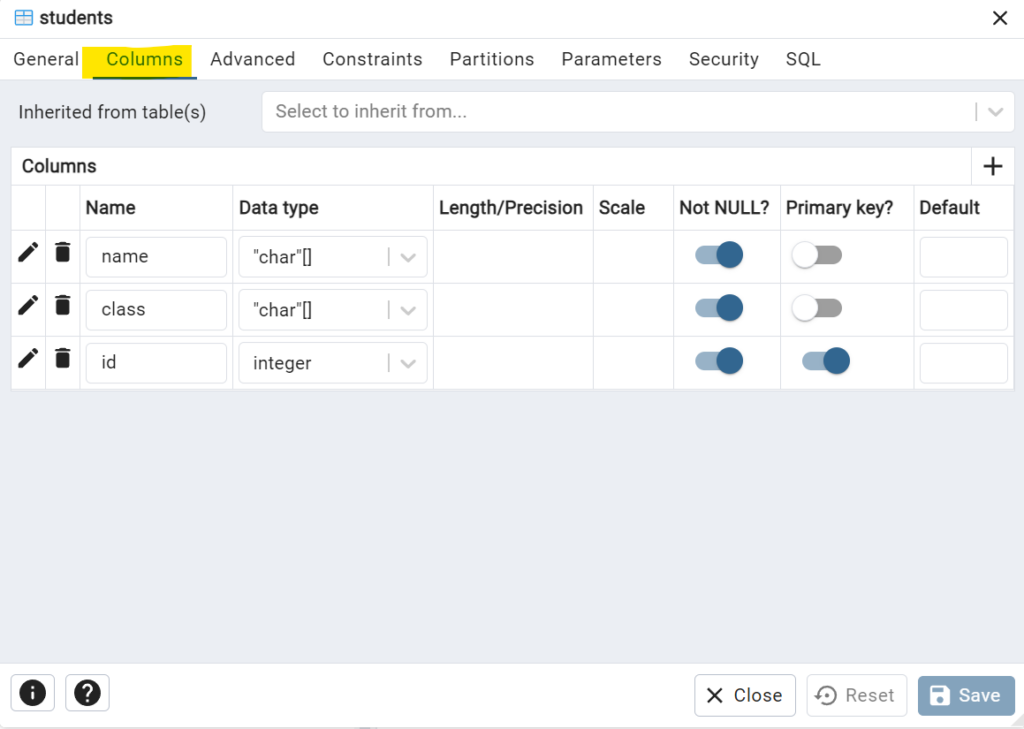
To delete a column, navigate to the Columns tab in the “Table Properties” dialog.

Step 4: Delete the Column
In the Columns tab, locate the column you want to delete. Select the column and click the - (Delete) button to remove it from the table’s structure.

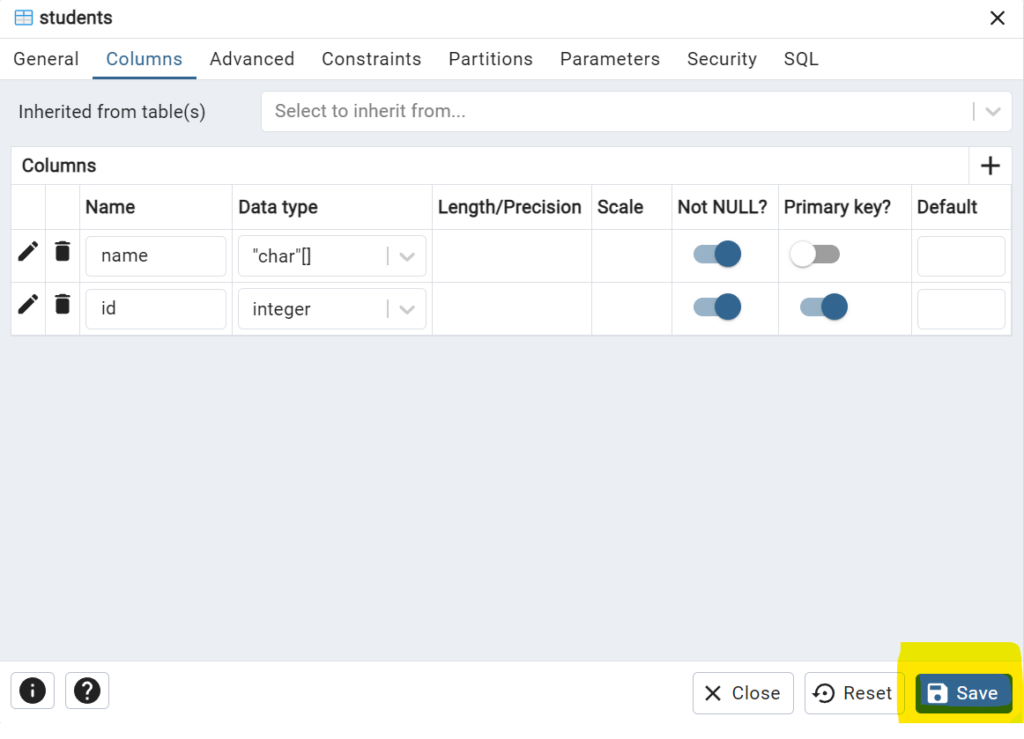
For example, if you want to delete a column named class. Click on the Delete button for the class column. You will get a confirmation as shown in the following screenshot.

Click Yes.
After deleting the column, click Save to apply the changes.

Step 5: Verify the Changes
To confirm the column has been deleted, you can view the table structure using the Query Tool.
Alternatively, refresh the table node in the navigation panel by right-clicking on it and selecting Refresh. The deleted column should no longer appear in the column list.

Conclusion
By following the steps outlined in this tutorial, you can safely remove columns while ensuring data integrity. Always review the impact of deleting columns on dependent objects, such as views and queries, before making changes.
