Export a Table in pgAdmin 4
Exporting a table in PostgreSQL allows you to save its data to an external file for sharing, backup, or further processing. pgAdmin 4 provides a user-friendly interface to export table data into formats such as CSV, text, or SQL.
In this PostgreSQL tutorial, we will go through the step-by-step process of exporting a table in pgAdmin 4.
Note: Exporting a table only saves its data. If you want to export the table structure (schema), use the Backup or Generate Script options in pgAdmin 4.
Prerequisites
Before exporting a table, ensure the following:
You have pgAdmin 4 installed and running on your system. You are connected to the PostgreSQL server and database containing the table. You have sufficient privileges to read the table data.
Once these prerequisites are met, follow the steps below to export the table data.
Step 1: Launch pgAdmin 4
Open pgAdmin 4 from your applications menu or web browser. The left-hand navigation panel displays a tree structure showing the connected PostgreSQL servers and databases.

Ensure the PostgreSQL server hosting the table is connected. If not, right-click on the server node and select Connect.
Step 2: Locate the Table
In the left-hand navigation panel, expand the server node to view its databases. Click on the database containing the table you wish to export. Expand the Schemas node, then expand the public schema (or the schema containing your table), and locate the Tables node.

Click on the Tables node to display the list of tables in the schema. Select the table you want to export.
Step 3: Open the Export Dialog
Right-click on the table name and select Import / Export Data > All Rows.
In this example, we will export the students table.
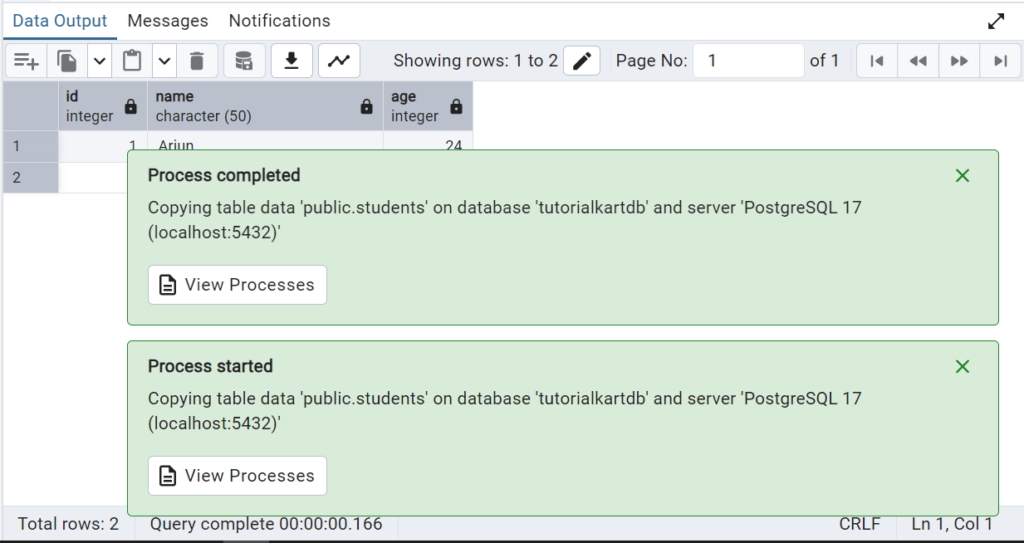
This action opens a new tab displaying all the data in the selected table.

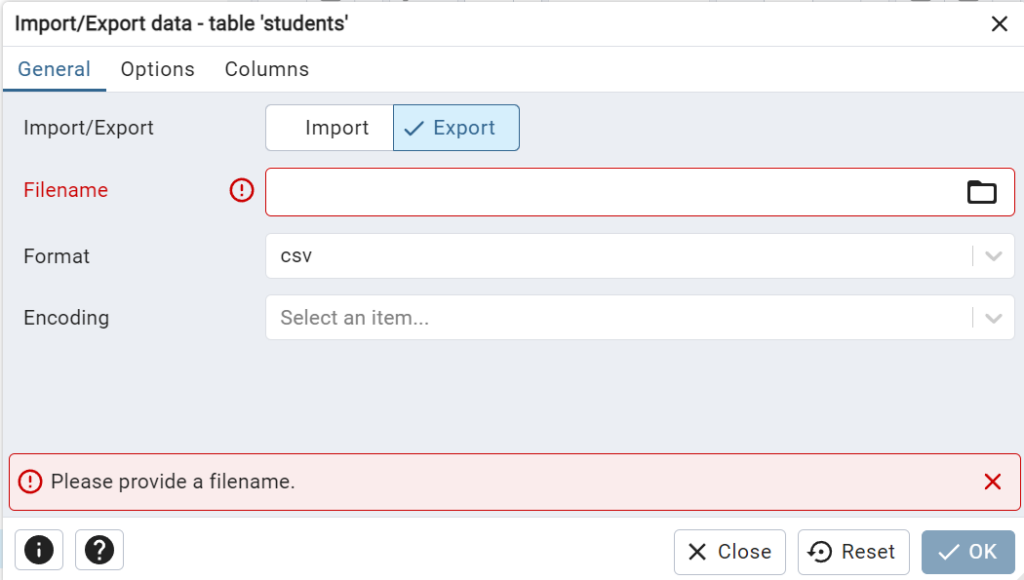
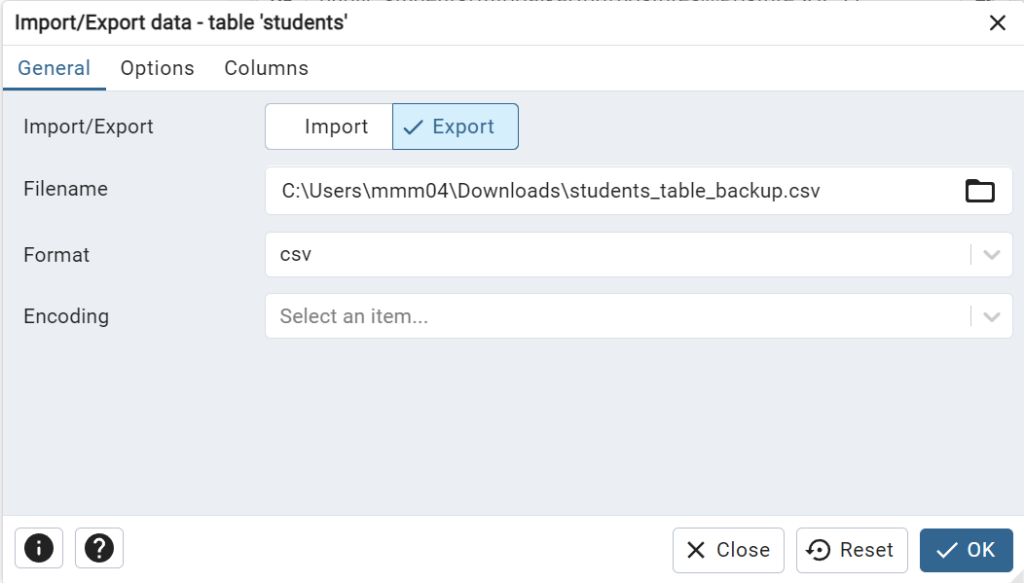
This opens the “Import/Export data” dialog, where you can configure export settings.

Step 4: Configure Export Settings
In the “Export Data” dialog, configure the following settings:

File Format: Choose the desired format for the exported file. Common formats include CSV, text, or SQL.
File Path: Specify the location and name of the file where the table data will be saved. For example, C:/exports/employees.csv.
Delimiter: If you selected CSV format, choose a delimiter (e.g., comma or tab) to separate values (in the Options tab).
Include Column Headers: In the Options tab, check the Header switch, to include the column names as the first row in the exported file.
Review the settings and ensure they match your requirements, and click OK.
Step 5: Exported Table Data
If the export is successful, a confirmation message will appear. Navigate to the specified file path to access the exported table data.

For example, a CSV file for a table named employees might look like this:
id,name,age
1,Arjun                                             ,24
2,Ram                                               ,22
Step 6: Verify the Exported Data
Open the exported file in an appropriate application, such as a text editor, spreadsheet software, or database management tool, to verify its contents. Check that all data has been exported as expected and the format is correct.
Conclusion
By following the steps in this guide, you can configure and execute table exports efficiently. Always verify the exported data to ensure it meets your requirements and is correctly formatted.
