How to Modify Table Structure in pgAdmin 4
In PostgreSQL, modifying a table structure might be required where there are changing data requirements. Using pgAdmin 4, you can easily make adjustments to a table’s structure, such as adding or deleting columns, modifying data types, changing constraints, and renaming columns.
In this tutorial, we will provide a step-by-step guide on how to modify a table structure in pgAdmin 4, like adding a new column, modifying an existing column, or deleting a column from the table.
Note: Modifying a table’s structure can affect data integrity and dependent objects, such as views or queries. Ensure you review the impact of the changes before proceeding.
Prerequisites
Before modifying a table, ensure the following:
You have pgAdmin 4 installed and running on your system. You are connected to the PostgreSQL server and database where the table resides. You have sufficient privileges to modify the table structure.
Once these prerequisites are met, you can proceed with the steps below to modify the table structure.
Step 1: Launch pgAdmin 4
Open pgAdmin 4 from your applications menu or web browser. Once launched, the dashboard displays a tree structure on the left-hand navigation panel, listing the available servers and their databases.
Ensure the PostgreSQL server hosting the table is connected. If not, right-click on the server node and select Connect.
Step 2: Locate the Table
In the left-hand navigation panel, expand the server node to view its databases. Click on the database containing the table you want to modify. Within the database, expand the Schemas node, then the public schema (or the schema containing your table), and locate the Tables node.

Click on the Tables node to display a list of tables in the schema. Select the table you wish to modify.

Step 3: Open the Properties Dialog
Right-click on the table name and select Properties from the context menu. This action opens the “Table Properties” dialog box, where you can view and modify various aspects of the table’s structure.
The Columns tab in this dialog allows you to manage the table’s columns, including adding, deleting, and modifying them.
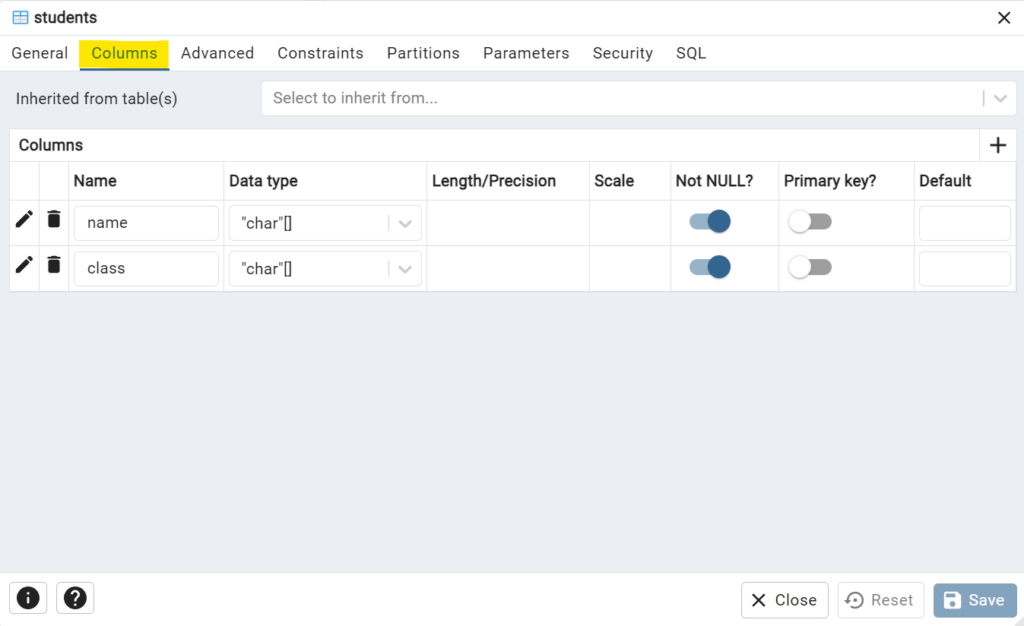
Step 4: Modify Table Columns
In the Columns tab, you can perform the following actions:
Add a New Column: Click the + (Add) button to add a new column.
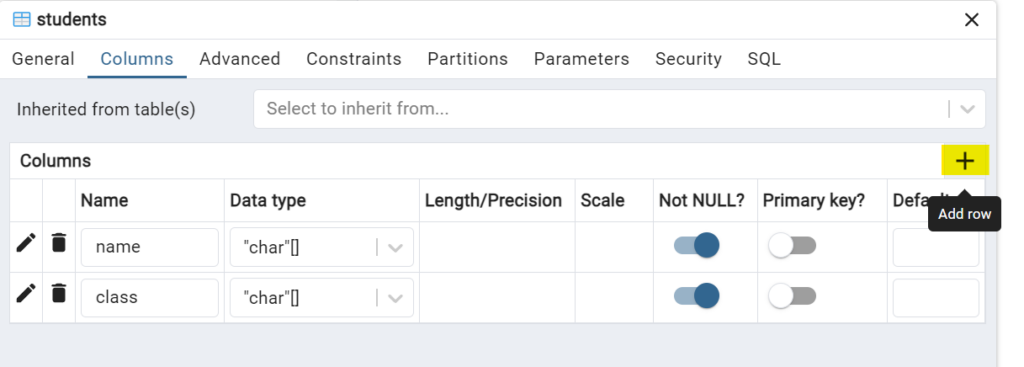
Specify the column name, data type, and constraints, such as NOT NULL or DEFAULT.
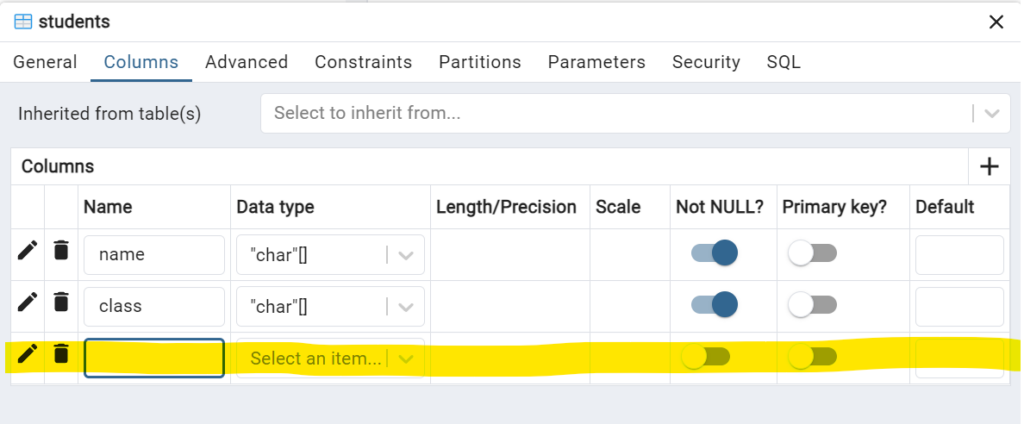
Modify an Existing Column: Select an existing column from the list and edit its properties.
You can change its name, data type, constraints, or default value.
Delete a Column: Select the column you want to remove and click the - (Delete) button. This action permanently deletes the column and its data from the table.

After making the desired changes, click Save to apply the modifications.
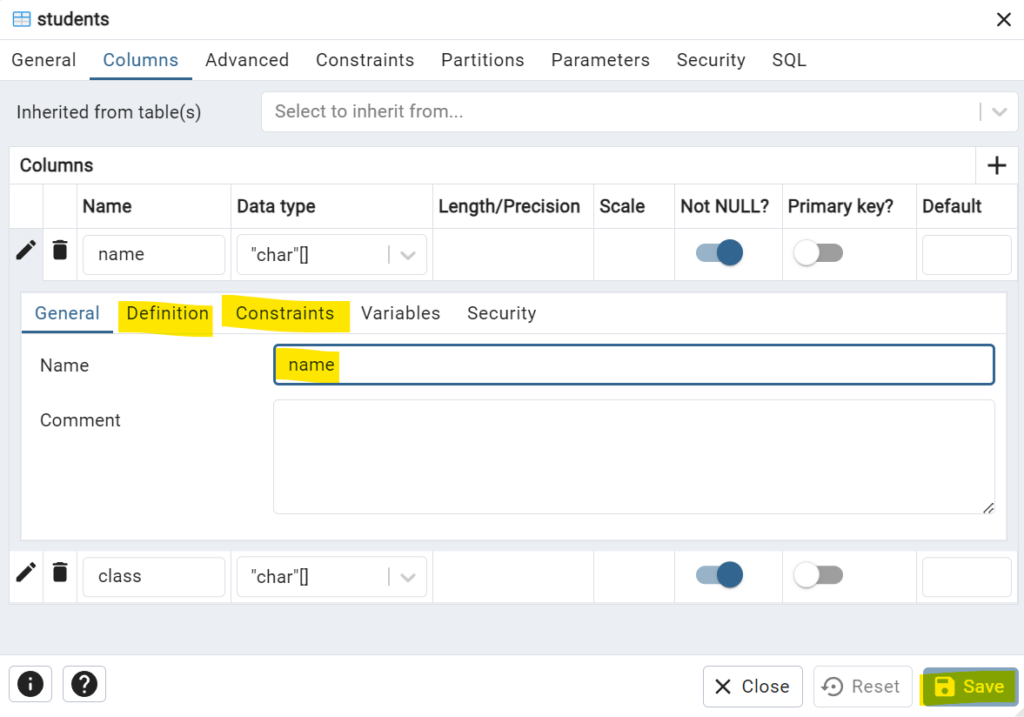
Step 5: Modify Constraints
To modify constraints such as primary keys, foreign keys, or unique constraints, navigate to the respective tabs in the “Table Properties” dialog:
Primary Key: Use the Primary key switch against the column to set a specific column as a Primary key.
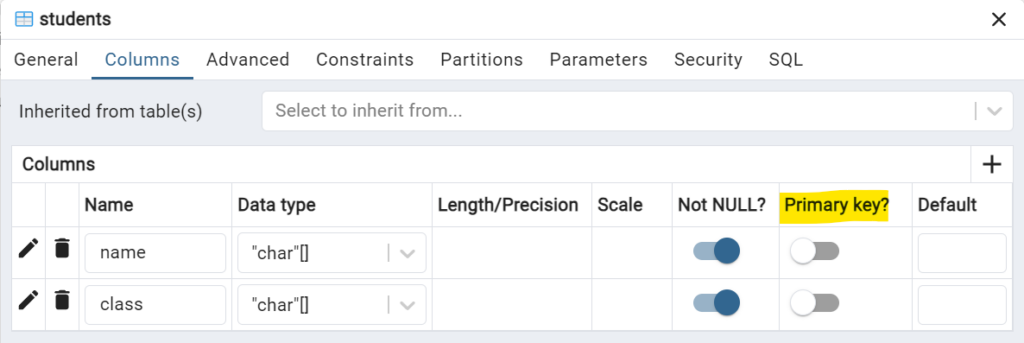
Foreign Key: You can add one or more Foreign keys to a table. You can add new foreign keys, or modify existing foreign keys. You can check this in Constraints tab -> Foreign Key tab.

Unique Constraints: Use the Constraints tab to enforce unique values in specific columns.

Click Save after making changes to the constraints.
Conclusion
Modifying a table structure in pgAdmin 4 is straightforward and allows you to adapt your database schema as your requirements change. By following this tutorial, you can easily add or modify columns, update constraints, and manage other aspects of a table’s structure using pgAdmin’s user-friendly interface. Always verify your changes and back up your database to ensure data integrity and consistency.
