Rename a Table in pgAdmin 4
Renaming a table is required in database management when restructuring data or updating table naming conventions.
In pgAdmin 4, you can easily rename a table using its graphical user interface without directly executing SQL commands. This tutorial provides a detailed, step-by-step guide on renaming a table in pgAdmin 4.
Note: Renaming a table can impact applications or queries that depend on the table’s original name. Ensure you review dependencies before proceeding with the renaming process.
Prerequisites
Before renaming a table, ensure the following:
You have pgAdmin 4 installed and running on your system. You are connected to the PostgreSQL server and database where the table resides. You have sufficient privileges to modify the table name.
Once these prerequisites are met, follow the steps outlined below.
Step 1: Launch pgAdmin 4
Open pgAdmin 4 from your applications menu or web browser. Once launched, the dashboard displays a tree structure in the left-hand navigation panel, listing the available PostgreSQL servers and databases.

Ensure the PostgreSQL server hosting the table is connected. If not, right-click on the server node and select Connect.
Step 2: Locate the Table
In the left-hand navigation panel, expand the server node to view its databases. Select the database containing the table you wish to rename by expanding the Databases node and clicking on the desired database.
Within the database, navigate to Schemas, expand the public schema (or the schema containing your table), and locate the Tables node. Click on the Tables node to display a list of tables in the schema. Find and select the table you want to rename.
Let us say that we would like to rename the students table highlighted in the following screenshot, to students_new.

Step 3: Open the Properties Dialog
Right-click on the table name and select Properties from the context menu.

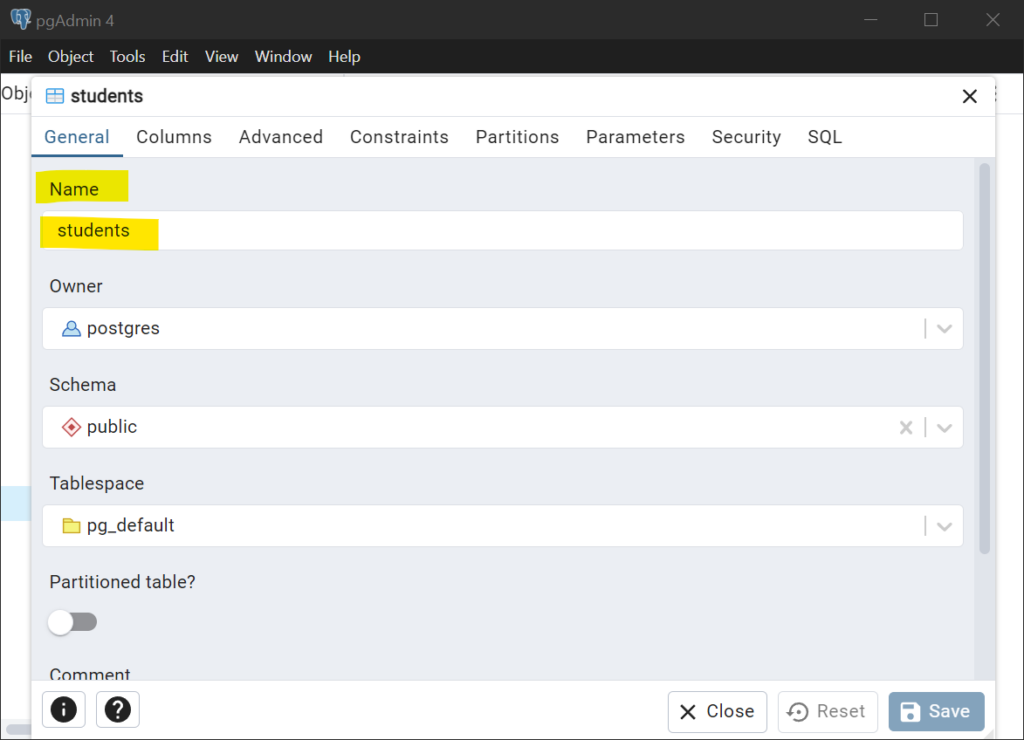
This action opens the “Table Properties” dialog box, where you can view and modify various configurations of the table, including its name.

The General tab of the “Table Properties” dialog contains the name field, allowing you to rename the table.
Step 4: Rename the Table
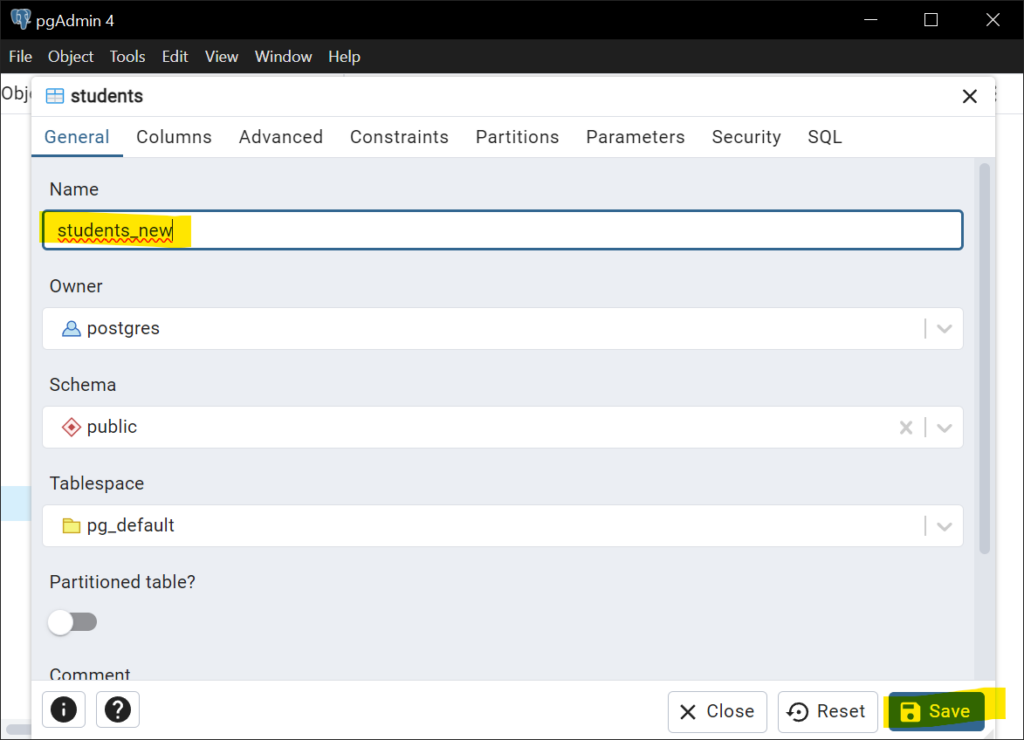
In the General tab of the “Table Properties” dialog, locate the Name field. Replace the current name of the table with the new name. Since we would like to rename the table to students_new, update the Name field with this value.

After entering the new name, click Save to apply the changes. pgAdmin 4 will execute the necessary SQL command to rename the table in the database.
ALTER TABLE public.students RENAME TO students_new;The SQL command above is executed automatically by pgAdmin when you save the changes.
Step 5: Verify the Renaming
To ensure the table has been successfully renamed, refresh the Tables node by right-clicking on it and selecting Refresh. The renamed table should now appear in the list with its new name.

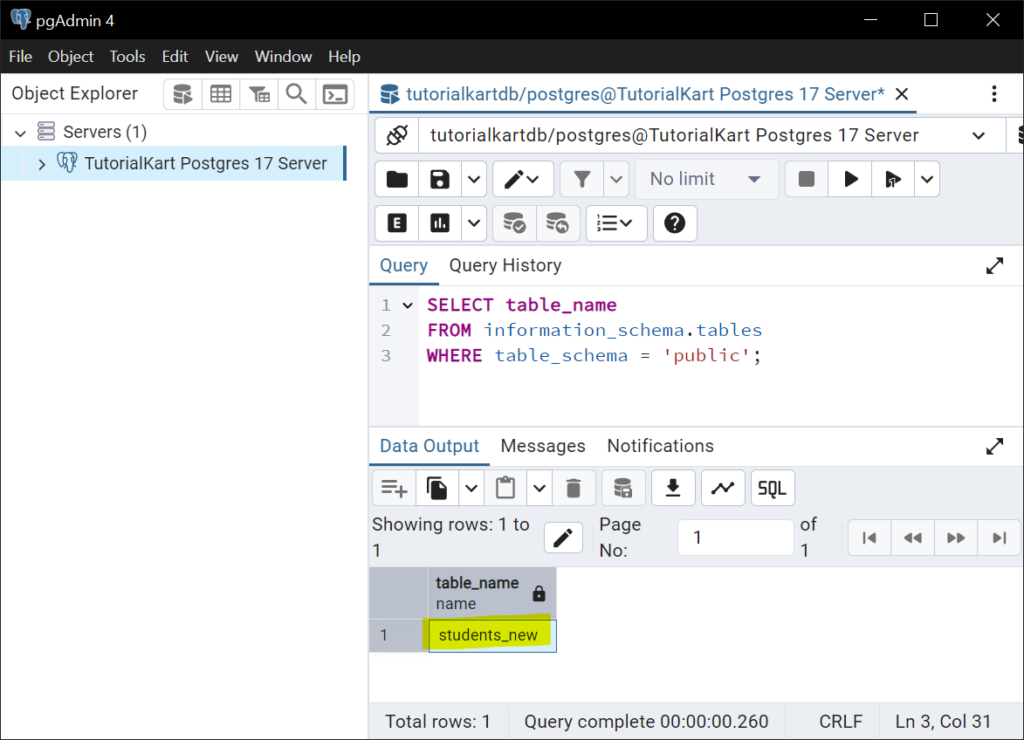
You can also verify the renaming by running a query in the Query Tool. Open the Query Tool from the toolbar and execute the following command:
SELECT table_name
FROM information_schema.tables
WHERE table_schema = 'public';
The result should include the new name of the table and exclude the old name.

Conclusion
Renaming a table in pgAdmin 4 is a simple and efficient process that can be performed using the graphical interface without writing SQL commands manually. By following this tutorial, you can easily rename tables in your PostgreSQL database while ensuring minimal disruption to applications and queries that depend on the table. Always verify the renaming and review any dependencies to ensure a smooth transition.
