Restore a Database in pgAdmin 4
Restoring a database is an essential process to recover data from a backup file. pgAdmin 4 makes it simple to restore PostgreSQL databases using its graphical interface. Whether you’re recovering from a failure or transferring data to another server, pgAdmin 4 provides an intuitive way to complete the restoration process.
This tutorial provides detailed step-by-step instructions to restore a database in pgAdmin 4 using a backup file created earlier.
Prerequisites
Before restoring a database, ensure the following prerequisites are met:
You have a valid backup file created using pgAdmin 4 or the pg_dump command. The PostgreSQL server is running and accessible from pgAdmin 4. You have administrative privileges to perform the restoration. The target database exists (for some restoration formats), or you have the necessary permissions to create one.
Ensure the backup file format is compatible with the restoration process (e.g., custom, plain-text SQL, or directory).
Step 1: Launch pgAdmin 4
Open pgAdmin 4 on your system. You can access it via your applications menu or a web browser, depending on how it is installed. Once pgAdmin 4 is launched, the dashboard will display the list of available servers in the left-hand navigation panel.
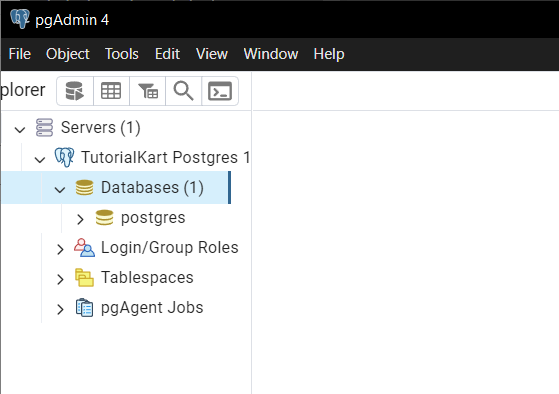
Ensure you are connected to the PostgreSQL server where the restoration will take place. If not, right-click on the server and select Connect to establish a connection.
Step 2: Create a New Database (If Necessary)
If your backup file requires an existing database for restoration, create a new database if it doesn’t already exist.
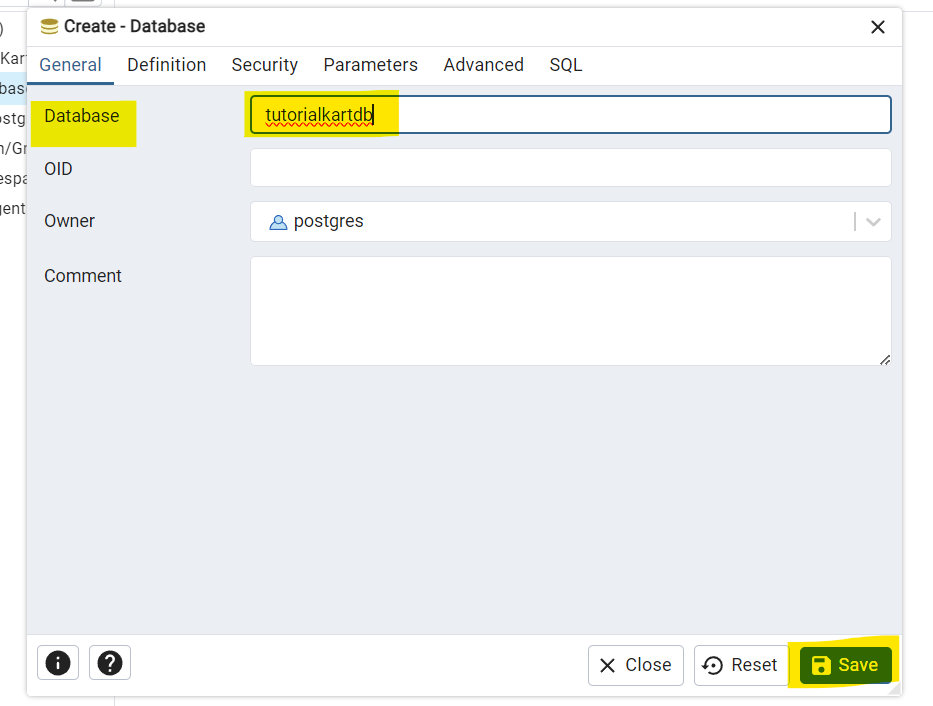
For example, let us say that we would like to restore a database named tutorialkartdb. Create a database with the same name.
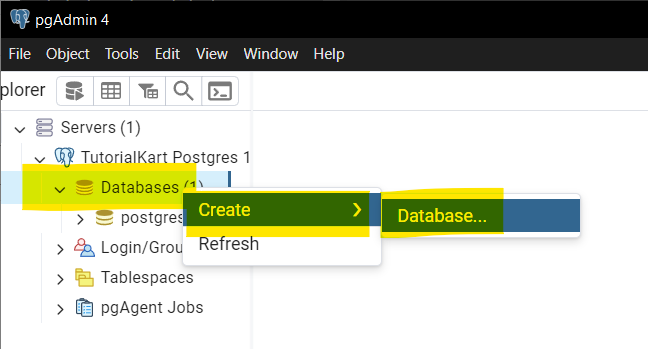
Right click on Databases, then Create, Database.
Enter the Database name and click Save.
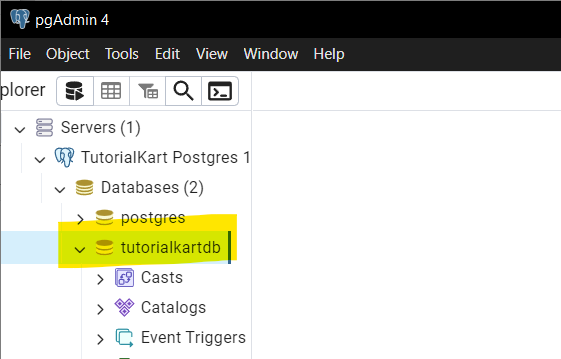
A database is created with the give name and appears under the Databases list.
This step is essential if the backup file was created in a “custom” or “directory” format that requires restoring to an existing database.
Step 3: Open the Restore Dialog
To restore the database, right-click on the target database in the left-hand navigation panel. From the context menu, select Restore....
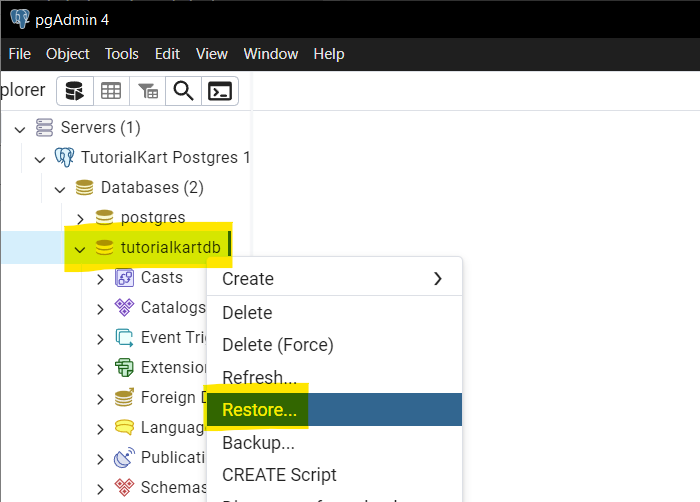
This action will open the “Restore” dialog box, where you can configure the restoration settings.
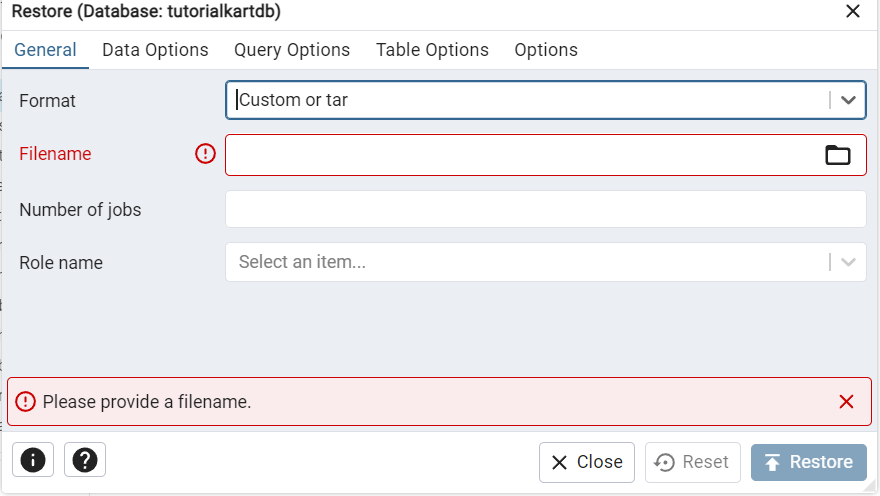
The “Restore” dialog is used to specify the backup file and restoration options.
Step 4: Configure Restore Options
In the “Restore” dialog, configure the following options:
Filename: Enter the path to the backup file you wish to restore. You can use the file picker to navigate to the file’s location on your system. Format: Ensure the format matches the backup file (e.g., Custom, Tar, Directory). This information is usually known during the backup creation process. Role Name: Specify the database owner role to assign to the restored database. This is optional and depends on your setup.
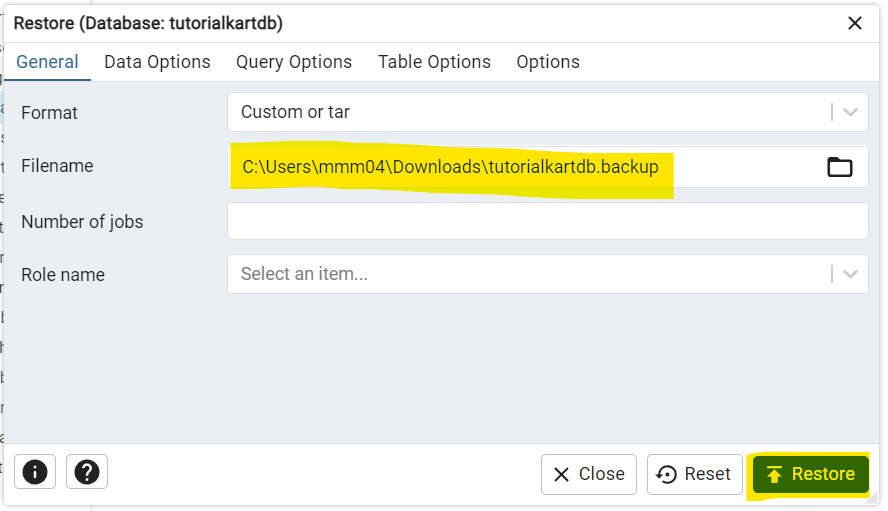
Other advanced options include restoring specific objects, schema-only or data-only restoration, and excluding specific data. Configure these as needed based on your requirements.
Click Restore to initiate the restoration process.
Step 5: Monitor the Restoration Process
After clicking Restore, pgAdmin 4 will display a progress dialog showing the status of the restoration. The progress bar indicates how much of the process is complete, and any errors or messages are displayed in the dialog box.
Depending on the size of the database and the backup format, the restoration process may take some time. Wait until the process is complete.
Once the restoration finishes, a success message will be displayed.
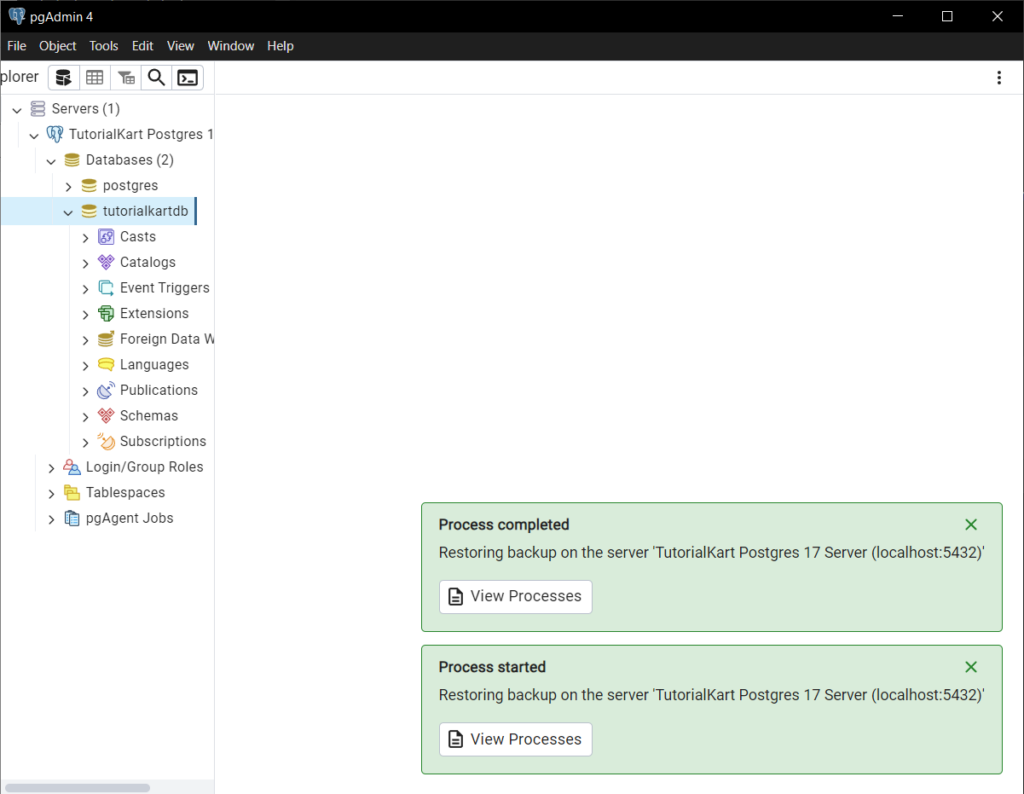
If any errors occur, they will be shown in the dialog, and you may need to troubleshoot based on the error messages.
Step 6: Verify the Restored Database
To verify the restoration, expand the database node in the left-hand navigation panel. Check that the schemas, tables, and other objects are present and consistent with the original backup. You can also run queries to confirm that the data has been restored correctly.
If the verification reveals any issues, review the restoration process and reattempt it if necessary.
Conclusion
Restoring a database is done by using the “Restore” dialog, and you can recover your data efficiently and reliably. Regularly testing your backups by restoring them to a separate database is a best practice to ensure data integrity and readiness in case of emergencies.
