Set Database Connection Limits in pgAdmin 4
Database connection limits control how many concurrent connections a PostgreSQL database can accept. By setting these limits, you can manage server resources effectively and ensure optimal performance for your applications. pgAdmin 4 provides an intuitive graphical interface to configure database connection limits.
In this PostgreSQL tutorial, we will guide you through the process of setting database connection limits using pgAdmin 4.
Step 1: Launch pgAdmin 4
Open pgAdmin 4 from your applications menu or web browser. Once the application is launched, you will see the dashboard displaying the list of PostgreSQL servers and databases in the left-hand navigation panel.
Ensure the server where the database resides is connected. If not, right-click on the server node and select Connect.
Step 2: Locate the Database
In the left-hand navigation panel, expand the server node where your target database resides. Under the server, click on the Databases node to view the list of databases available on the server. Identify and select the database for which you want to set connection limits.
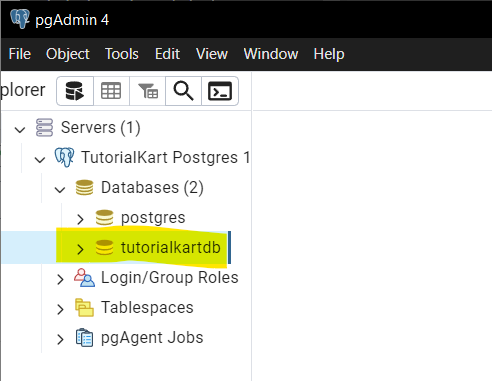
For example, let us consider that we would like to set limit on the number of connections to tutorialkartdb database.
Step 3: Open the Database Properties Dialog
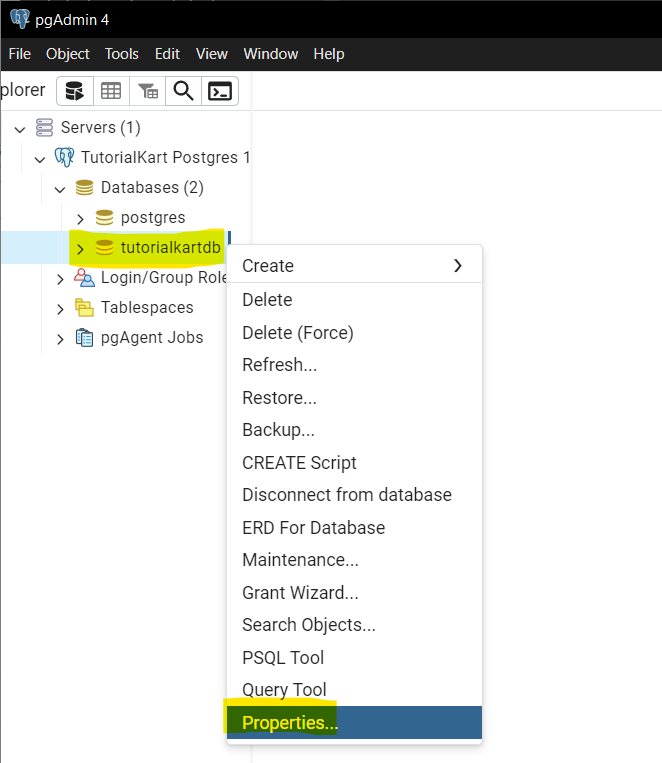
Right-click on the database name and select Properties from the context menu. This action opens the “Database Properties” dialog, where you can view and modify various database configurations, including connection limits.
Step 4: Set the Connection Limit
In the “Database Properties” dialog, navigate to the Definition tab. Here, you will find the Connection limit field. By default, this field is set to -1, which means unlimited connections are allowed.
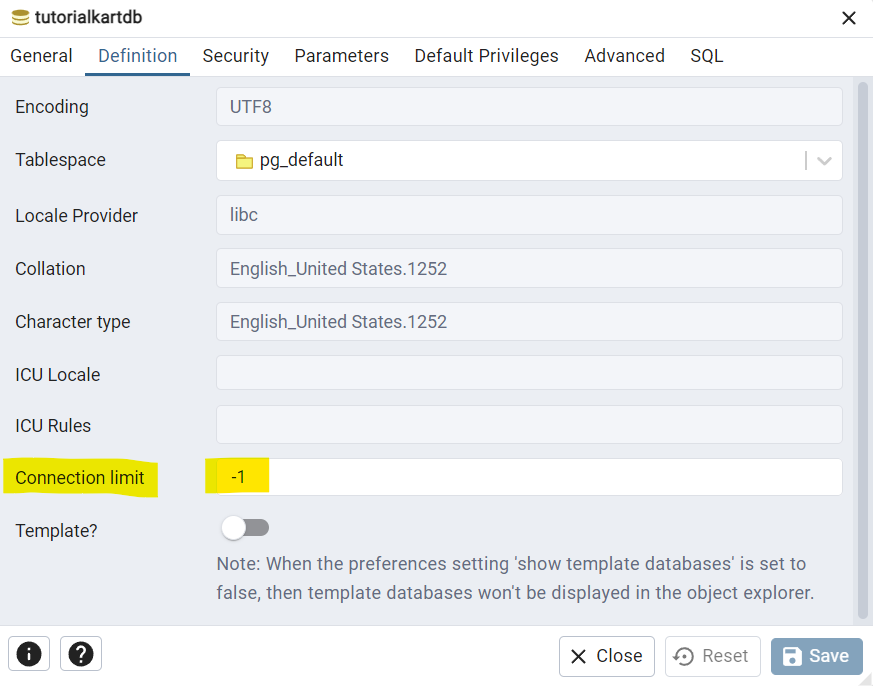
To limit the number of concurrent connections to the database, enter a positive integer value in the Connection limit field. For example, setting it to 50 allows a maximum of 50 concurrent connections.
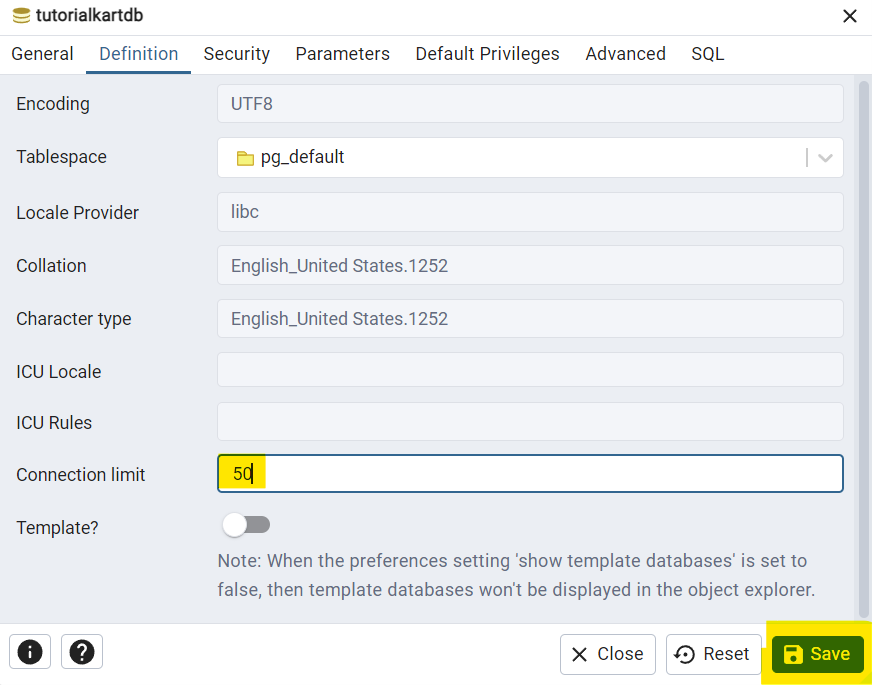
After entering the desired connection limit, click Save to apply the changes.
Step 5: Verify the Changes
To verify that the connection limit has been successfully updated, you can run a query in the Query Tool. Open the Query Tool by selecting Tools > Query Tool, and execute the following SQL command:
SELECT datname, datconnlimit
FROM pg_database
WHERE datname = 'your_database_name';
Replace your_database_name with the name of your database.
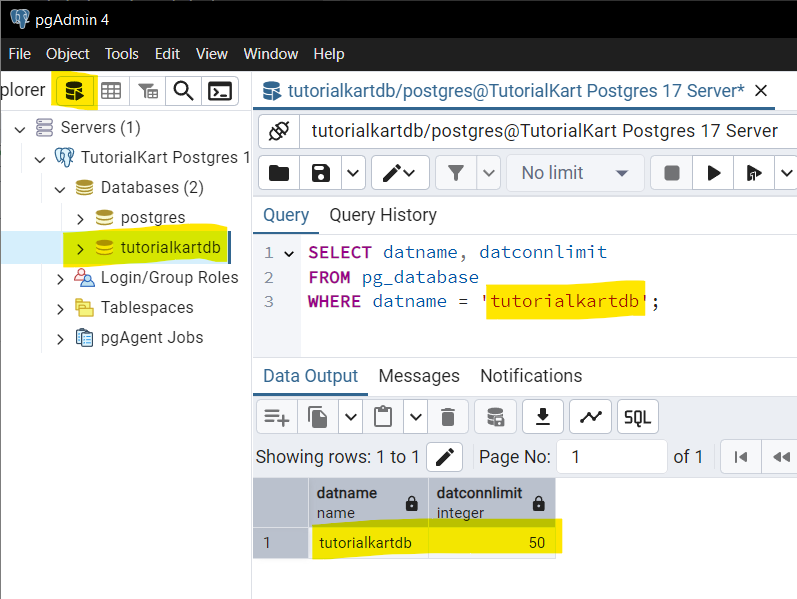
The result will display the connection limit for the specified database. Confirm that it matches the value you set in the “Database Properties” dialog.
Conclusion
Setting database connection limits in pgAdmin 4 is an effective way to manage server resources and ensure stable performance. By following the steps in this guide, you can easily configure connection limits to suit your requirements. Regularly reviewing and updating these limits can help optimize your PostgreSQL server for various workloads.
