Flutter Animation Basic Example
In this tutorial, we will learn how to animate a widget, say, increase fontsize when you long press on Text.
Consider following Flutter application, where we shown some text to the user and increase the font size when button is pressed.
main.dart
import 'package:flutter/material.dart';

void main() {
  runApp(MyApp());
}

class MyApp extends StatefulWidget {
  @override
  _MyAppState createState() => _MyAppState();
}

class _MyAppState extends State<MyApp> {
  double _fontSize = 20;

  void increaseFontSize() {
    setState(() {
      _fontSize = 40;
    });
  }

  @override
  Widget build(BuildContext context) {
    return MaterialApp(
        home: Scaffold(
      appBar: AppBar(
        title: Center(child: Text('Flutter - tutorialkart.com')),
      ),
      body: ListView(children: <Widget>[
        Container(
            margin: EdgeInsets.all(20),
            child: Text(
              'Hello! Welcome to TutorialKart. We shall zoom this text when you long press on it.',
              style: TextStyle(fontSize: _fontSize),
            )),
        RaisedButton(
          onPressed: () => {increaseFontSize()},
          child: Text('Bigger Font'),
        )
      ]),
    ));
  }
}
It displays text and increases fontSize to 40 when the button is pressed.
The transition is quite drastic.
Step by Step Process – Animation in your Flutter Application
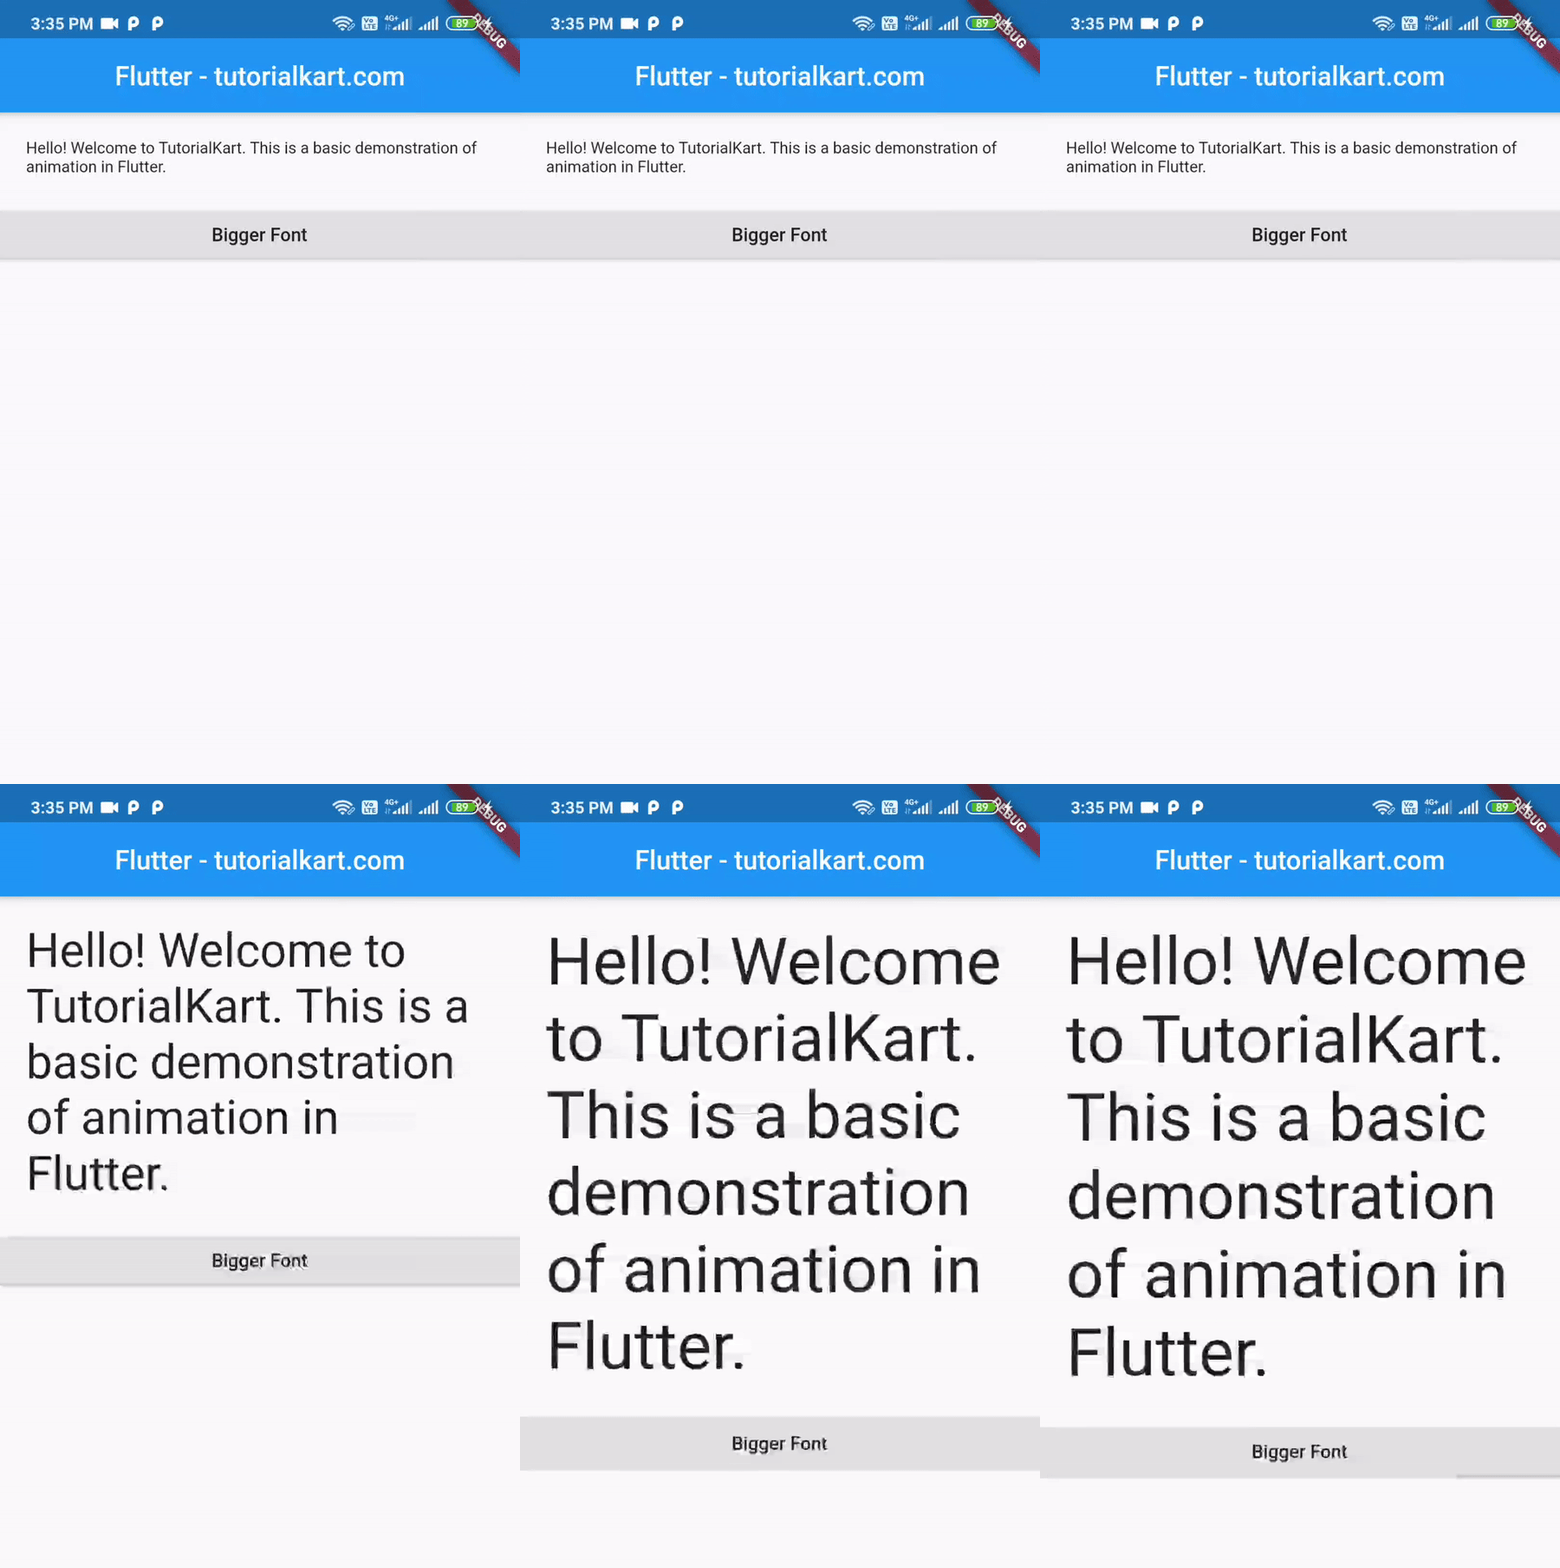
Now, we shall animate this transition with respect to fontSize. Following is a sample of the animation on fontSize for Text, that we shall do in this example.

Following is a step by step process.
Step 1
Import animation package
import 'package:flutter/animation.dart';Step 2
We shall declare the State class of your app with SingleTickerProviderStateMixin. This is called mixin, which is a very useful feature in flutter.
class _MyAppState extends State<MyApp> with SingleTickerProviderStateMixin {
 ...
}
Step 3
Declare animation and animation controller objects in State class of your application.
Animation<double> animation;
AnimationController controller;
Step 4
Override initState() method and define animation and controller.
void initState() {
  super.initState();
  controller =
  	AnimationController(duration: const Duration(seconds: 1), vsync: this);
  animation = Tween<double>(begin: 12.0, end: 50.0).animate(controller)
    ..addListener(() {
  	setState(() {
  	  // The state that has changed here is the animation object’s value.
  	});
    });
}
Step 5
Start animation when required using the following statement.
controller.forward();Final main.dart with all the changes
main.dart
import 'package:flutter/animation.dart';
import 'package:flutter/material.dart';

void main() {
  runApp(MyApp());
}

class MyApp extends StatefulWidget {
  @override
  _MyAppState createState() => _MyAppState();
}

class _MyAppState extends State<MyApp> with SingleTickerProviderStateMixin {
  Animation<double> animation;
  AnimationController controller;

  @override
  void initState() {
    super.initState();
    controller =
        AnimationController(duration: const Duration(seconds: 1), vsync: this);
    animation = Tween<double>(begin: 12.0, end: 50.0).animate(controller)
      ..addListener(() {
        setState(() {
          // The state that has changed here is the animation object’s value.
        });
      });
  }

  void increaseFontSize() {
    controller.forward();
  }

  @override
  Widget build(BuildContext context) {
    return MaterialApp(
        home: Scaffold(
      appBar: AppBar(
        title: Center(child: Text('Flutter - tutorialkart.com')),
      ),
      body: ListView(children: <Widget>[
        Container(
            margin: EdgeInsets.all(20),
            child: Text(
              'Hello! Welcome to TutorialKart. This is a basic demonstration of animation in Flutter.',
              style: TextStyle(fontSize: animation.value),
            )),
        RaisedButton(
          onPressed: () => {increaseFontSize()},
          child: Text('Bigger Font'),
        )
      ]),
    ));
  }

  @override
  void dispose() {
    controller.dispose();
    super.dispose();
  }
}
Conclusion
In this Flutter Tutorial, we learned how to do basic animation in Flutter.
