Flutter Canvas Draw Circle
You can draw custom shapes, like rectangle, circle, line, etc., in your application.
In this tutorial, we shall learn how to draw a circle on a Canvas using CustomPainter widget.
Draw Circle Function – Canvas.drawCircle()
Following is the syntax of drawCircle() function in Flutter.
void drawCircle(Offset c, double radius, Paint paint)A quick example of drawCircle() is given below.
void drawCircle(Offset(200, 200), 50, Paint())Of course you can change the offset and radius of circle and paint properties.
Example – Flutter Canvas – Draw Circle
To draw a circle in our Flutter Application, we shall follow the below steps.
Step 1: Create a class that extends CustomPainter. This is our widget that has canvas and allows user to paint on to the canvas.
class OpenPainter extends CustomPainter {
    ...
}
Step 2: Override paint() and shouldRepaint() methods of the CustomPainter class. In the paint() method, we have access to canvas and size of the canvas.
Step 3: Draw a circle on the canvas using canvas.drawCircle() method. You write this statement in paint() method of the class we created.
@override
void paint(Canvas canvas, Size size) {
  //...
  canvas.drawCircle(Offset(200, 200), 100, Paint());
}
Complete example program is
main.dart
import 'package:flutter/cupertino.dart';
import 'package:flutter/material.dart';

void main() {
  runApp(MyApp());
}

class MyApp extends StatelessWidget {
  @override
  Widget build(BuildContext context) {
    return MaterialApp(
      title: 'Flutter TutorialKart',
      home: MyHomePage(),
    );
  }
}

class MyHomePage extends StatefulWidget {
  @override
  _MyHomePageState createState() => _MyHomePageState();
}

class _MyHomePageState extends State<MyHomePage> {

  @override
  Widget build(BuildContext context) {
    return Scaffold(
      appBar: AppBar(
        title: Text('Flutter - www.tutorialkart.com'),
      ),
      body: ListView(children: <Widget>[
        Container(
          width: 400,
          height: 400,
          child: CustomPaint(
            painter: OpenPainter(),
          ),
        ),
      ]),
    );
  }
}

class OpenPainter extends CustomPainter {
  @override
  void paint(Canvas canvas, Size size) {
    var paint1 = Paint()
      ..color = Color(0xffaa44aa)
      ..style = PaintingStyle.fill;
    canvas.drawCircle(Offset(200, 200), 100, paint1);
  }

  @override
  bool shouldRepaint(CustomPainter oldDelegate) => true;
}
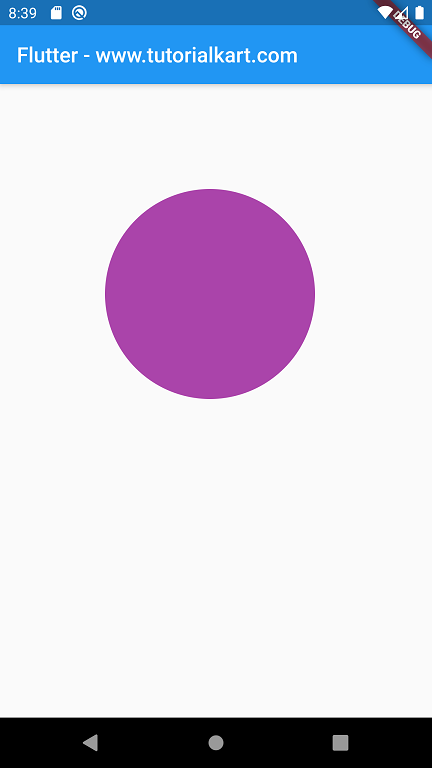
Run the application in your Android Device or Android Emulator.

Example – Flutter Canvas – Update Circle
You can update any property of the circle you would like to change in runtime.
In the following example application, we are changing the color and radius of the circle.
To change a property of the circle you are painting, follow these steps.
Step 1: Declare all the properties you would like to change, as variables. Assign the default or initial value to these variables.
Color circleColor1 = Color(0xff000000);
double circleRadius1 = 100;
Step 2: Use this variables while you are painting the circle in CustomPainter class.
var paint1 = Paint()
  ..color = circleColor1
  ..style = PaintingStyle.fill;
canvas.drawCircle(Offset(150, 150), circleRadius1, paint1);
Step 3: When a change has to be made, like when user presses a button, assign the new value for property using the variable(declared in step 1).
circleColor1 = Color(0xff885599);
circleRadius1 = 80;
The complete program is
main.dart
import 'package:flutter/cupertino.dart';
import 'package:flutter/material.dart';

Color circleColor1 = Color(0xff000000);
double circleRadius1 = 100;

void main() {
  runApp(MyApp());
}

class MyApp extends StatelessWidget {
  @override
  Widget build(BuildContext context) {
    return MaterialApp(
      title: 'Flutter TutorialKart',
      home: MyHomePage(),
    );
  }
}

class MyHomePage extends StatefulWidget {
  @override
  _MyHomePageState createState() => _MyHomePageState();
}

class _MyHomePageState extends State<MyHomePage> {

  @override
  Widget build(BuildContext context) {
    return Scaffold(
      appBar: AppBar(
        title: Text('Flutter - www.tutorialkart.com'),
      ),
      body: ListView(children: <Widget>[
        Text(
          'My Canvas',
          textAlign: TextAlign.center,
          style: TextStyle(fontSize: 20),
        ),
        Container(
          width: 400,
          height: 400,
          child: CustomPaint(
            painter: OpenPainter(),
          ),
        ),
        RaisedButton(
          child: Text('Repaint Canvas'),
          onPressed: (){
            setState(() {
              circleColor1 = Color(0xff885599);
              circleRadius1 = 80;
            });
          },
        ),
      ]),
    );
  }
}

class OpenPainter extends CustomPainter {
  @override
  void paint(Canvas canvas, Size size) {
    var paint1 = Paint()
      ..color = circleColor1
      ..style = PaintingStyle.fill;
    canvas.drawCircle(Offset(150, 150), circleRadius1, paint1);
  }

  @override
  bool shouldRepaint(CustomPainter oldDelegate) => true;
}
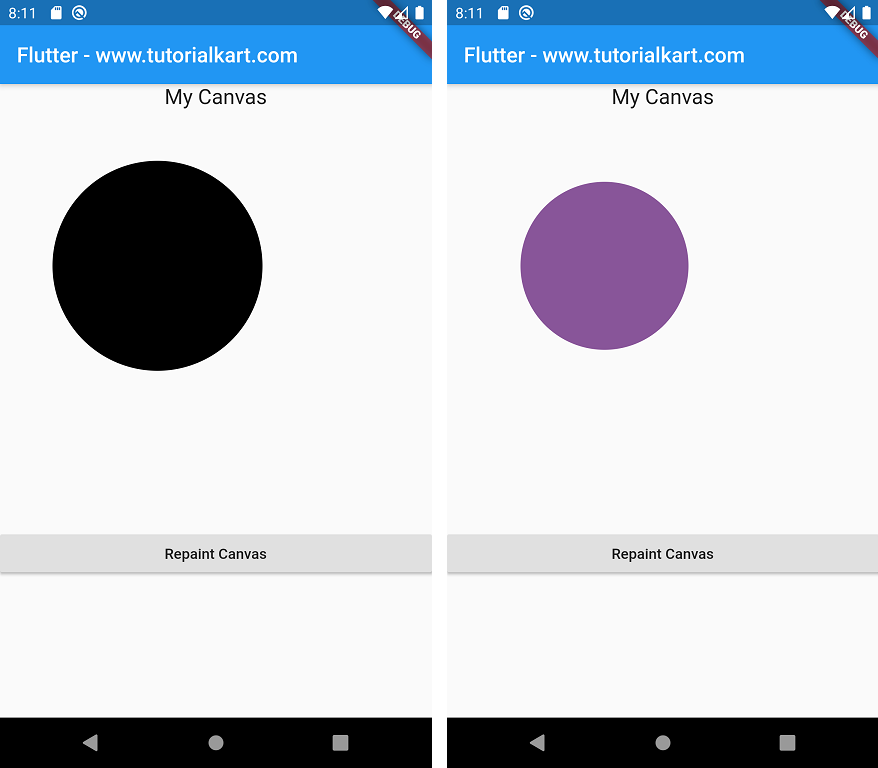
Run the application in your Android Smartphone or Emulator, you will get the left screen as shown in the following screenshot. When you press the Repaint Canvas button, the color the circle and the radius change to a new value.

Conclusion
In this Flutter Tutorial, we learned how to draw a circle on a Canvas using CustomPainter class.
