How to create user status profile in SAP
In this SAP tutorials, you will learn how to create user status profile in SAP step by step using tcode “OK02”.
Navigation
| SAP R/3 Role Menu | Create user status profile |
| Transaction Code | OK02 |
| SAP Menu Path | SPRO > Project System > Structures > Operative structures > Work breakdown structures > WBS user status > Create status profile. |
Configuration Values
| Status Profile | Text | Language |
| SP00001 | Project def. status profile | EN |
| SP00002 | WBS element status profile | EN |
| SP00003 | Network status profile | EN |
Configuration steps
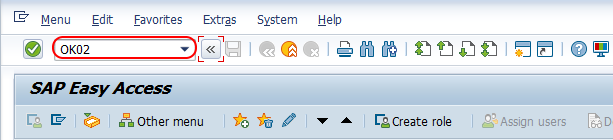
Step 1 : – Execute toode “OK02” from SAP command field.
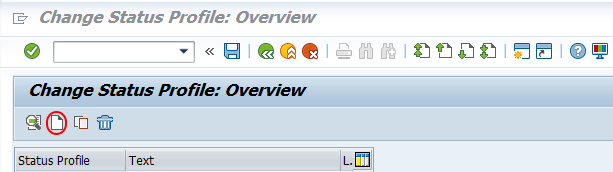
Step 2 : – From change status profile overview screen, choose create tab to create new status profile in SAP project systems.
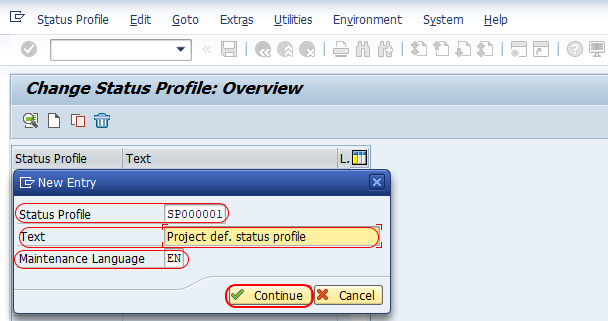
Step 3 : – Now a pop up window called new entry opens, update the following details.
- Status Profile : – Enter the key that defines as user status profile in SAP system, you are allowed to enter up to 7 digits alphanumeric key for status profile.
- Text : – Enter the descriptive text of user status profile.
- Maintenance Language : – Update preference language as EN (English).
Choose save icon and save the configured stats profile in SAP system.
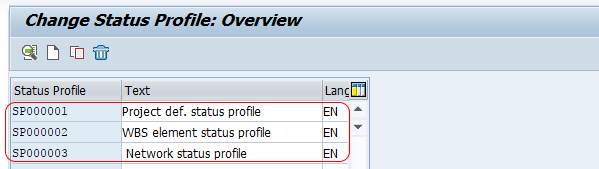
Similarly create other status profiles of SP00002 & SP00003 by using configuration steps. After creation of status profiles, you can the list of configured profiles from overview screen.
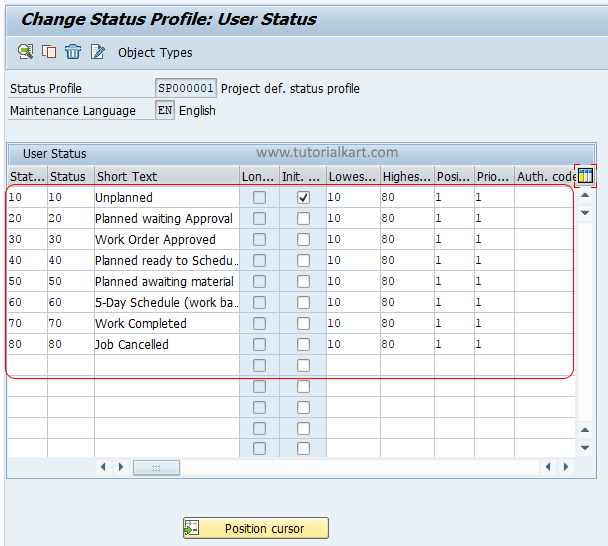
Double click on status profile key and update all the required details like status number, status, short text, initial status, lowest status no, highest status no, position and priority.
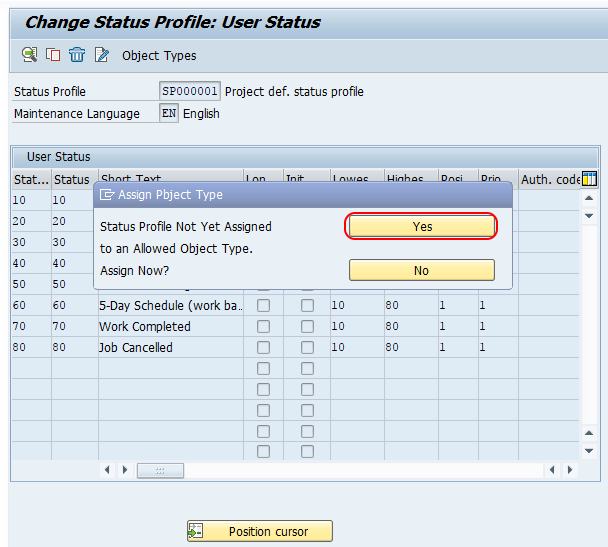
Now choose save icon to save the data, system prompts a message as “Assign Pbject Type” choose yes option.
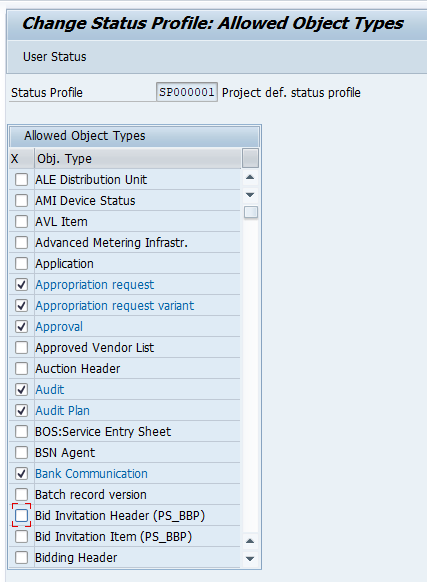
On change status profile allowed object types screen, choose the check fields of allowed object types.
Successfully we have defined new user status profile in SAP PS.