Setup of Kotlin Java Project in IntelliJ IDEA
Many IDEs are available to choose from, for Kotlin project development. IntelliJ has been responsible for the development of Kotlin programming language. So, we pick IntelliJ IDEA for Kotlin programming.
In this tutorial, we shall learn to set up a Kotlin Java Project in IntelliJ IDEA, in a step by step process.
First of all, you need to have IntelliJ IDEA setup in your computer. If you don’t have the setup, latest Community Edition is available at https://www.jetbrains.com/idea/. Download the IDE and follow the instructions for installation.
Steps to Setup Kotlin Java Project
1. Start IntelliJ IDEA and Create New Project
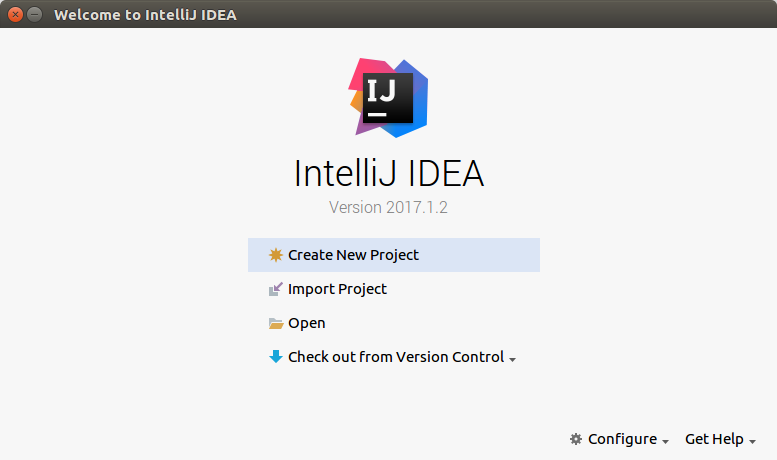
Once you are ready with the IntelliJ IDEA Community Edition, start IntelliJ IDEA. A welcome window should appear with an option to Create New Project.
2. Select Kotlin Java
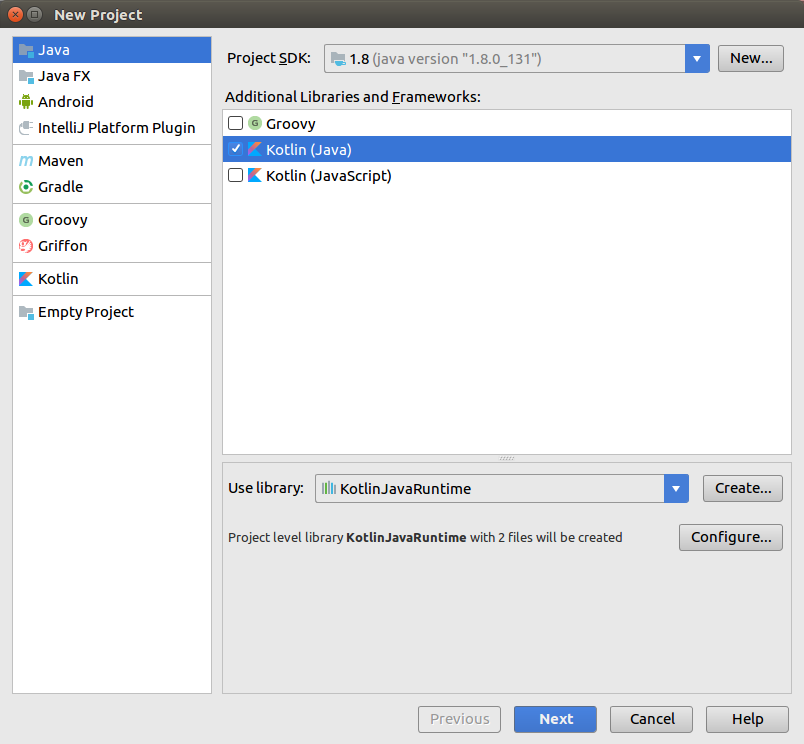
Click on the “Create New Project” button. It takes to a New Project window. By default, on the left pane, you may find Java, Java FX, Android etc. Select Java. In the “Additional Libraries and Frameworks” section, check “Kotlin(Java)”. Leave other options to their defaults. Click on Next.
3. Project Name and Location
Give your project a name, “KotlinTutorial” and choose a location for the project to be created in, as per you choice.
Click on Finish.
4. New Kotlin File/Class in the newly created project
If Project window is not visible, hit Alt+1.
Expand the project. “src” project should be there in the Project.
Now, right click on “src” folder -> New -> Kotlin File/Class.
Give a name, “hello_world” and click on “OK”
5. Main method in Kotlin File/Class
Write the main method and hit Run-> Run.
The Kotlin compiles and runs the project. The message “Hello, world!” is printed to the output as shown in the below screenshot.
Conclusion
In this Kotlin Tutorial, we have learnt the setup of Kotlin Java Project in IntelliJ IDEA and start writing our first Kotlin program to print a “Hello, world!” message to the output. In our next tutorial, we shall look into Basic Kotlin Program.


