Android Spinner in Kotlin
Android Spinner is a view that displays one child at a time and when user clicks on it, it lets the user pick among multiple values.
In this tutorial, we will learn how to create a Spinner in layout file, and how to set listener for the Spinner to serve user actions like clicking on the Spinner, selecting a value from Spinner, etc.
Code – Android Spinner
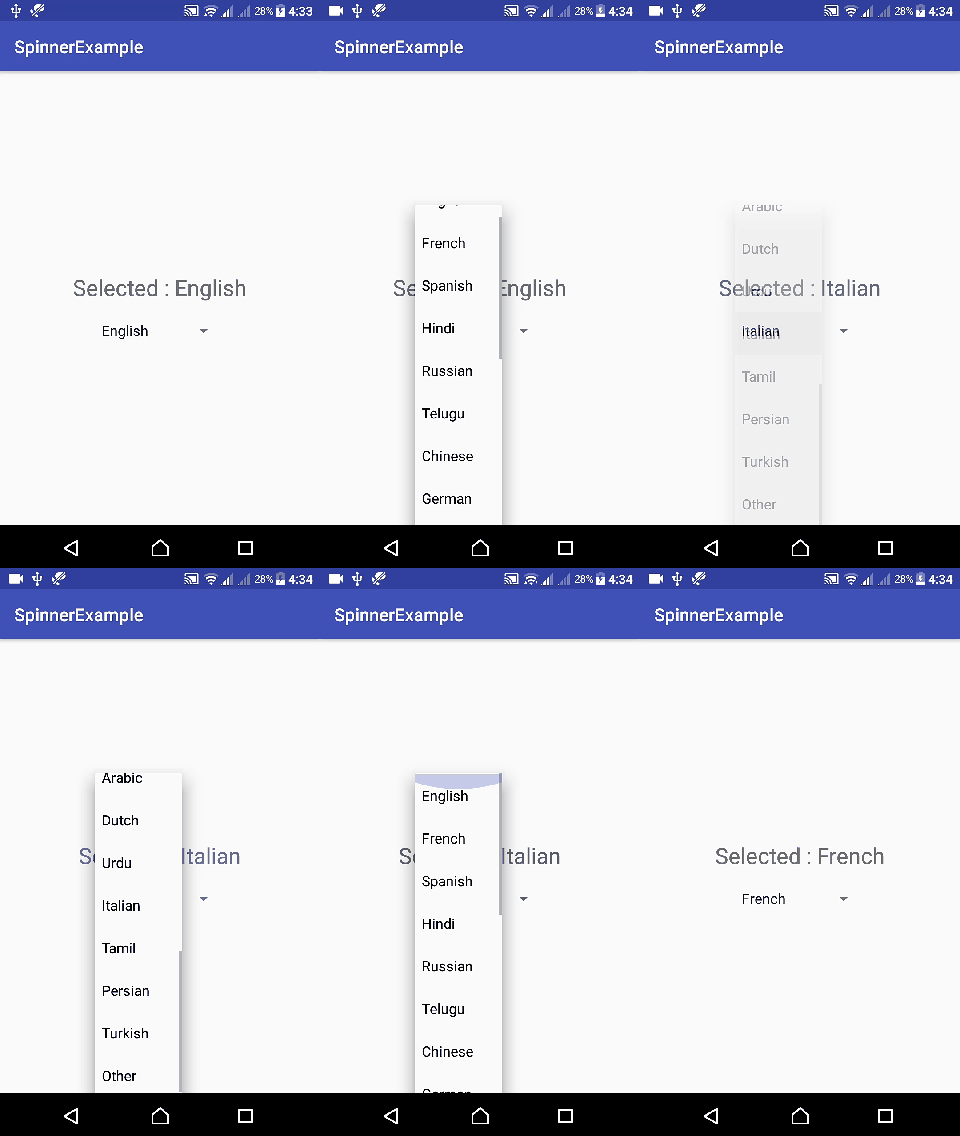
The following GIF shows how an Android Spinner looks, and how user could interact with it.

Android Spinner Code
A quick code snippet to use Android Spinner in layout and Kotlin file is as shown in the following respectively.
<Spinner
    android:id="@+id/spinner"
    android:layout_width="wrap_content"
    android:layout_height="wrap_content"/>
import android.view.View
import android.widget.*
class MainActivity : /** Other Classes, */AdapterView.OnItemSelectedListener {
var list_of_items = arrayOf("Item 1", "Item 2", "Item 3")
override fun onCreate(savedInstanceState: Bundle?) {
spinner!!.setOnItemSelectedListener(this)
// Create an ArrayAdapter using a simple spinner layout and languages array
val aa = ArrayAdapter(this, android.R.layout.simple_spinner_item, list_of_items)
// Set layout to use when the list of choices appear
aa.setDropDownViewResource(android.R.layout.simple_spinner_dropdown_item)
// Set Adapter to Spinner
spinner!!.setAdapter(aa)
}
override fun onItemSelected(arg0: AdapterView<*>, arg1: View, position: Int, id: Long) {
// use position to know the selected item
}
override fun onNothingSelected(arg0: AdapterView<*>) {
}
}
By default, the first element of the specified list is selected in the Spinner.
Following is a step by step guide of what is happening in the above code snippet to use Spinner
Step 1: Create a Spinner in layout file.
<Spinner
    android:id="@+id/spinner_sample"
    android:layout_width="wrap_content"
    android:layout_height="wrap_content"/>
Step 2: Add AdapterView.OnItemSelectedListener to the interface list of your Activity.
class MainActivity : /** Other Classes, */AdapterView.OnItemSelectedListener {
}
Step 3: Prepare an array of elements to be shown in Spinner view.
var list_of_items = arrayOf("Item 1", "Item 2", "Item 3")Step 4: Set setOnItemSelectedListener to the Spinner.
spinner!!.setOnItemSelectedListener(this)Step 5: Create an ArrayAdapter with the list of items and default layouts.
val array_adapter = ArrayAdapter(this, android.R.layout.simple_spinner_item, list_of_items)
array_adapter.setDropDownViewResource(android.R.layout.simple_spinner_dropdown_item)
Step 6: Set ArrayAdapter to Spinner.
spinner!!.setAdapter(array_adapter)Step 7: We have to override the following three methods of AdapterView.OnItemSelectedListener.
override fun onItemSelected(arg0: AdapterView<*>, arg1: View, position: Int, id: Long) {
    textView_msg!!.text = "Selected : "+languages[position]
}

override fun onNothingSelected(arg0: AdapterView<*>) {

}
Example – Android Spinner
Following are the details of the Android Application we created for this example.
| Application Name | SpinnerExample |
| Company name | tutorialkart.com |
| Minimum SDK | API 21: Android 5.0 (Lollipop) |
| Activity | Empty Activity |
You may keep rest of the values as default and create Android Application with Kotlin Support.
activity_main.xml
<?xml version="1.0" encoding="utf-8"?>
<LinearLayout xmlns:android="http://schemas.android.com/apk/res/android"
    xmlns:tools="http://schemas.android.com/tools"
    android:layout_width="match_parent"
    android:layout_height="match_parent"
    android:gravity="center"
    android:orientation="vertical"
    tools:context="com.tutorialkart.spinnerexample.MainActivity">

    <TextView
        android:id="@+id/msg"
        android:layout_width="wrap_content"
        android:layout_height="wrap_content"
        android:textSize="25dp"
        android:padding="20dp"/>

    <Spinner
        android:id="@+id/spinner_sample"
        android:layout_width="wrap_content"
        android:layout_height="wrap_content"/>

</LinearLayout>
MainActivity.kt
package com.tutorialkart.spinnerexample

import android.support.v7.app.AppCompatActivity
import android.os.Bundle
import kotlinx.android.synthetic.main.activity_main.*
import android.view.View
import android.widget.*


class MainActivity : AppCompatActivity(),AdapterView.OnItemSelectedListener {

    var languages = arrayOf("English", "French", "Spanish", "Hindi", "Russian", "Telugu", "Chinese", "German", "Portuguese", "Arabic", "Dutch", "Urdu", "Italian", "Tamil", "Persian", "Turkish", "Other")

    var spinner:Spinner? = null
    var textView_msg:TextView? = null

    override fun onCreate(savedInstanceState: Bundle?) {
        super.onCreate(savedInstanceState)
        setContentView(R.layout.activity_main)

        textView_msg = this.msg

        spinner = this.spinner_sample
        spinner!!.setOnItemSelectedListener(this)

        // Create an ArrayAdapter using a simple spinner layout and languages array
        val aa = ArrayAdapter(this, android.R.layout.simple_spinner_item, languages)
        // Set layout to use when the list of choices appear
        aa.setDropDownViewResource(android.R.layout.simple_spinner_dropdown_item)
        // Set Adapter to Spinner
        spinner!!.setAdapter(aa)

    }

    override fun onItemSelected(arg0: AdapterView<*>, arg1: View, position: Int, id: Long) {
        textView_msg!!.text = "Selected : "+languages[position]
    }

    override fun onNothingSelected(arg0: AdapterView<*>) {

    }
}
Output

Conclusion
In this Android Tutorial : Android Spinner – Kotlin Example, we have learnt to use Spinner with an example Android Application.
