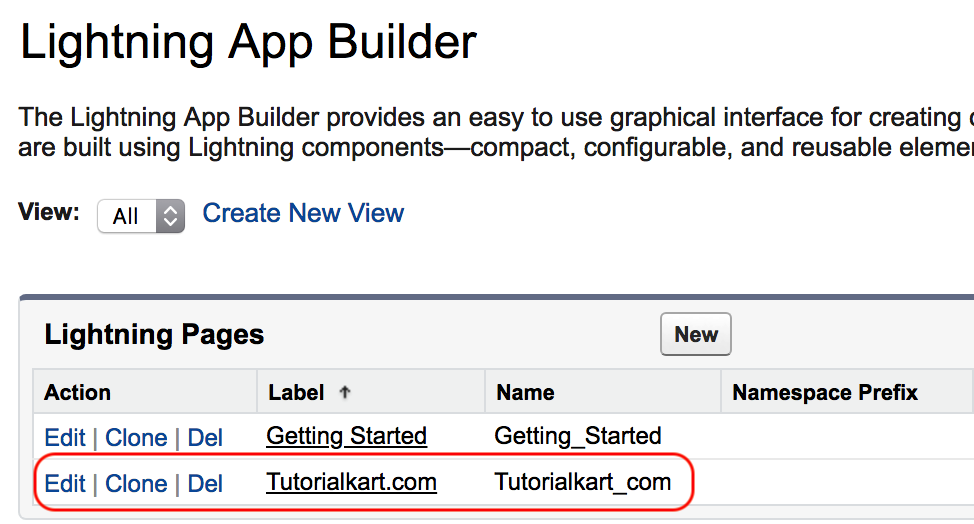
Salesforce Lightning App builder is a drag and drop environment that provides administrator to create lightning pages using standard and custom lightning components.
Lighting App Builder
In Lightning App Builder, we can use graphical interfaces to create Salesforce lighting pages. In the process of creating a new lightning page the following are the three steps that must be followed. Let us learn how to create Salesforce Lightning pages using Lightning App builder
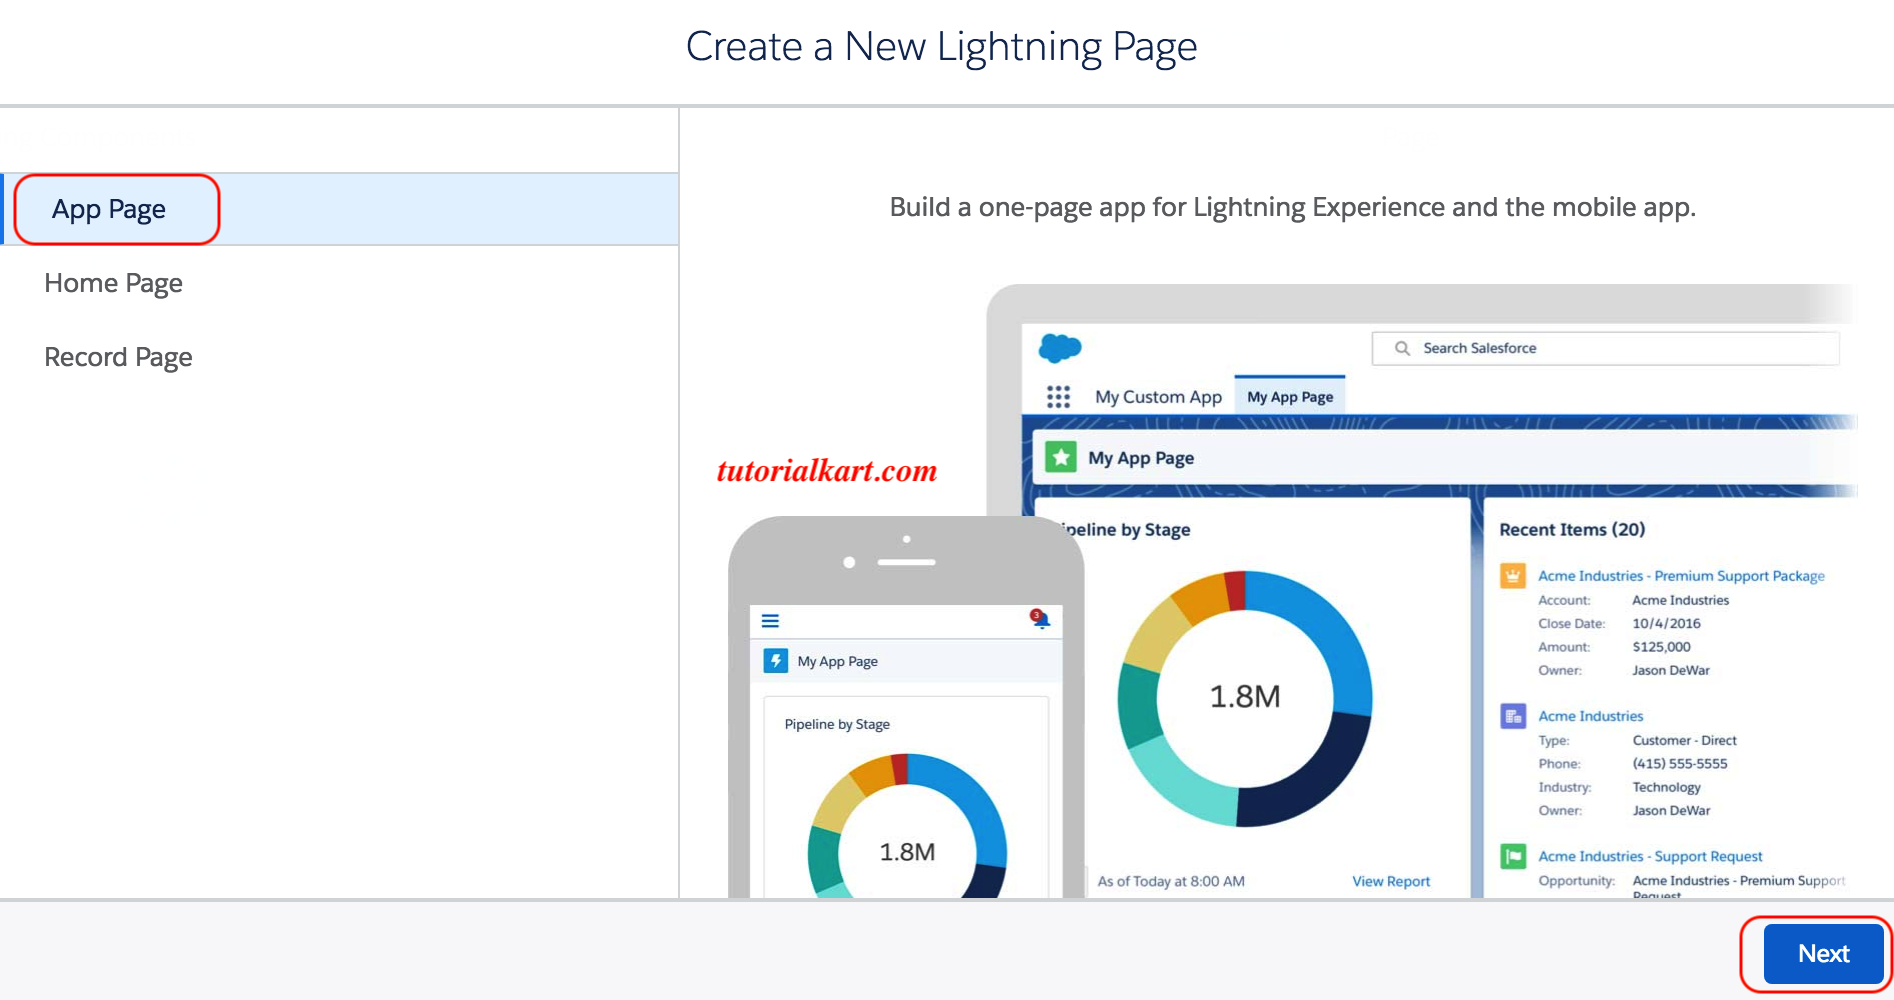
- we have build one-page app or lightning experience and the mobile App.
- Customise the lightning experience home page.
- Customise lightning experience records page.
Creating new Lightning Page using Lighting App Builder
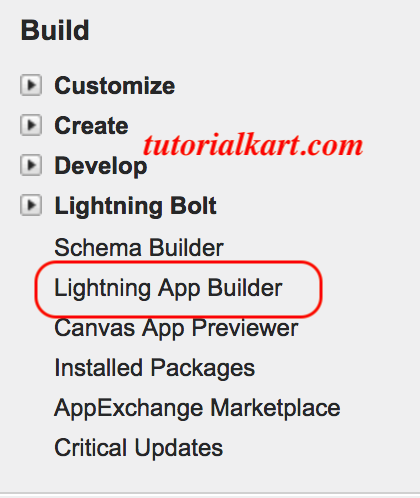
Salesforce Lightning pages can be created using Lightning App Builder. To create, navigate to Build => Lightning Bolt => Lightning App Builder => New.
Lightning App Builder – App page.
- In this step, select App page and click on next button as shown below.
- Now enter name for the new lightning page and click on Next button as shown below.
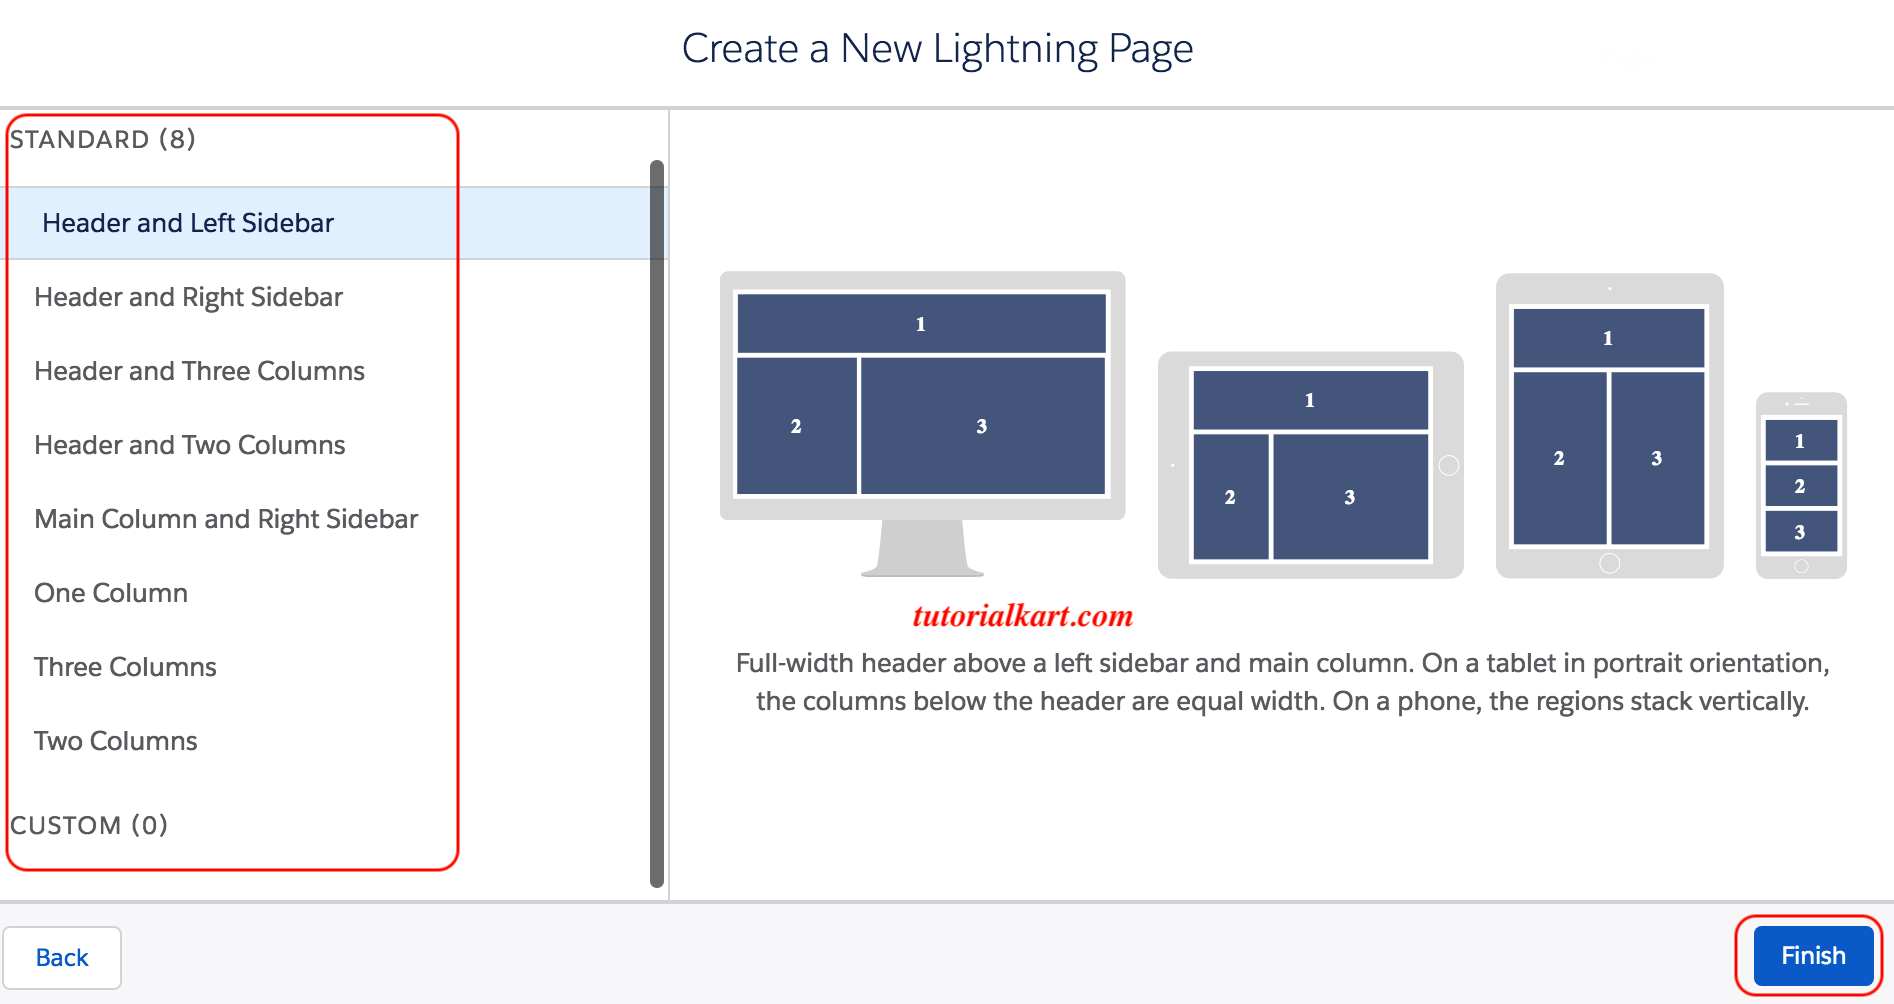
- Now select template for you lightning page. In standard, we have nearly 8 default templates. Choose any one and click on finish button.
After selecting the lightning page template, App builder canvas is displayed as shown below. In App builder canvas, the palette to the left side shows list of components available : Standard components and Custom components.
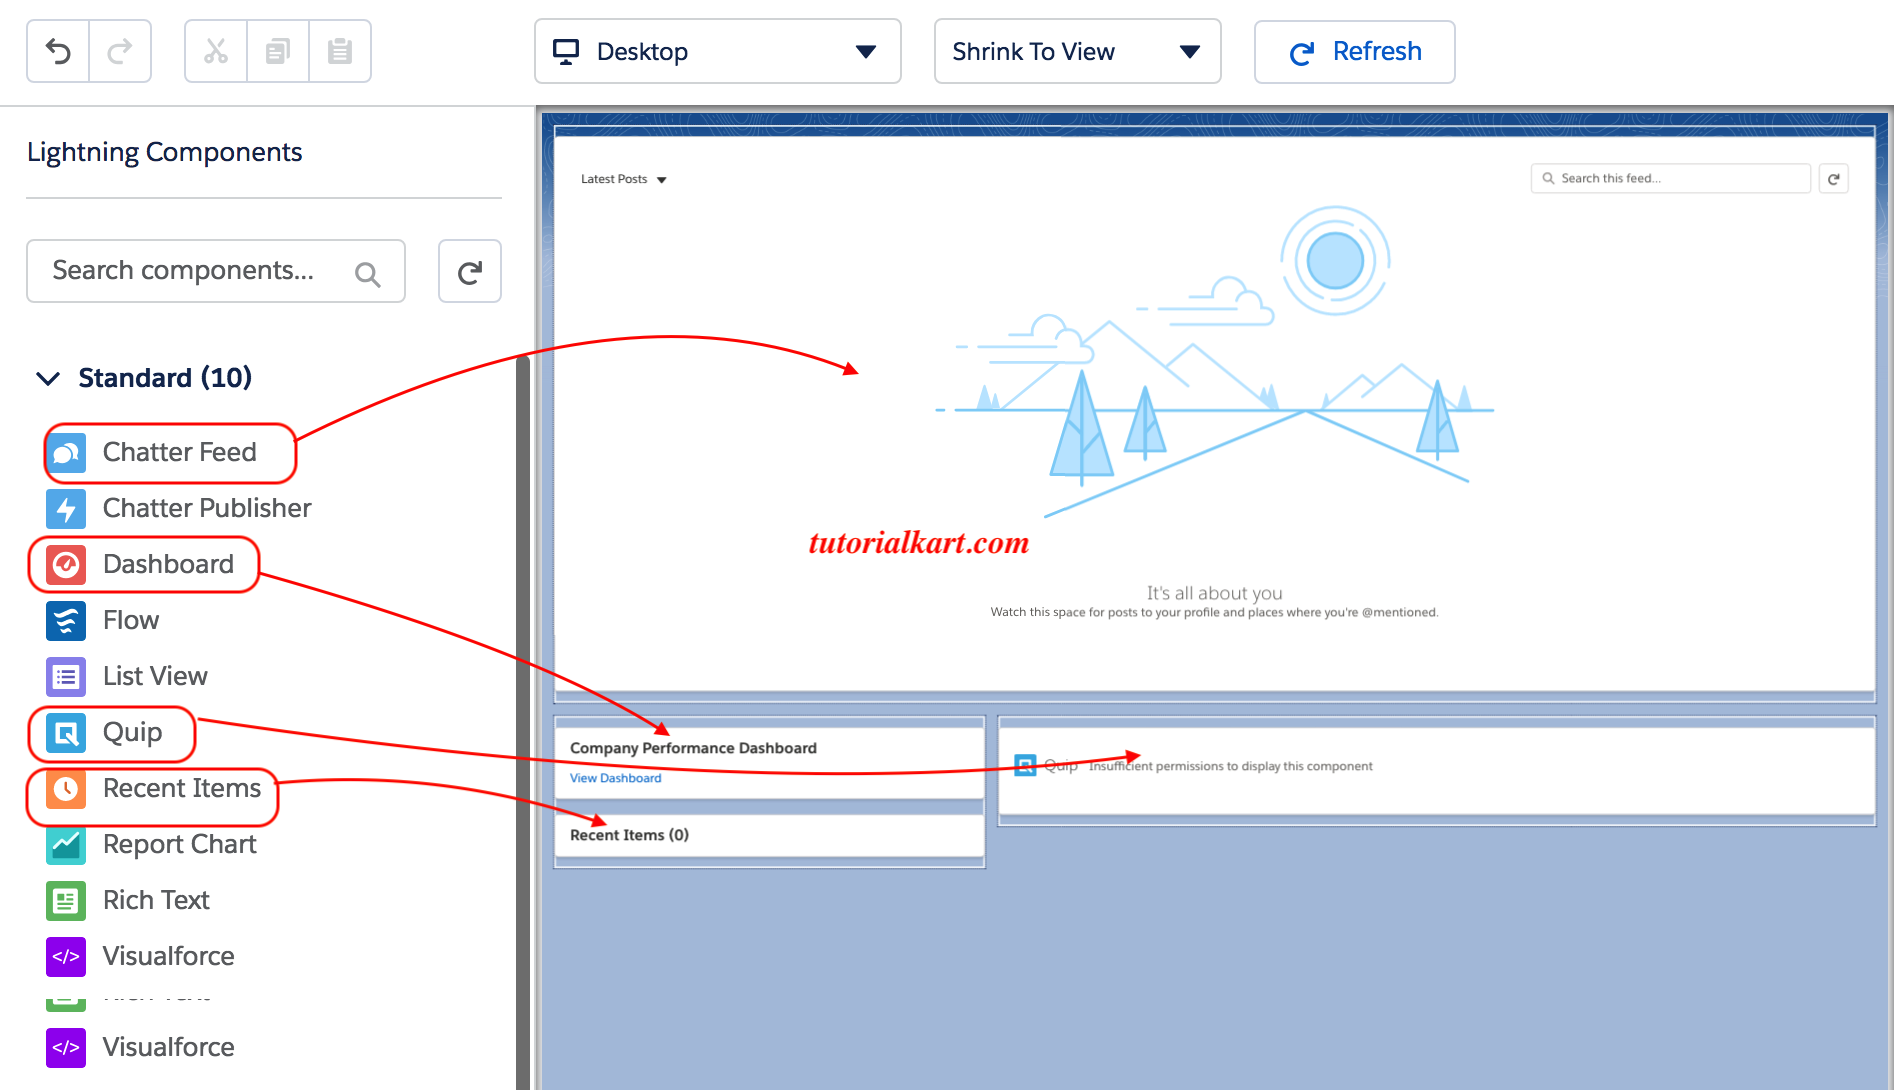
Code developers can create custom components, package them and distribute them through the AppExchange. Lightning components are dragged to the User Interface to add components. Finally click on Save button.
Activating Lightning page.
Once the lighting page is save, the activation screen provides different option to configure the profile for the page. Click on Activation link on the top left side of the page.
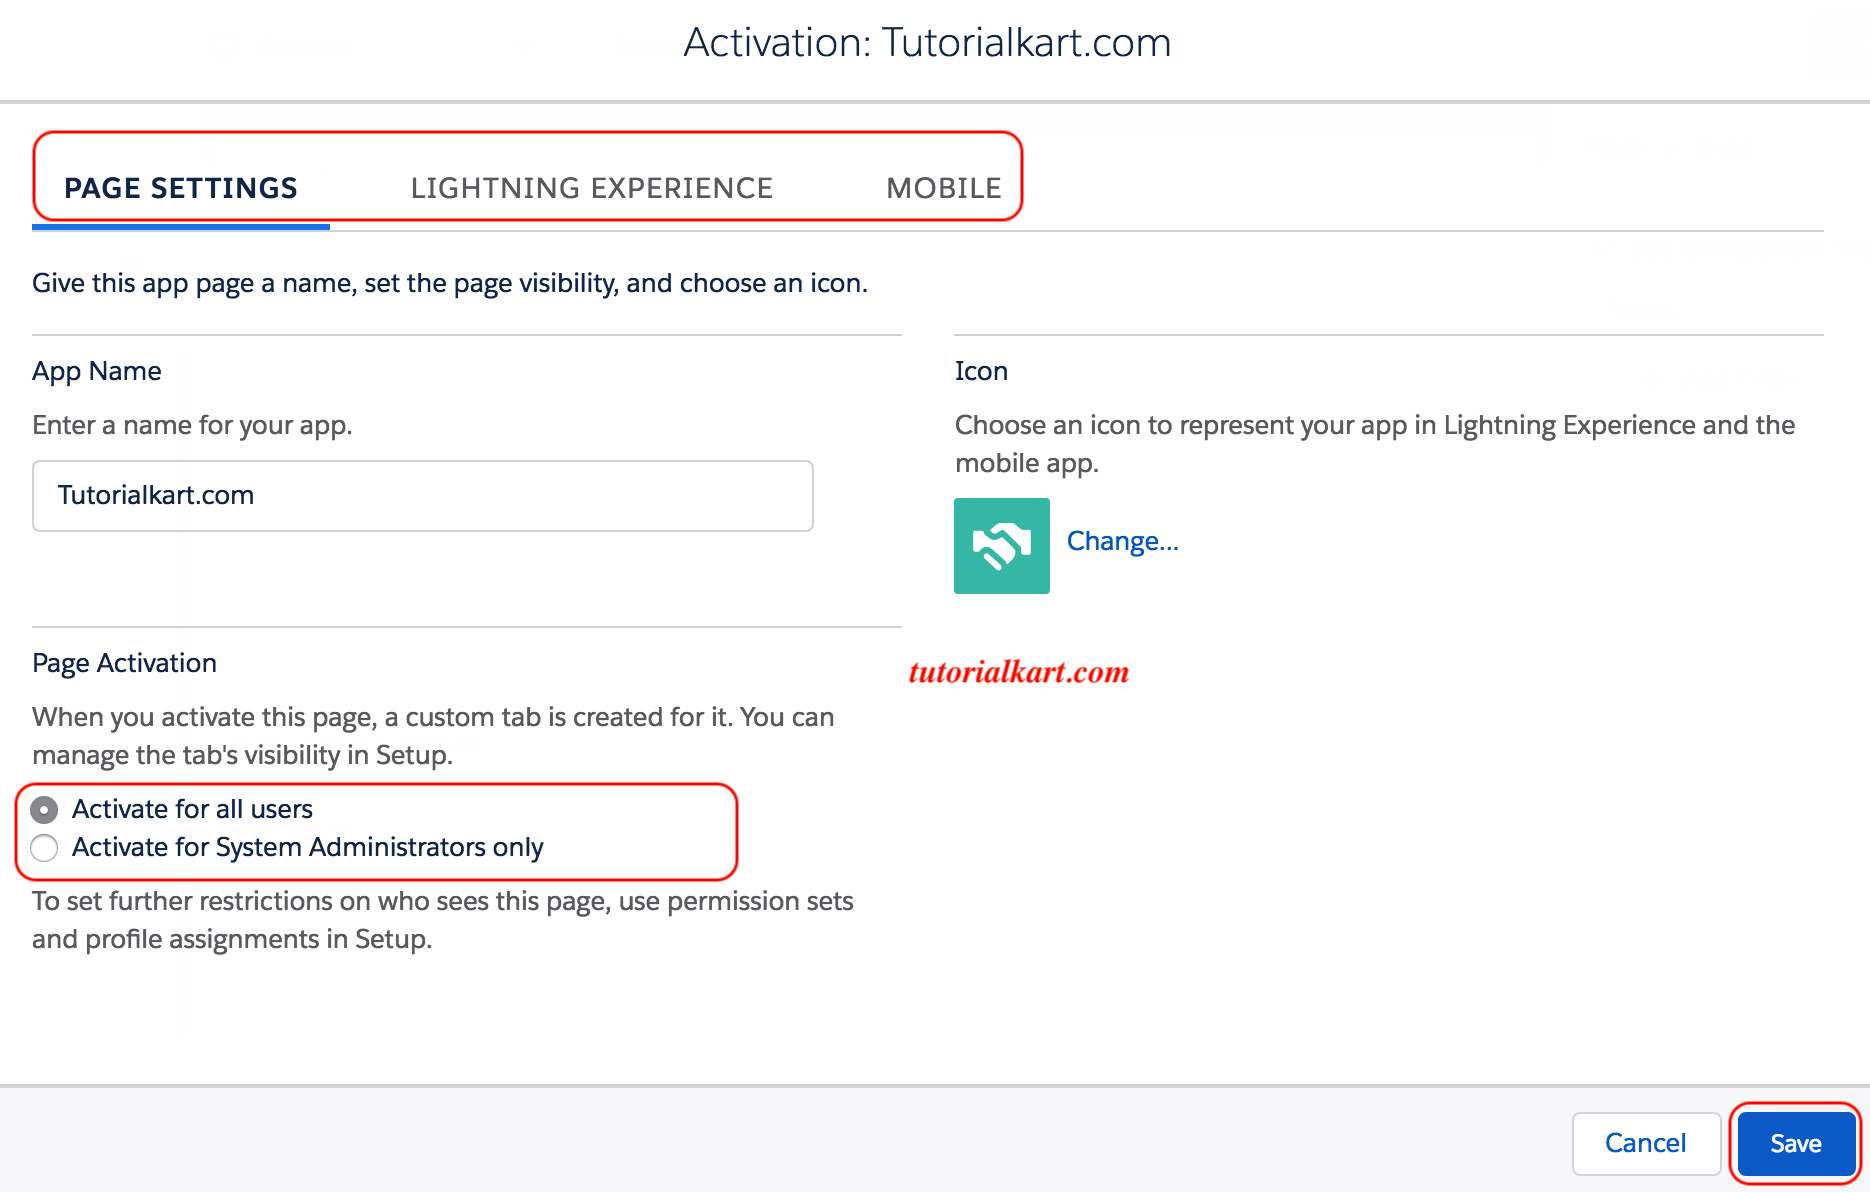
- Page settings : Select the user’s that you want to mange the tab’s visibility in Setup.
- Lightning Experience : Add Dev hub, lightning bolt, LightningInstrumentation and sales to Lightning Experience App.
- Mobile : Activate this page for mobile app.
Finally click on Save button
