What is Visual Workflow in Salesforce?
Visual Workflow in Salesforce is a drag and drop interface that allows Salesforce user’s to automate business processes by creating applications using Process builder without code. So what can we do with Visual Workflow in Salesforce? Using Visual Workflow, we can create, update, edit, and delete records and also we can send e-mail, submit records for approval, post to chatter, and take user input in Salesforce.
What is a flow in Salesforce?
When learning about Visual Workflow, we have understand about what is a flow? A flow is an application that can execute logic, interact with the Salesforce database, call apex classes and collect data from users.
Visual Workflow can execute business processes, interact with the database, invoke Apex classes (an Apex class implements the Process.Plugin interface), and create a series of screens to take user input in order to collect and update data in Salesforce; Flows can also be built with no user interface to allow them to be run from automated processes.
Automating business process using Visual Workflow?
Let us consider a scenario, this is a business case that Salesforce user (Vice president) wants to auto-close all the open opportunities with the Closed Lost stage, when an account out of business field is checked. Now let us check how this business requirement can be solved.
There are several ways to solve the above scenario. They are
- Using an Apex trigger.
- Using Visual Workflow and process builder.
- Using Process builder.
Auto Close all the opportunities with the closed Lost stage using Process builder.
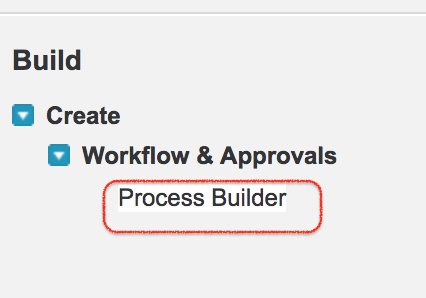
Now, we are going to create Salesforce Process builder to auto close all the opportunities with the closed lost stage. First login to Salesforce and navigate to Setup | Create | Workflow and Approvals | Process Builder.

- Click on Process Builder and create new processbuilder.
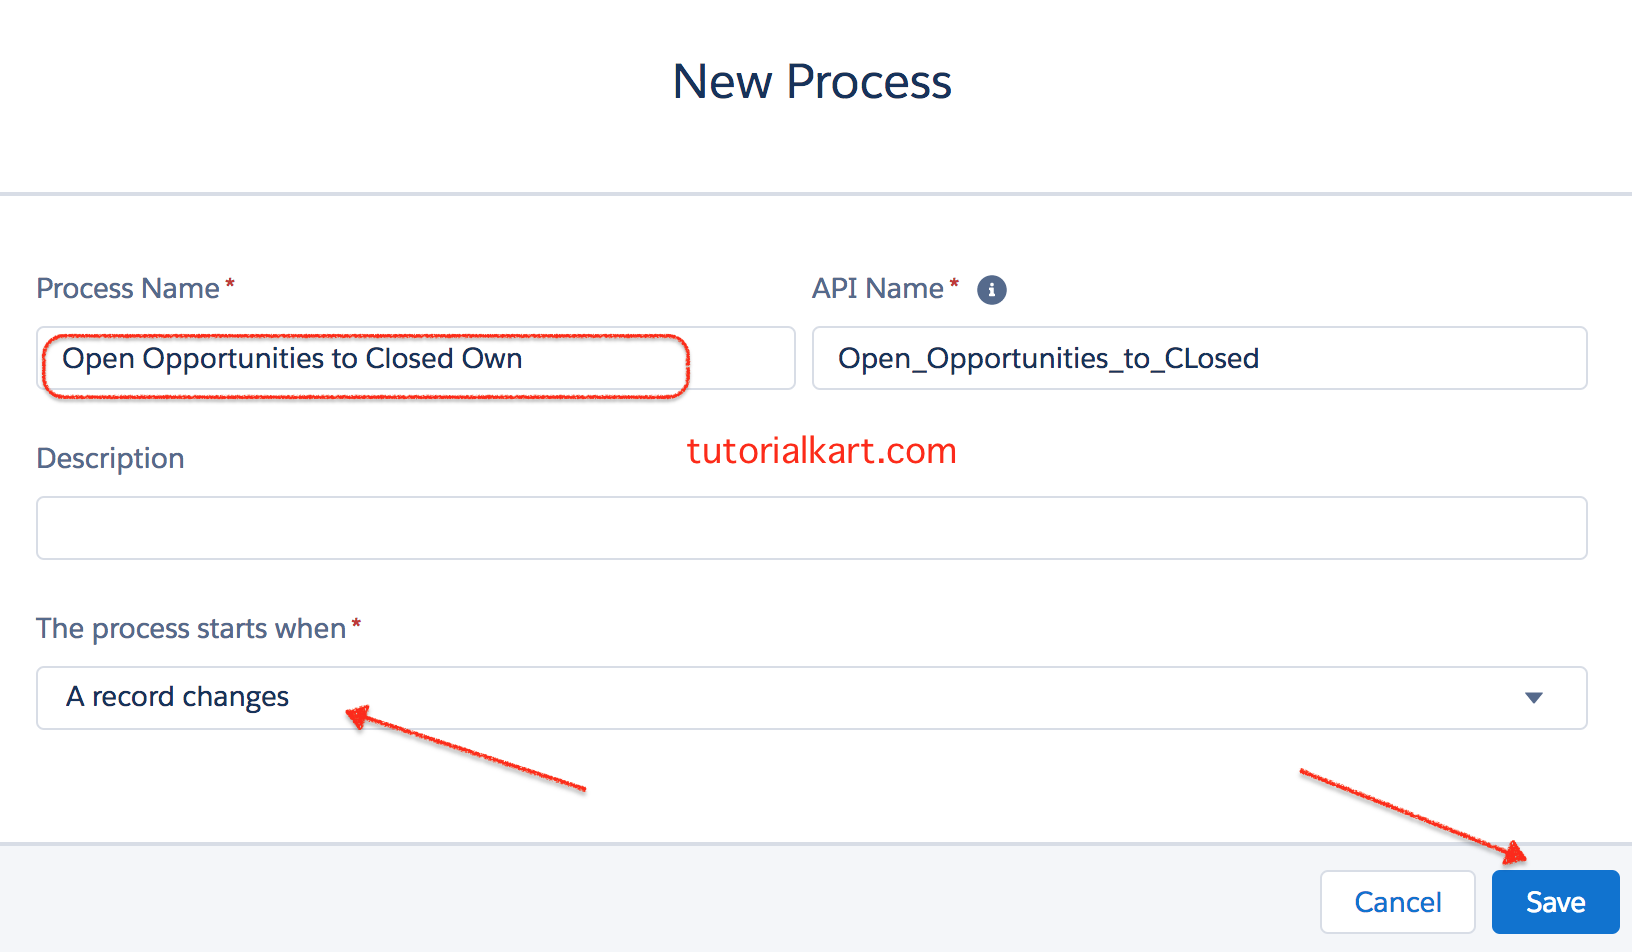
- Enter Process name, Api name and the criteria as shown below.
Step 1 : Creating Process.

- Click on Save button.
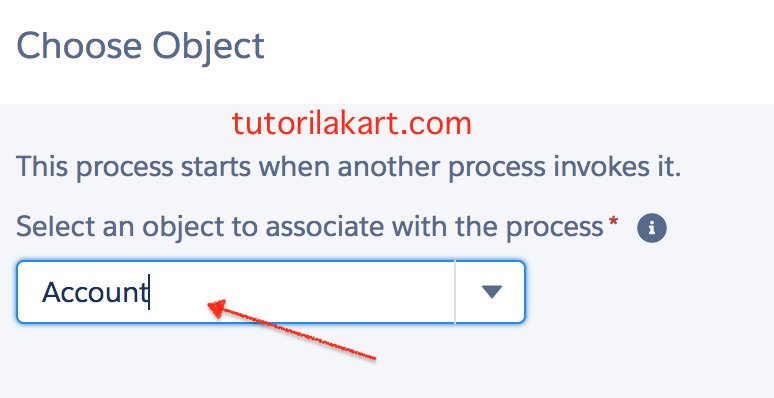
Step 2 : Selecting Object.
In this step, we have to select object (Account), when the out of business field in account checkbox is checked then the Update Records action will be fired.

- Click on Next button.
Step 3 : Adding Criteria.
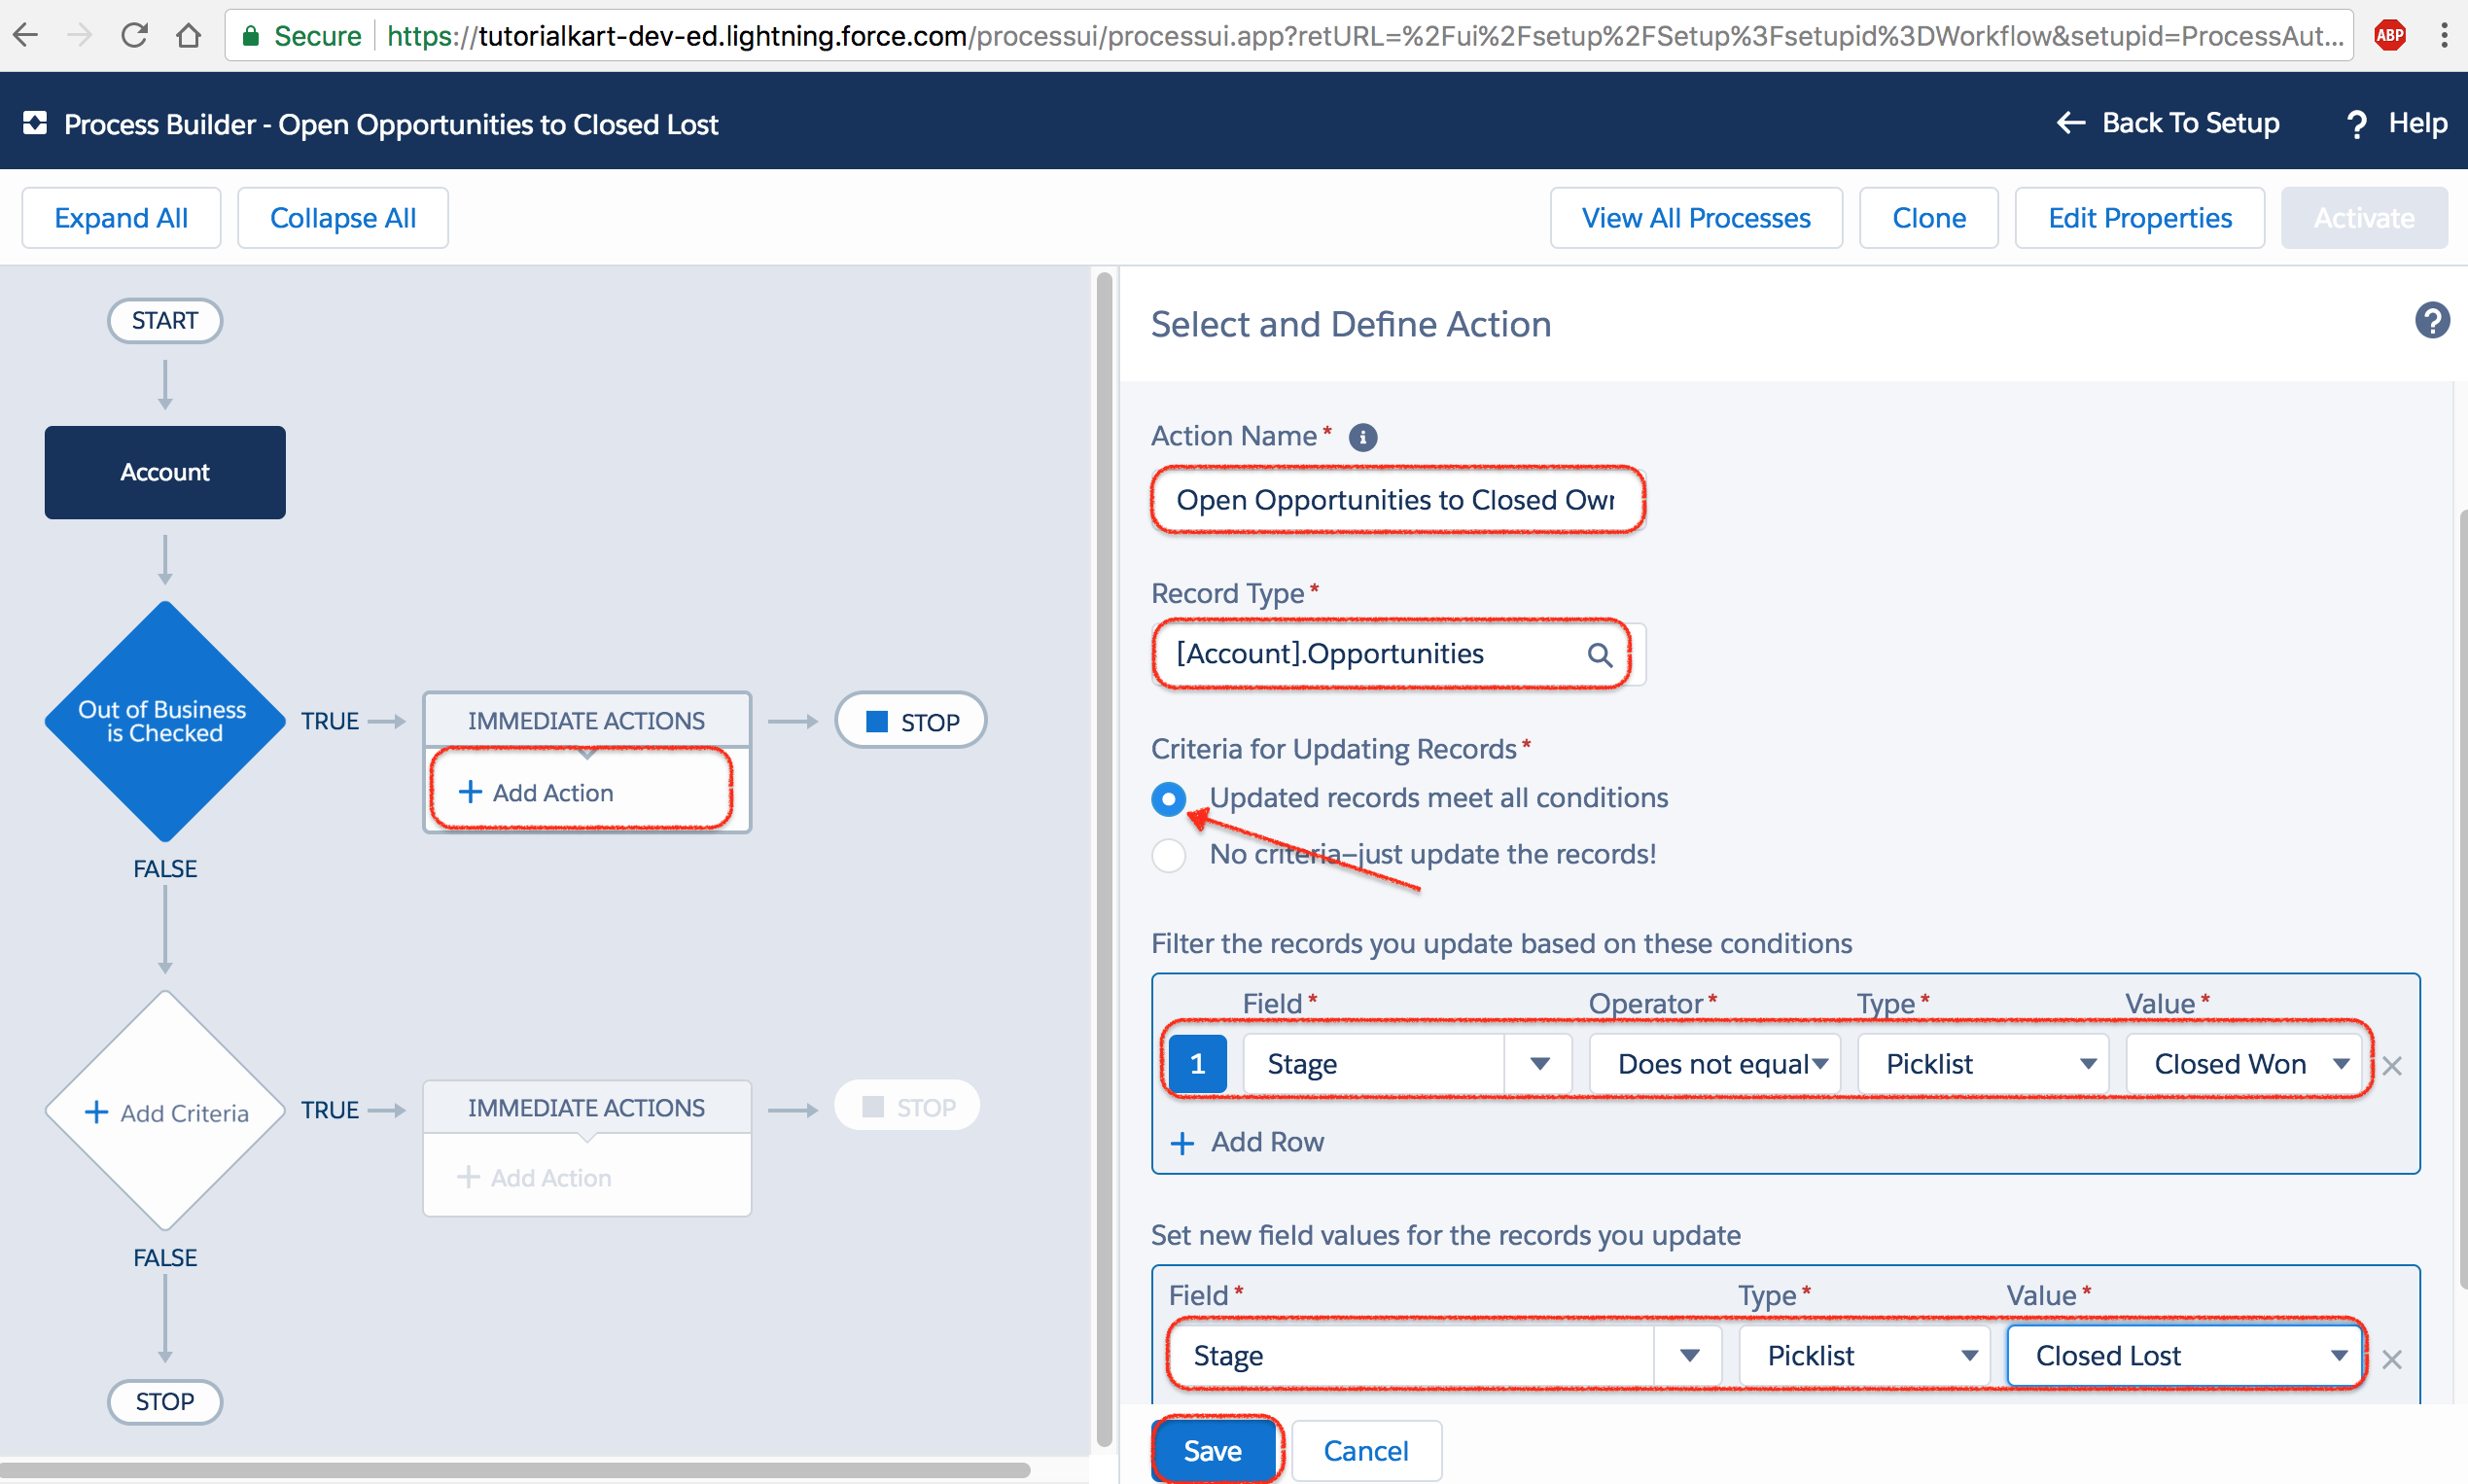
- Select a record related to the account. As shown above, we have selected opportunities object.
- Click on Choose button.
- Enter action name, select record type, select criteria for updating records, select filter the records you update based on these condition, select new field values for the records you update as shown below screenshot.

- Finally click on Save.
- Now activate the Process builder to run.
