This SAP tutorial will guide you through the basics of setting up and using SAP Query. We’ll cover the fundamental concepts, the key transaction codes, how to create and maintain Queries, User Groups, and InfoSets, and how to generate custom reports that fit your business requirements.
Introduction to SAP Query
SAP Query is a reporting tool that empowers business users, analysts, and functional consultants to quickly create custom reports without needing ABAP development. It allows you to combine multiple data sources (tables, logical databases) into InfoSets and then build queries for end-users to run. By using SAP Query, organizations can adapt to reporting needs on-the-fly, ensuring that the right information is available for timely decision-making.
Key Concepts and Components
The Whole process comprises of three steps, they are
- User Groups: Collections of users authorized to create and run certain queries and InfoSets.
- InfoSets: The data foundation of queries, specifying which tables or logical databases are used and how they are joined.
- Queries: The final reports, created based on an InfoSet, where you define selection criteria, output fields, sorting, totals, and formatting.
- QuickViewer: A simpler, ad-hoc reporting tool (SQVI) that can be converted into a standard query for further enhancement.
Transaction Codes used for SAP Queries
Use the table below as a quick reference guide for the key transaction codes involved in setting up and running SAP Queries.
| Transaction Code | Purpose | Notes |
|---|---|---|
| SQ03 | Maintain User Groups (Authorization grouping) | Create and assign users to groups for query security. |
| SQ02 | Maintain InfoSets (Data foundation) | Define data sources, joins, and available fields. |
| SQ01 | Maintain Queries (Report layout) | Create, edit, and run queries using specified InfoSets. |
| SQVI | QuickViewer (Ad-hoc reporting) | Create rapid, one-time queries; can be converted to SQ01. |
| SE16/SE16N | Data Browser (Table contents) | Not a query tool, but useful to explore raw table data. |
Step-by-Step Tutorial
Step 1: Create a User Group (SQ03)
- Access SQ03: Enter transaction SQ03 in the command field.
- Create User Group: Enter a user group name (e.g., User_Groupp2) as shown below and choose Create.
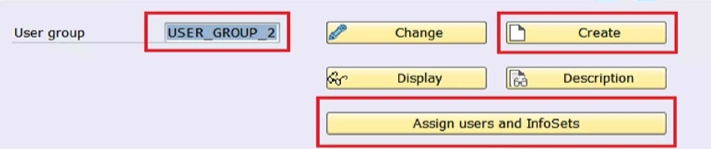
- Description and Users: Enter a descriptive text (e.g., “USER_Group_1 Testing”).
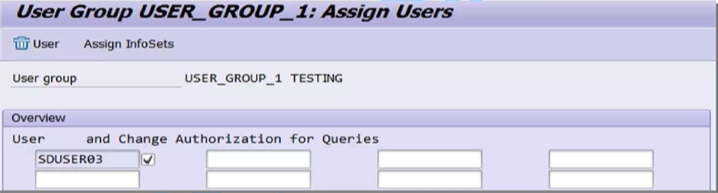
- Assign Users: Click User Assignment and add user IDs of those who should maintain or execute queries in this group.
- Save: Confirm your entries and save.
Result: A User Group now exists to control which users can access certain queries and InfoSets.
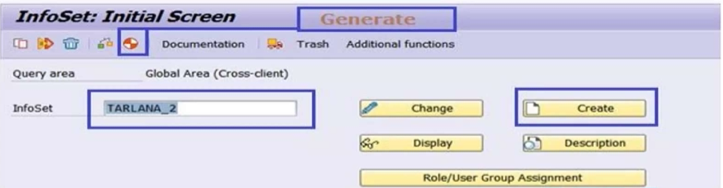
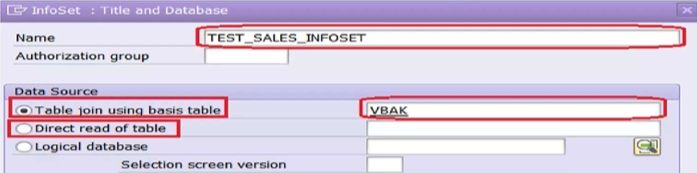
Step 2: Create an InfoSet (SQ02)
- Access SQ02: Enter transaction SQ02.
- Create InfoSet: Enter a name and choose Create.
- Data Source Type: Decide whether to use a single table, table join, logical database, or other data source. For example, choose Table Join if you need data from multiple tables.
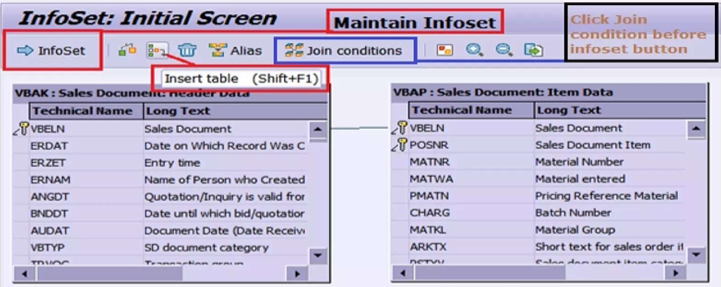
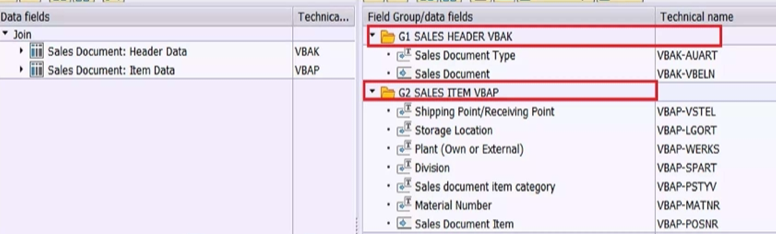
- Add Tables & Joins: For financial documents, you might join
BKPF(header table) andBSEG(line items). The system often proposes join conditions automatically.
- Select Fields: Mark which fields are available as selection fields and output fields.
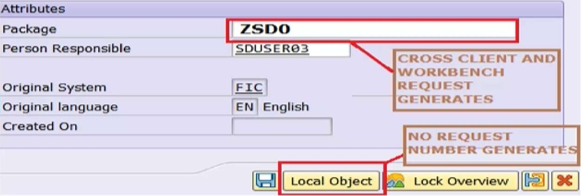
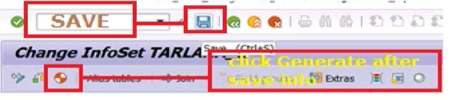
- Generate and Save: Assign the InfoSet to the previously created User Group and save.
Click Generate Button after save the InfoSet.
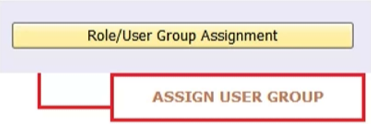
Assigning Infoset to UserGroup
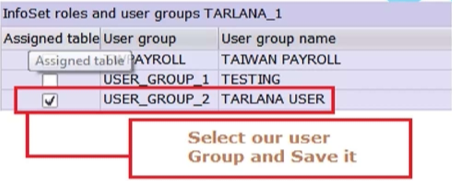
Go to InfoSet and click on Role/User Group Assignment. Select our user group and save it.
When we save the Info Set it is automatically assigned to our User Group.
Result: An InfoSet defines your data model, including which tables and fields will be accessible in queries.
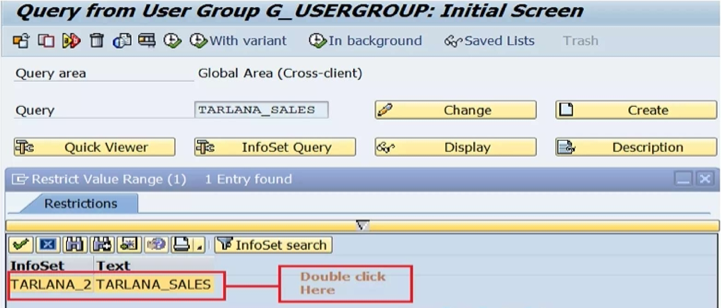
Step 3: Create a Query (SQ01)
- Access SQ01: Enter transaction SQ01.
- Choose User Group: If needed, switch to the correct User Group via Environment → Query Areas.
- Create Query: Enter a query name and choose Create.
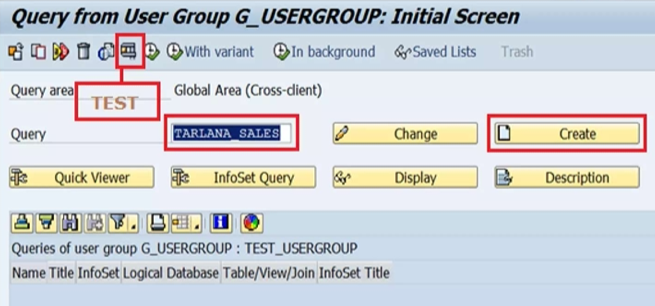
- Select InfoSet: Pick the InfoSet you just created.
- Define Layout:
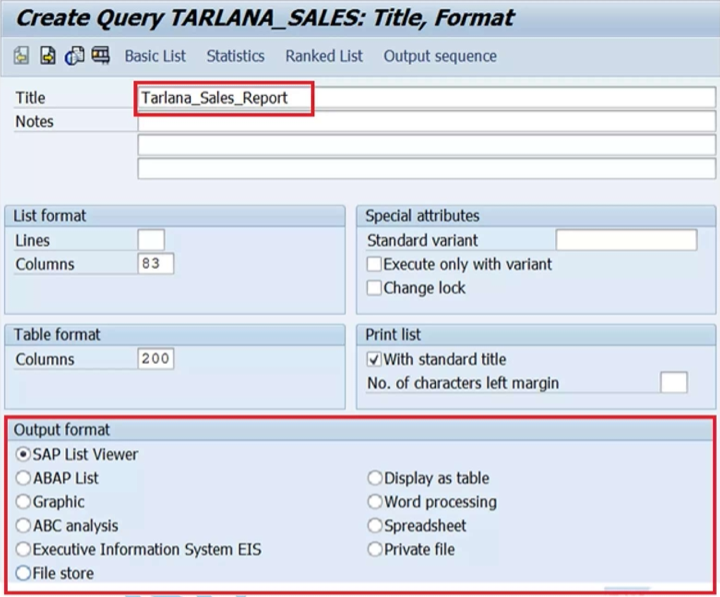
- Title/Format: Set a descriptive title.
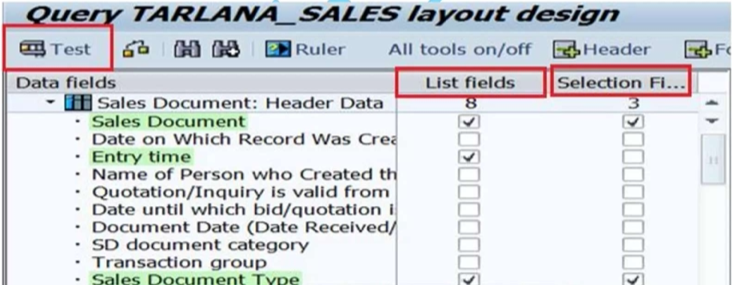
- Selection Fields: Choose fields that users will use to filter data at runtime.
- List Fields: Select fields for the output columns.
- Sorting & Totals: Define sort orders, subtotals, or totals if needed.
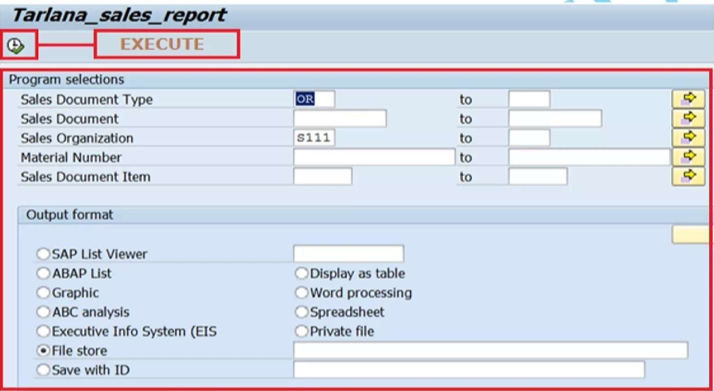
- Execute Test: Press F8 (Execute) to run the query, input sample selection criteria, and verify the output.
- Save Query: If everything looks correct, save the query for reuse by authorized users.
Result: You now have a functional query that users can run to get meaningful, custom report outputs.
Tips and Best Practices
- Consistent Naming: Prefix custom objects with “Z” or “Y” to differentiate from standard SAP objects.
- Incremental Development: Start small and add complexity gradually to keep queries manageable and efficient.
- Performance Considerations: Use selective filters and only the necessary fields to avoid performance bottlenecks, especially when dealing with large volumes of data.
- Security & Authorizations: Restrict sensitive data to appropriate users and maintain proper authorization objects.
- Documentation: Keep a record of each query’s purpose, selection fields, and output columns for easier maintenance and user guidance.
Conclusion
SAP Query streamlines the creation of custom reports by enabling non-technical users to define data sources, layout, and filtering without ABAP coding. By following the steps above—creating User Groups, InfoSets, and Queries—and applying best practices, you can rapidly respond to changing business needs. As you gain experience, explore advanced options like integrating with logical databases, converting QuickViewer reports, and adding calculated fields to enhance your organization’s reporting capabilities.